📑 Table of Contents
This user manual contains 12 comprehensive sections covering all aspects of Clinic Manager. Click any section below to jump directly to that topic.
- 1 Getting Started
- 2 User Roles & Permissions
- 3 Login & Authentication
- 4 Dashboard Overview
- 5 Client Management
- 6 Appointment Management
- 7 Payment Management
- 8 Settings & Configuration
- 9 User Management Admin Only
- 10 Reports & Analytics
- 11 Admin Tools Admin Only
- 12 Troubleshooting & FAQs
- Use the sidebar navigation for quick access to any section
- Use the search box in the sidebar to find specific topics
- Click on images to view them in full size
- On mobile, tap the ☰ button to open the navigation menu
- Press Ctrl+P (Windows) or Cmd+P (Mac) to print this manual
- All admin-only features are marked with the Admin Only badge
1. Getting Started
Welcome to Clinic Manager
The Clinic Manager is a comprehensive web-based application designed to streamline clinic operations, manage patient appointments, track payments, and provide insightful analytics. Built with modern web technologies and Firebase backend, it offers a secure, scalable, and user-friendly solution for healthcare providers.
System Overview
The system consists of several key modules:
- Dashboard: Real-time overview of clinic metrics, upcoming appointments, and revenue statistics
- Client Management: Comprehensive patient records with appointment history, payments, and clinical notes
- Appointment Scheduling: Intuitive calendar-based booking system with automated reminders
- Payment Tracking: Complete financial records with payment history and revenue reporting
- Settings: Customizable clinic details, working hours, and user preferences
- User Management: Role-based access control for admin, consultant, and staff members
- Reports & Analytics: Data-driven insights into clinic performance
- Admin Tools: Advanced features for data management and system configuration
Quick Start Guide
Step 1: Access the Application
Open your web browser and navigate to your clinic's booking system URL. You will be presented with the login screen:
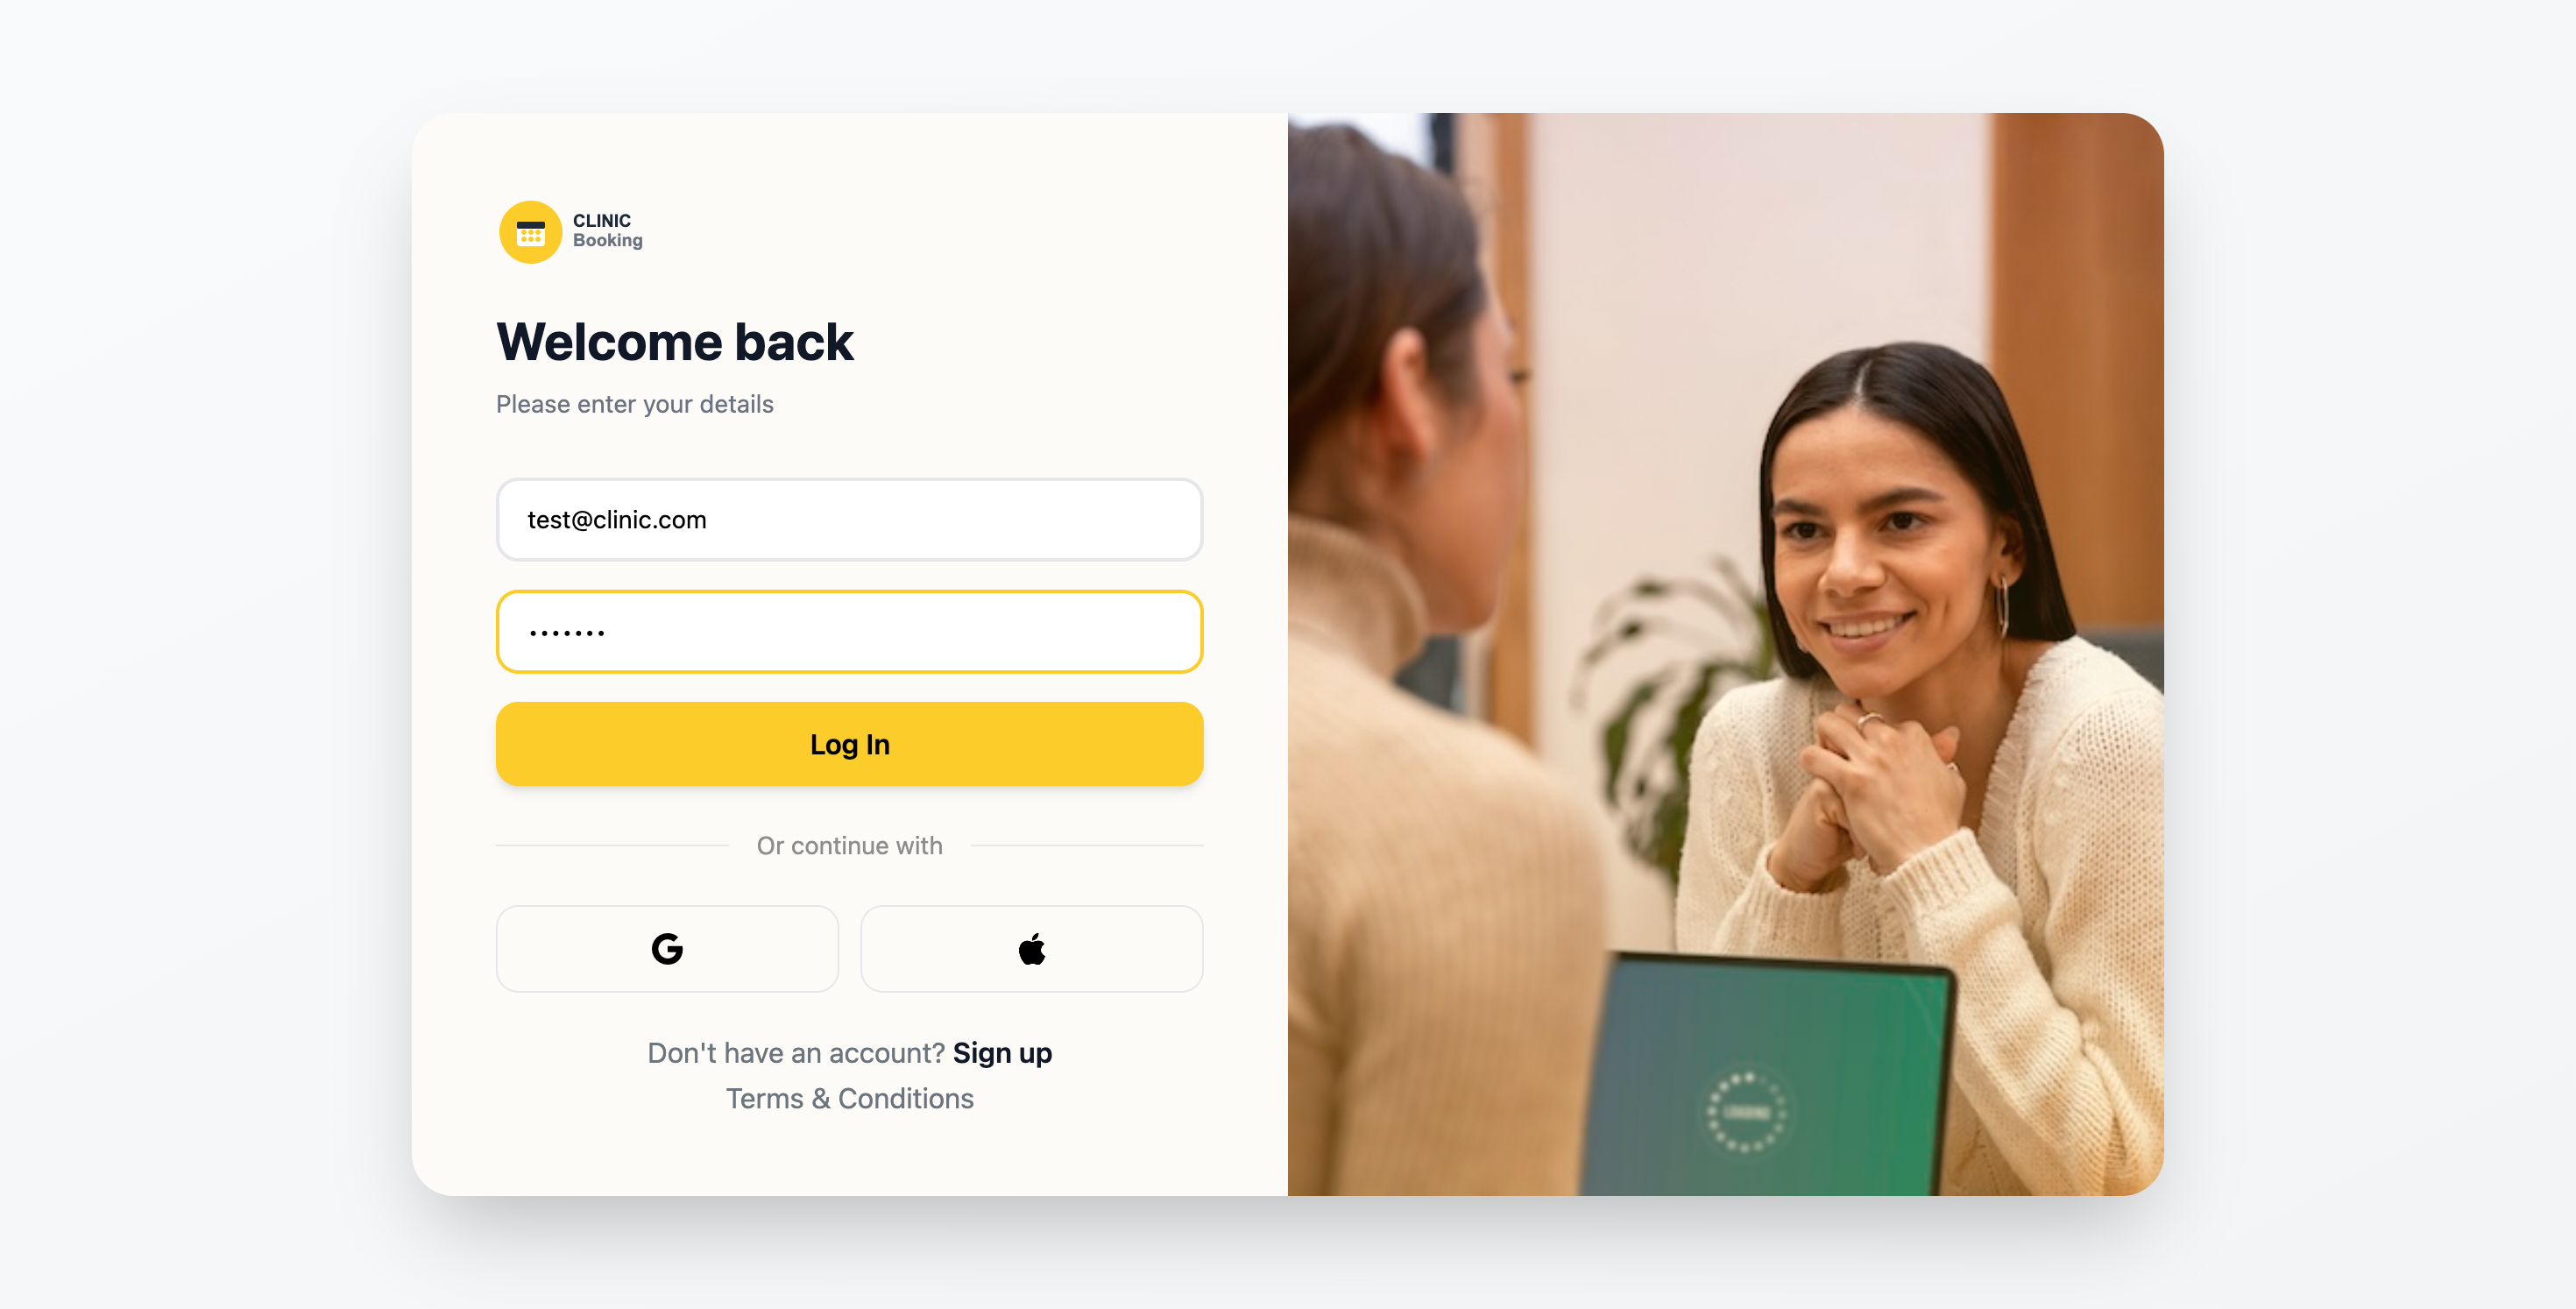
Login screen with email and password authentication
Step 2: First-Time Login
If you don't have an account yet, contact your clinic administrator to create one for you. New users should receive:
- Email address (used as username)
- Temporary password (change on first login)
- Role assignment (Admin, Consultant, or Staff)
For new clinics setting up the system for the first time, use the registration page:
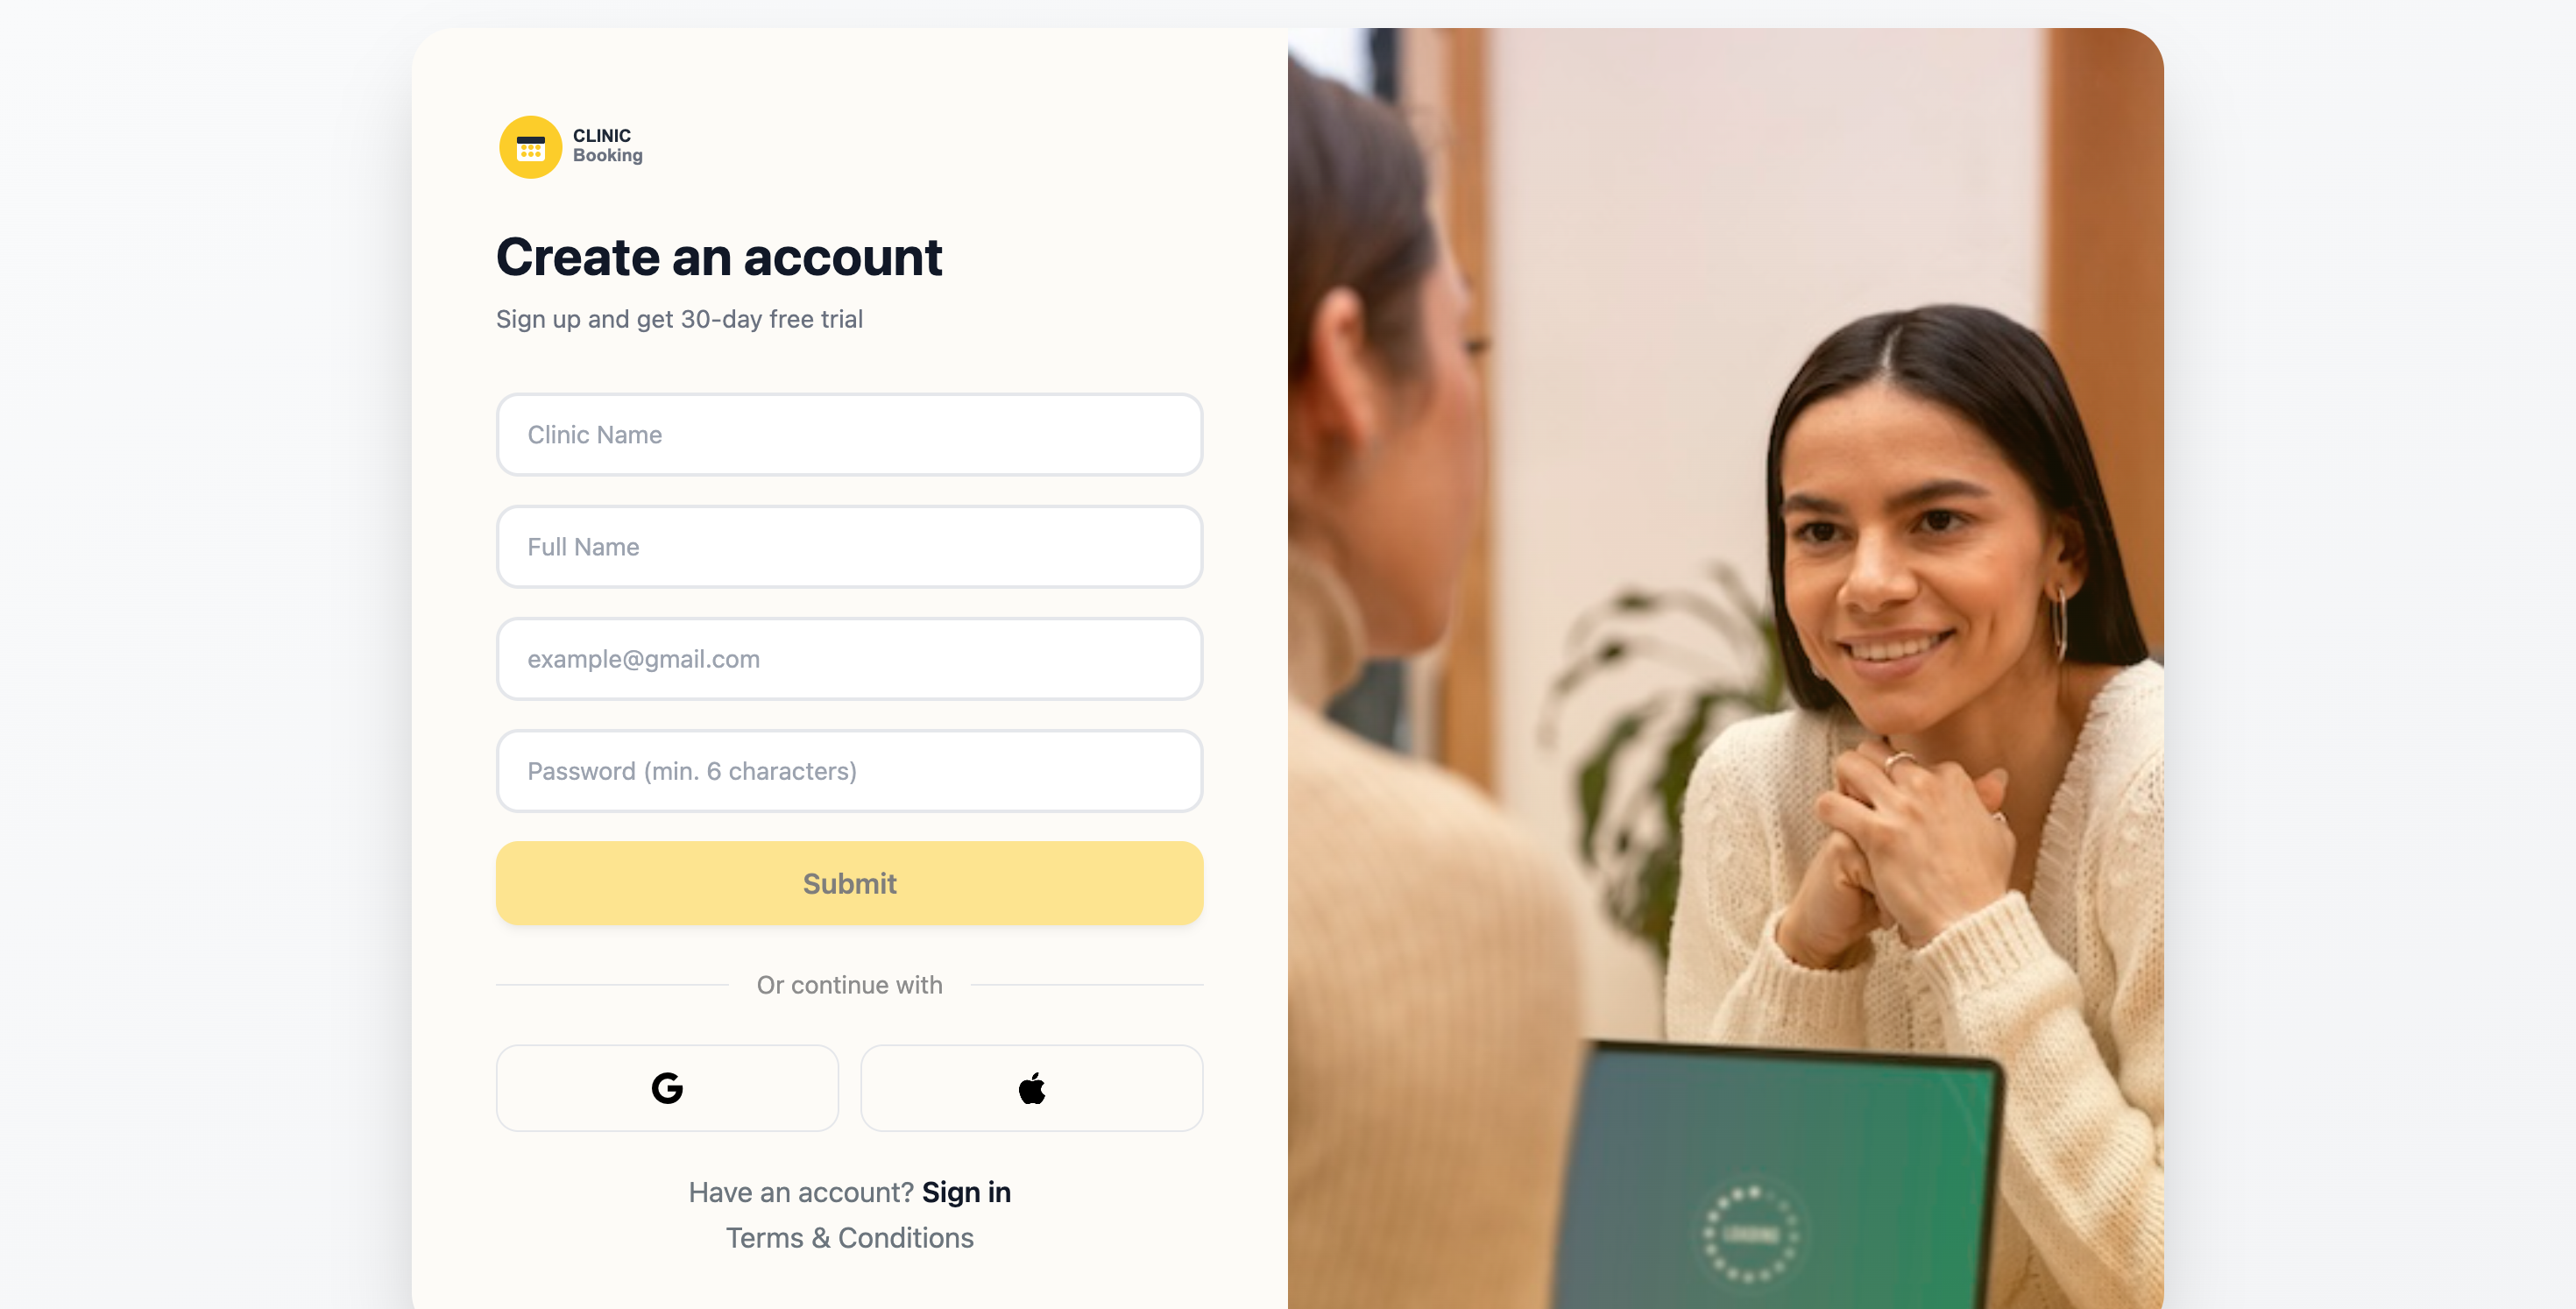
Registration form for new clinic setup
Step 3: Understanding the Dashboard
After successful login, you'll be redirected to your dashboard. The dashboard provides an at-a-glance view of your clinic's operations:
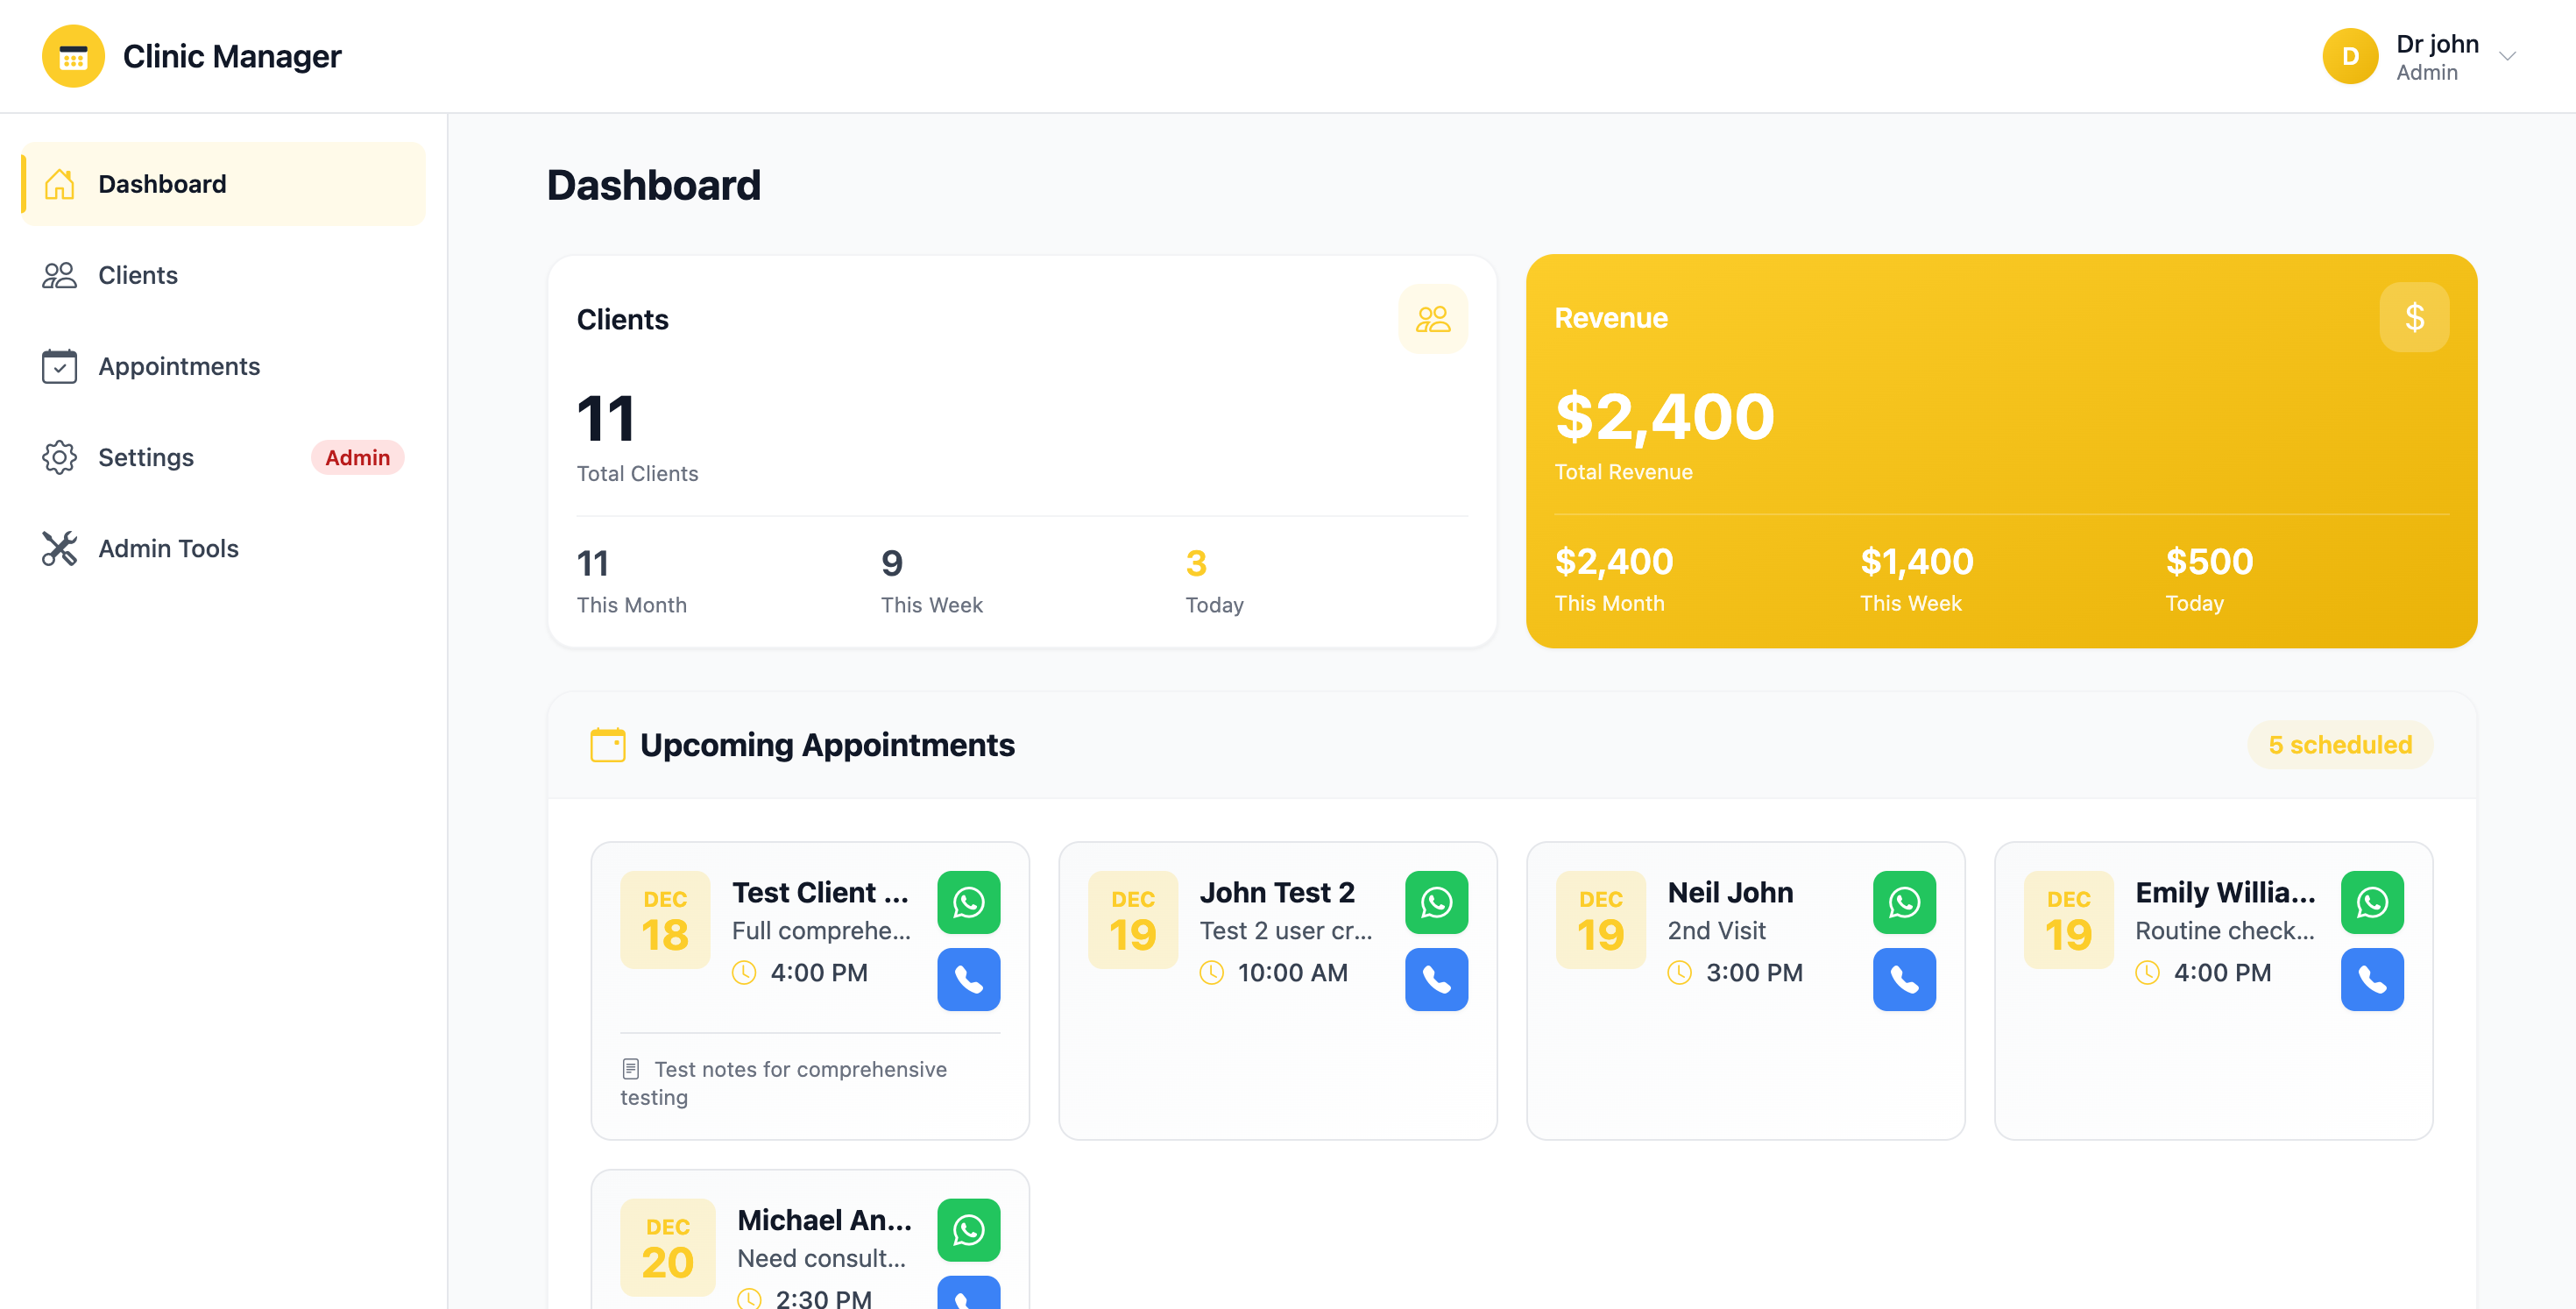
Admin dashboard showing comprehensive clinic metrics
User Interface Overview
Navigation Sidebar
The left sidebar contains all main navigation links:
- Dashboard: Your home screen with key metrics
- Clients: Patient database and records
- Appointments: Schedule and manage bookings
- Settings: System configuration (Admin badge indicates admin-only access)
- Admin Tools: Advanced administrative features
Click the collapse button at the bottom to minimize the sidebar for more screen space.
Top Header Bar
The header includes:
- Clinic Logo & Name: Click to return to dashboard
- User Profile Menu: Access profile settings and logout
Main Content Area
The central area displays the active module's content. Each page includes:
- Page title and description
- Action buttons (Add, Edit, Delete, etc.)
- Data tables or forms
- Filters and search functionality
Getting Help
If you encounter any issues or need assistance:
- Refer to the relevant section in this manual
- Check the Troubleshooting & FAQs section
- Contact your system administrator
- Review error messages carefully - they often contain helpful guidance
Ctrl+K (or Cmd+K on Mac) to quickly search for clients or appointments.
2. User Roles & Permissions
Overview
The Clinic Booking System implements a comprehensive Role-Based Access Control (RBAC) system to ensure data security and appropriate access levels. There are three distinct user roles, each with specific permissions tailored to their responsibilities within the clinic.
User Roles
1. Administrator (Admin)
Administrators have full system access and are responsible for overall system configuration and management.
Admin dashboard with full access to all clinic data and metrics
Key Responsibilities:
- Complete system configuration and settings management
- User account creation, modification, and deactivation
- Clinic details and working hours configuration
- Access to all reports, analytics, and audit logs
- Delete operations for clients, appointments, and payments
- Admin tools for data management and system maintenance
What Admins Can Do:
- ✅ View all clinic statistics without filters
- ✅ Manage all client records (create, view, edit, delete)
- ✅ Manage all appointments and assign consultants
- ✅ Record and delete payments
- ✅ Add and delete clinical notes
- ✅ Configure clinic settings and working hours
- ✅ Create and manage user accounts
- ✅ Generate reports and export data
- ✅ Access admin tools and audit logs
2. Consultant (Doctor/Practitioner)
Consultants have focused access to their own appointments and assigned clients, maintaining patient confidentiality while providing essential clinical functions.

Consultant dashboard showing filtered data for assigned appointments only
Key Responsibilities:
- Manage their own appointment schedule
- View client records for assigned appointments
- Add clinical notes for their patients
- Update appointment status for their consultations
- View payment information for their appointments
What Consultants Can Do:
- ✅ View dashboard with filtered statistics (own appointments/revenue only)
- ✅ View clients assigned to their appointments
- ✅ Create appointments for themselves only
- ✅ View and update status of own appointments
- ✅ Add clinical notes to patient records
- ✅ View payment information
- ⛔ Cannot edit other consultants' appointments
- ⛔ Cannot assign appointments to other consultants
- ⛔ Cannot access settings or user management
- ⛔ Cannot delete any records
- ⛔ Cannot record or modify payments
3. User (Staff/Receptionist)
Staff members handle day-to-day clinic operations including scheduling, client management, and payment processing.
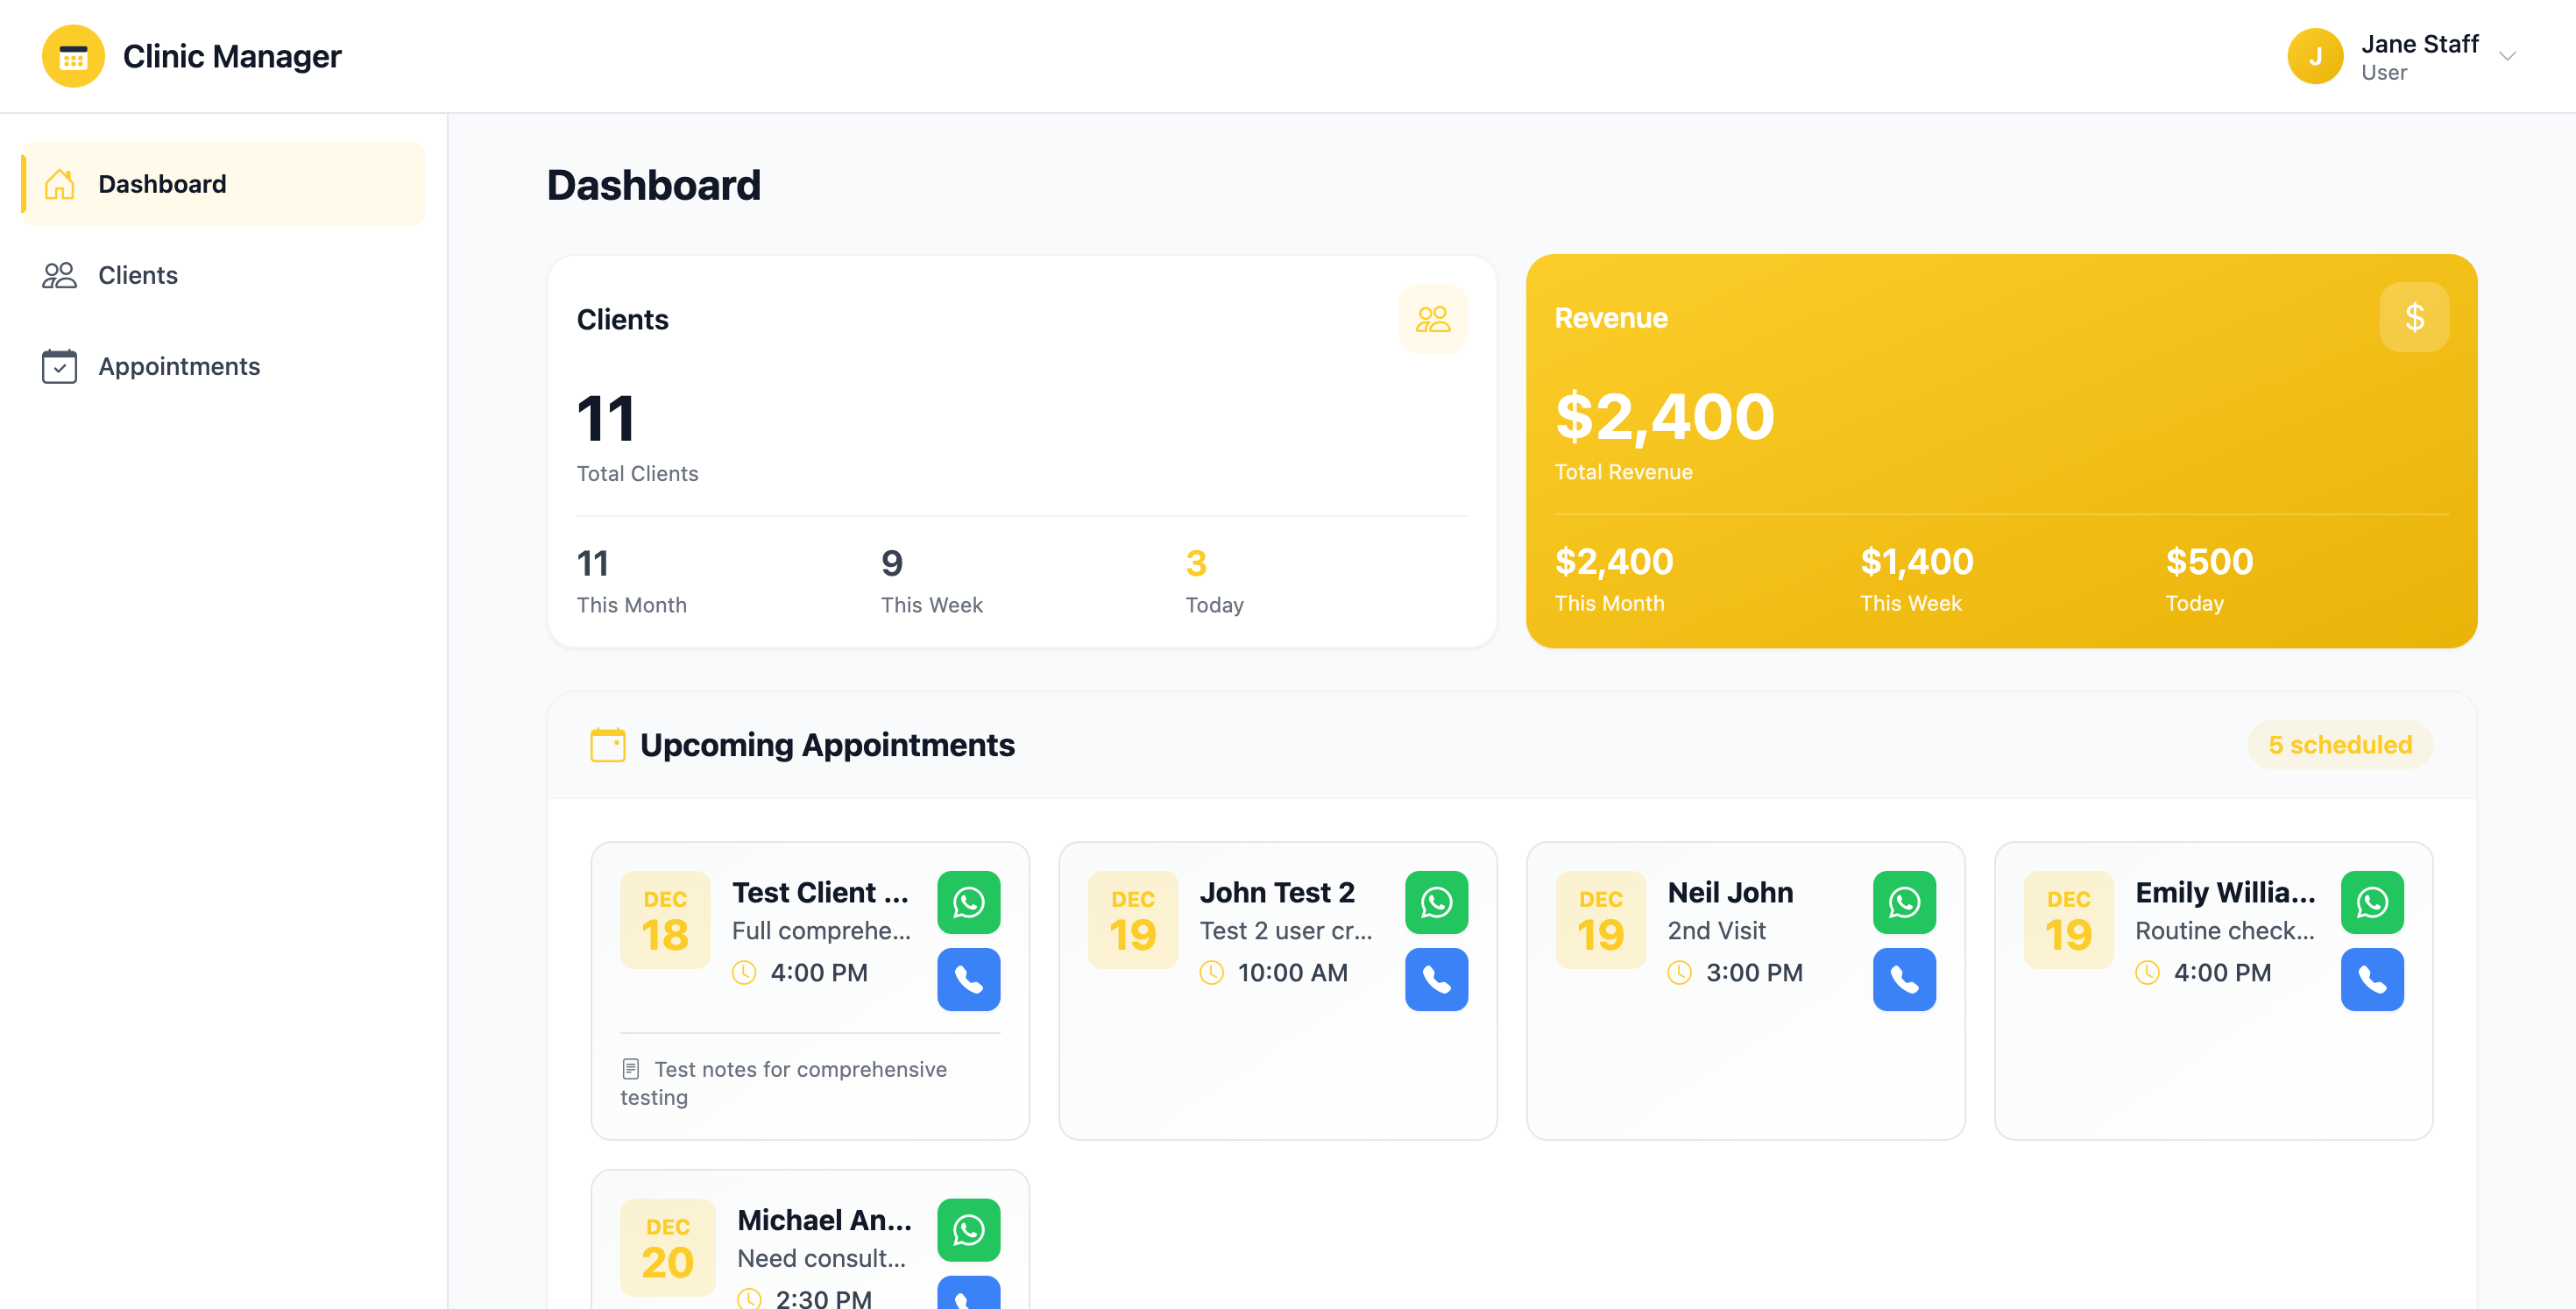
Staff dashboard with access to all clinic data for operational management
Key Responsibilities:
- Schedule and manage appointments for all consultants
- Maintain client database and records
- Process payments and maintain financial records
- Add clinical notes and documentation
- Generate reports for clinic operations
What Staff Can Do:
- ✅ View all clinic statistics without filters
- ✅ Manage all clients (create, view, edit)
- ✅ Manage all appointments and assign consultants
- ✅ Record payments for appointments
- ✅ Add clinical notes
- ✅ Generate and export reports
- ⛔ Cannot delete clients
- ⛔ Cannot delete payments
- ⛔ Cannot delete clinical notes
- ⛔ Cannot access settings or user management
- ⛔ Cannot access admin tools
Permission Matrix
The following table provides a comprehensive overview of permissions for each role:
| Feature | Admin | Consultant | User (Staff) |
|---|---|---|---|
| Dashboard & Analytics | |||
| View All Statistics | ✅ Full | ⚠️ Limited | ✅ Full |
| View Revenue Reports | ✅ Full | ⚠️ Own Only | ✅ Full |
| Client Management | |||
| View Clients | ✅ All | ⚠️ Assigned | ✅ All |
| Add Client | ✅ Yes | ⛔ No | ✅ Yes |
| Edit Client | ✅ Yes | ⛔ No | ✅ Yes |
| Delete Client | ✅ Yes | ⛔ No | ⛔ No |
| Appointment Management | |||
| View Appointments | ✅ All | ⚠️ Own Only | ✅ All |
| Create Appointment | ✅ Any | ⚠️ Self Only | ✅ Any |
| Assign Consultant | ✅ Yes | ⛔ No | ✅ Yes |
| Edit Appointment | ✅ Yes | ⛔ No | ✅ Yes |
| Delete Appointment | ✅ Yes | ⛔ No | ✅ Yes |
| Change Status | ✅ All | ⚠️ Own Only | ✅ All |
| Payment Management | |||
| View Payments | ✅ Yes | ✅ Yes | ✅ Yes |
| Record Payment | ✅ Yes | ⛔ No | ✅ Yes |
| Delete Payment | ✅ Yes | ⛔ No | ⛔ No |
| Clinical Notes | |||
| View Notes | ✅ Yes | ✅ Yes | ✅ Yes |
| Add Note | ✅ Yes | ✅ Yes | ✅ Yes |
| Delete Note | ✅ Yes | ⛔ No | ⛔ No |
| System Settings | |||
| Clinic Configuration | ✅ Yes | ⛔ No | ⛔ No |
| Working Hours Setup | ✅ Yes | ⛔ No | ⛔ No |
| User Management | ✅ Yes | ⛔ No | ⛔ No |
| Admin Tools | ✅ Yes | ⛔ No | ⛔ No |
| Audit Logs | ✅ Yes | ⛔ No | ⛔ No |
Role Indicators
The system clearly indicates admin-only features throughout the interface:
- Red "Admin" Badge: Appears next to navigation items requiring administrator access (e.g., Settings, Admin Tools)
- Hidden Menu Items: Navigation options not available to your role are automatically hidden
- Disabled Buttons: Action buttons you don't have permission to use appear grayed out or are hidden
- Role Display: Your current role is shown in the top-right user profile menu
Security & Best Practices
- All role permissions are enforced both at the frontend (UI) and backend (Firestore security rules)
- Attempting to access unauthorized features via direct URL will redirect you to the dashboard
- All administrative actions are logged in the audit trail
- Contact your administrator if you need different permissions or role changes
Requesting Role Changes
If you need access to features not available in your current role:
- Contact your clinic administrator
- Explain which features you need access to and why
- The administrator can modify your role or grant temporary elevated permissions
- All role changes are logged for security compliance
3. Login & Authentication
3.1 Logging Into the System
To access the Clinic Booking System:
- Navigate to the login page - Open your web browser and go to the system URL provided by your administrator
- Enter your credentials - Type your registered email address and password
- Click "Sign In" - The system will verify your credentials
- Access granted - Upon successful login, you'll be redirected to your dashboard
Figure 3.1: Login page with email and password fields
3.2 First-Time Login
If this is your first time logging in:
- Use the temporary credentials provided by your administrator
- After your first successful login, navigate to Settings → User Profile to update your profile information
- It's highly recommended to change your temporary password immediately for security
3.3 Forgot Password
If you've forgotten your password:
- Click the "Forgot Password?" link on the login page
- Enter your registered email address
- Check your email inbox for a password reset link (may take 1-2 minutes)
- Click the link in the email and follow the instructions to create a new password
- Return to the login page and use your new password
3.4 Logging Out
To securely log out of the system:
- Click your profile icon in the top-right corner of the header
- Select "Logout" from the dropdown menu
- You'll be redirected to the login page
- Your session will be terminated immediately
- You're finished using the system
- You're stepping away from your computer in a shared environment
- You're switching between user accounts
- You notice any suspicious activity
3.5 Session Management
The system uses automatic session management for security:
- Session timeout: After 30 minutes of inactivity, you'll be automatically logged out
- Activity tracking: Any interaction with the system (clicks, typing) resets the inactivity timer
- Warning notification: You'll receive a 2-minute warning before automatic logout
- Multi-device: You can be logged in on multiple devices simultaneously
3.6 Account Security Tips
- ✅ Use a strong password with at least 8 characters including letters, numbers, and symbols
- ✅ Never share your login credentials with anyone, including colleagues
- ✅ Change your password regularly (recommended: every 90 days)
- ✅ Be cautious of phishing emails asking for your password
- ✅ Report any suspicious activity to your administrator immediately
- ❌ Don't use the same password for multiple systems
- ❌ Don't write down passwords in easily accessible places
- ❌ Don't let your browser remember passwords on shared computers
4. Dashboard Overview
The dashboard is your home screen and provides a quick overview of key clinic statistics and activities. The information displayed varies based on your user role.
Figure 4.1: Administrator dashboard showing all clinic statistics
4.1 Client Statistics Card
The top-left card shows total client information:
- Total Clients: The total number of active clients registered in the system
- New This Month: Number of new clients added in the current month
- What it means: Track client growth and measure the success of outreach efforts
- Role access: All roles can view this card
4.2 Revenue Statistics Card
The top-middle card displays financial performance:
- Total Revenue: Lifetime sum of all payments recorded in the system (formatted in LKR)
- This Month: Revenue collected in the current calendar month
- What it means: Monitor financial health and compare monthly performance
- Calculation: Includes all payment methods (Cash, Card, Bank Transfer, Insurance)
- Role access: Admin and Consultant only (Staff cannot view revenue)
Figure 4.2: Consultant dashboard (limited statistics compared to Admin)
4.3 Appointment Statistics Card
The top-right card shows appointment information:
- Total Appointments: All appointments ever scheduled (all statuses)
- This Month: Appointments scheduled for the current month
- Status breakdown: Includes Scheduled, Completed, Cancelled, and No-Show appointments
- What it means: Understand booking volume and clinic capacity utilization
- Role access: All roles can view this card
4.4 Upcoming Appointments Widget
The middle section displays your schedule at a glance:
- Next 5 appointments: Shows the 5 closest upcoming appointments chronologically
- Information displayed:
- Client name
- Date and time
- Appointment type (Consultation, Follow-up, Treatment, etc.)
- Current status (Scheduled, Confirmed, etc.)
- Quick actions: Click on an appointment to view full details or make changes
- Empty state: If no upcoming appointments, a message "No upcoming appointments" is shown
4.5 Last 30 Days Activity Chart
The bottom section shows a visual trend of appointment activity:
- Time period: Displays the last 30 days from today
- Data shown: Number of appointments per day (blue bars)
- Y-axis: Number of appointments (0-10 scale adjusts automatically)
- X-axis: Calendar dates
- Interactive: Hover over bars to see exact appointment count for that day
- What it means: Identify busy days, trends, and patterns in your clinic's scheduling
4.6 Role-Based Dashboard Differences
| Feature | Admin | Consultant | Staff |
|---|---|---|---|
| Client Statistics | ✅ All clients | ✅ All clients | ✅ All clients |
| Revenue Statistics | ✅ Full access | ✅ Full access | ❌ Hidden |
| Appointment Statistics | ✅ All appointments | ⚠️ Own appointments only | ✅ All appointments |
| Upcoming Appointments | ✅ All upcoming | ⚠️ Own upcoming only | ✅ All upcoming |
| Activity Chart | ✅ All activity | ⚠️ Own activity only | ✅ All activity |
4.7 Refreshing Dashboard Data
To ensure you're viewing the most current information:
- Auto-refresh: Dashboard data updates every time you navigate to it from another page
- Manual refresh: Click the browser refresh button (F5 or Cmd+R) to force an update
- Real-time updates: Some changes (like new appointments) may take 5-10 seconds to reflect
5. Client Management
The Client Management module allows you to maintain a comprehensive database of all patients/clients. You can add new clients, view their complete history, manage appointments, track payments, and add clinical notes.

Figure 5.1: Clients list page with search, filter, and add options
5.1 Viewing the Client List
To access the client list:
- Click "Clients" in the left sidebar navigation
- The main table displays all clients with the following columns:
- Name (First name + Last name)
- Email address
- Phone number
- Date of Birth
- Registration Date
- Actions (View, Edit, Delete)
- Search: Use the search bar at the top to filter clients by name, email, or phone
- Pagination: Navigate through multiple pages if you have many clients
- Sort: Click column headers to sort ascending/descending
5.2 Adding a New Client
To register a new client in the system:
- Click the "+ Add Client" button in the top-right corner of the Clients page
- A modal form will appear with the following fields:
- First Name (required) - Enter the client's first name
- Last Name (required) - Enter the client's last name
- Email (required) - Must be a valid email format (e.g., client@example.com)
- Phone (required) - Enter contact number with country code (e.g., +94771234567)
- Date of Birth (required) - Use the date picker to select
- Address (optional) - Full residential address
- Emergency Contact (optional) - Name and phone of emergency contact person
- Medical History (optional) - Brief notes about allergies, conditions, medications
- Fill in all required fields (marked with red asterisk *)
- Click "Save" to create the client record
- The new client will appear in the list immediately
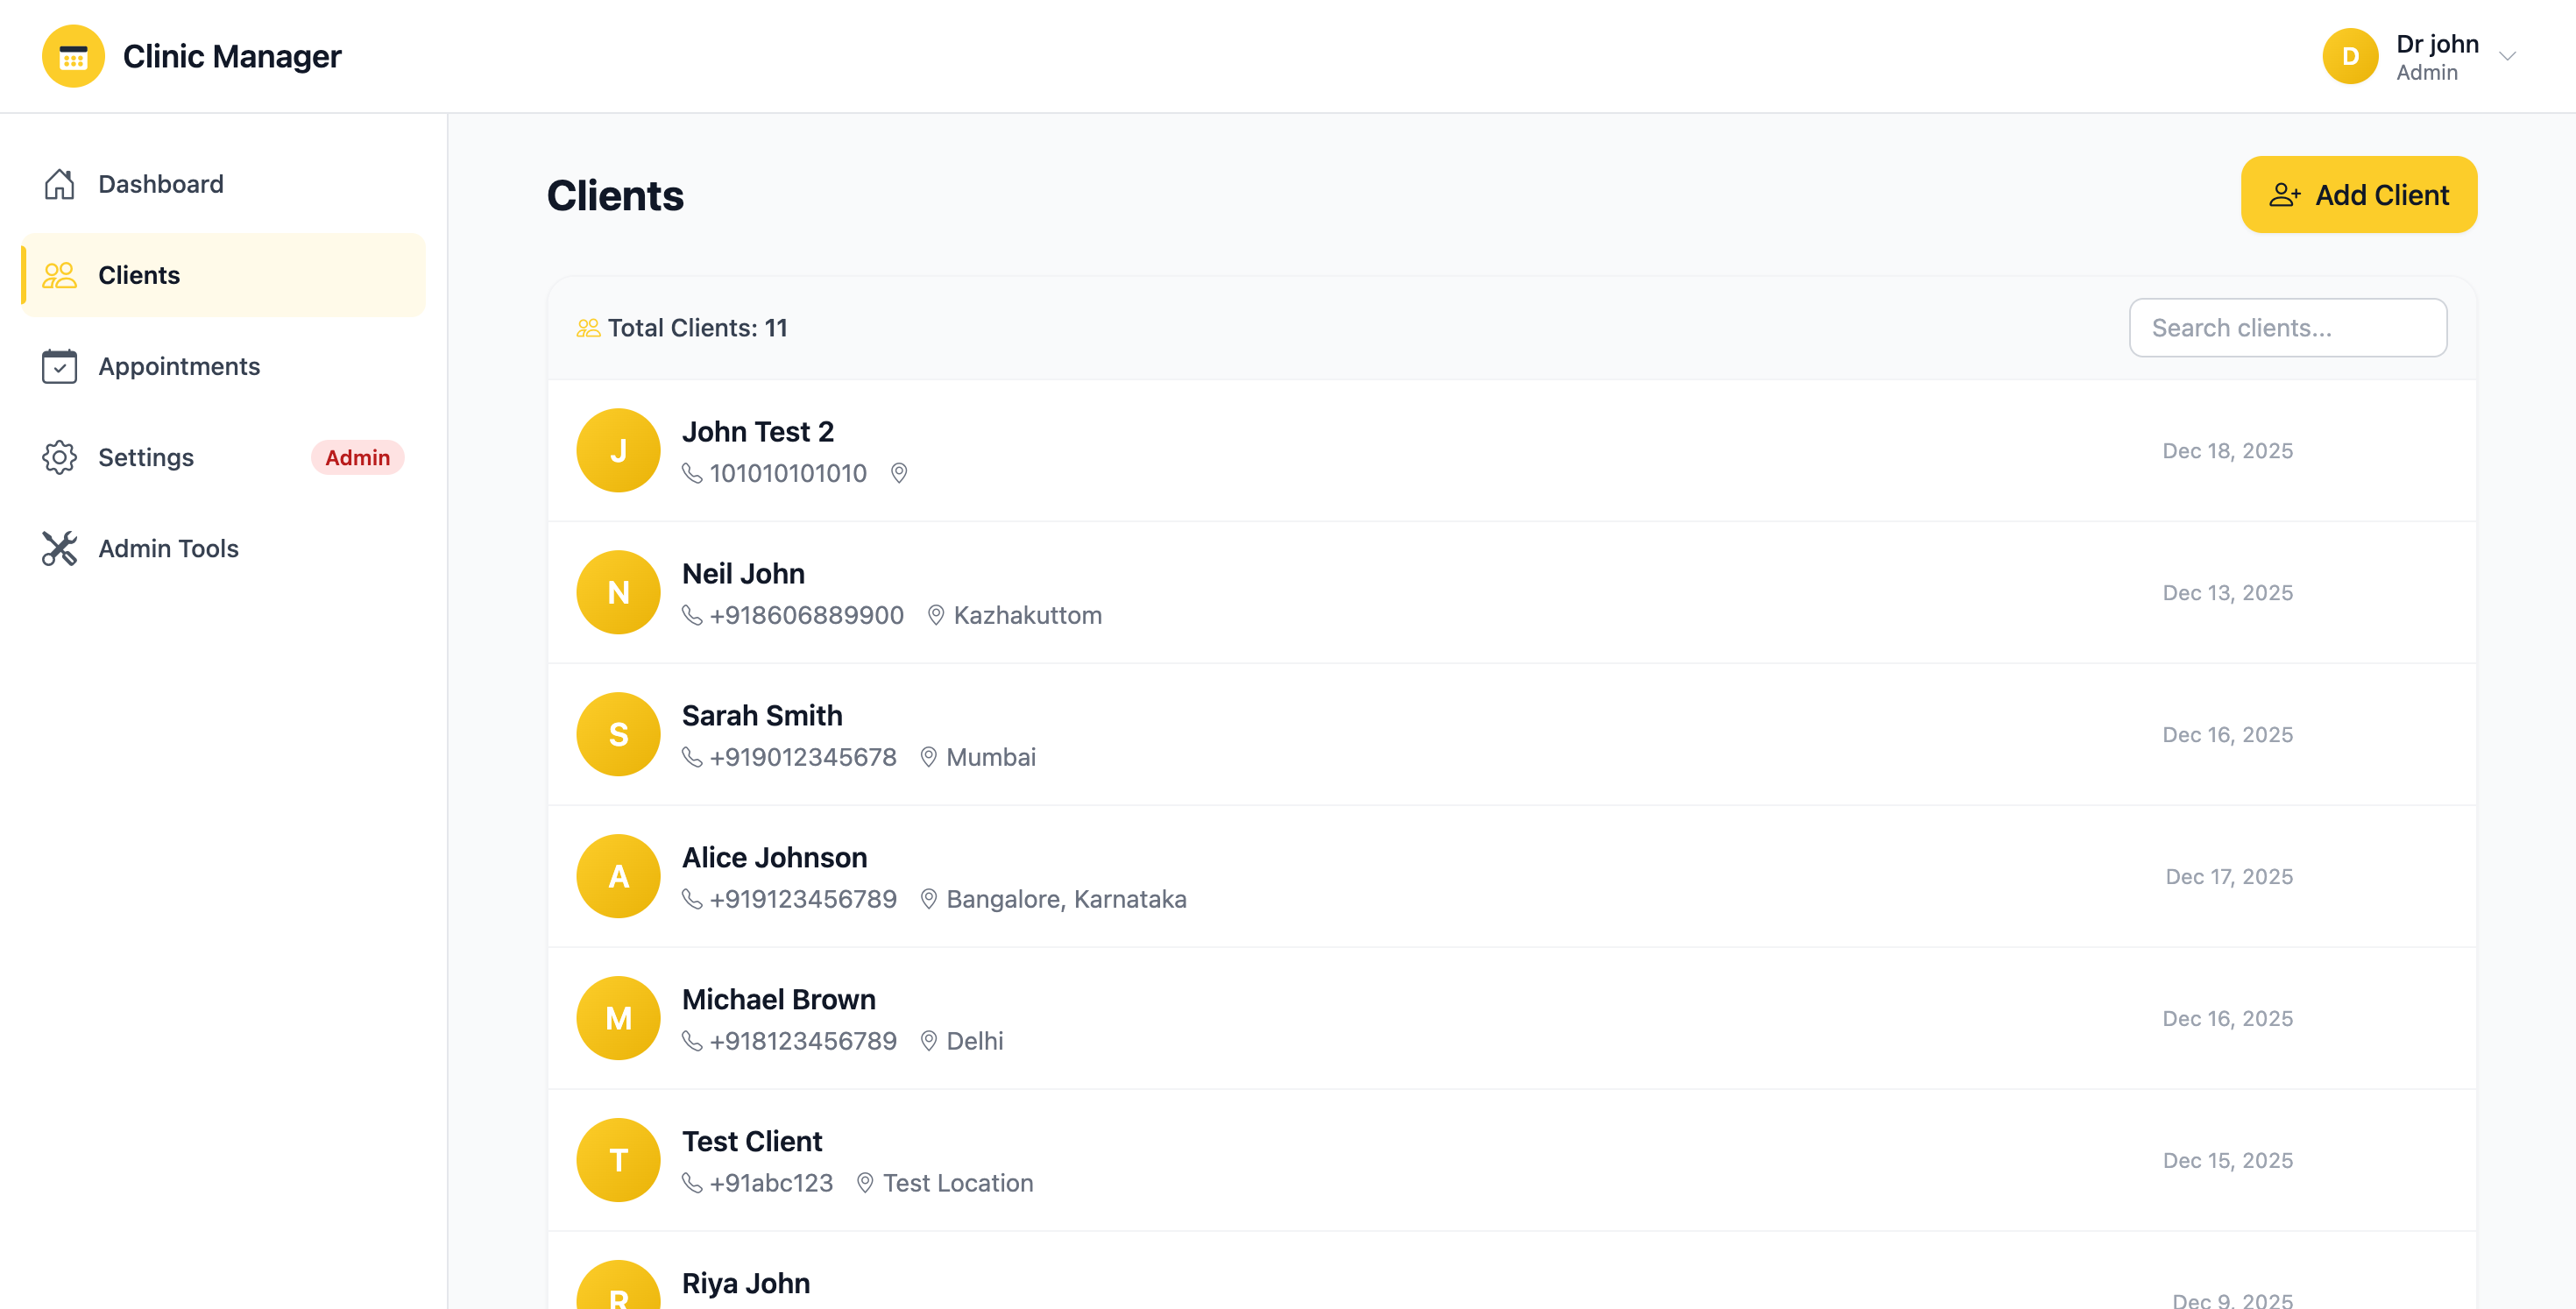
Figure 5.2: Add new client form with all required and optional fields
- Email must be unique - you cannot register two clients with the same email
- Phone number must be in international format (+country code)
- Date of Birth cannot be in the future
- All required fields must be filled before saving
5.3 Viewing Client Details
To see a client's complete profile:
- From the Clients list, click the "View" (eye icon) button next to any client
- The Client Details page opens with four main tabs:
- Overview: Personal information and medical history
- Appointments: Complete appointment history
- Payments: All payment records linked to this client
- Notes: Clinical notes and observations
- Navigate between tabs to view different aspects of the client's record
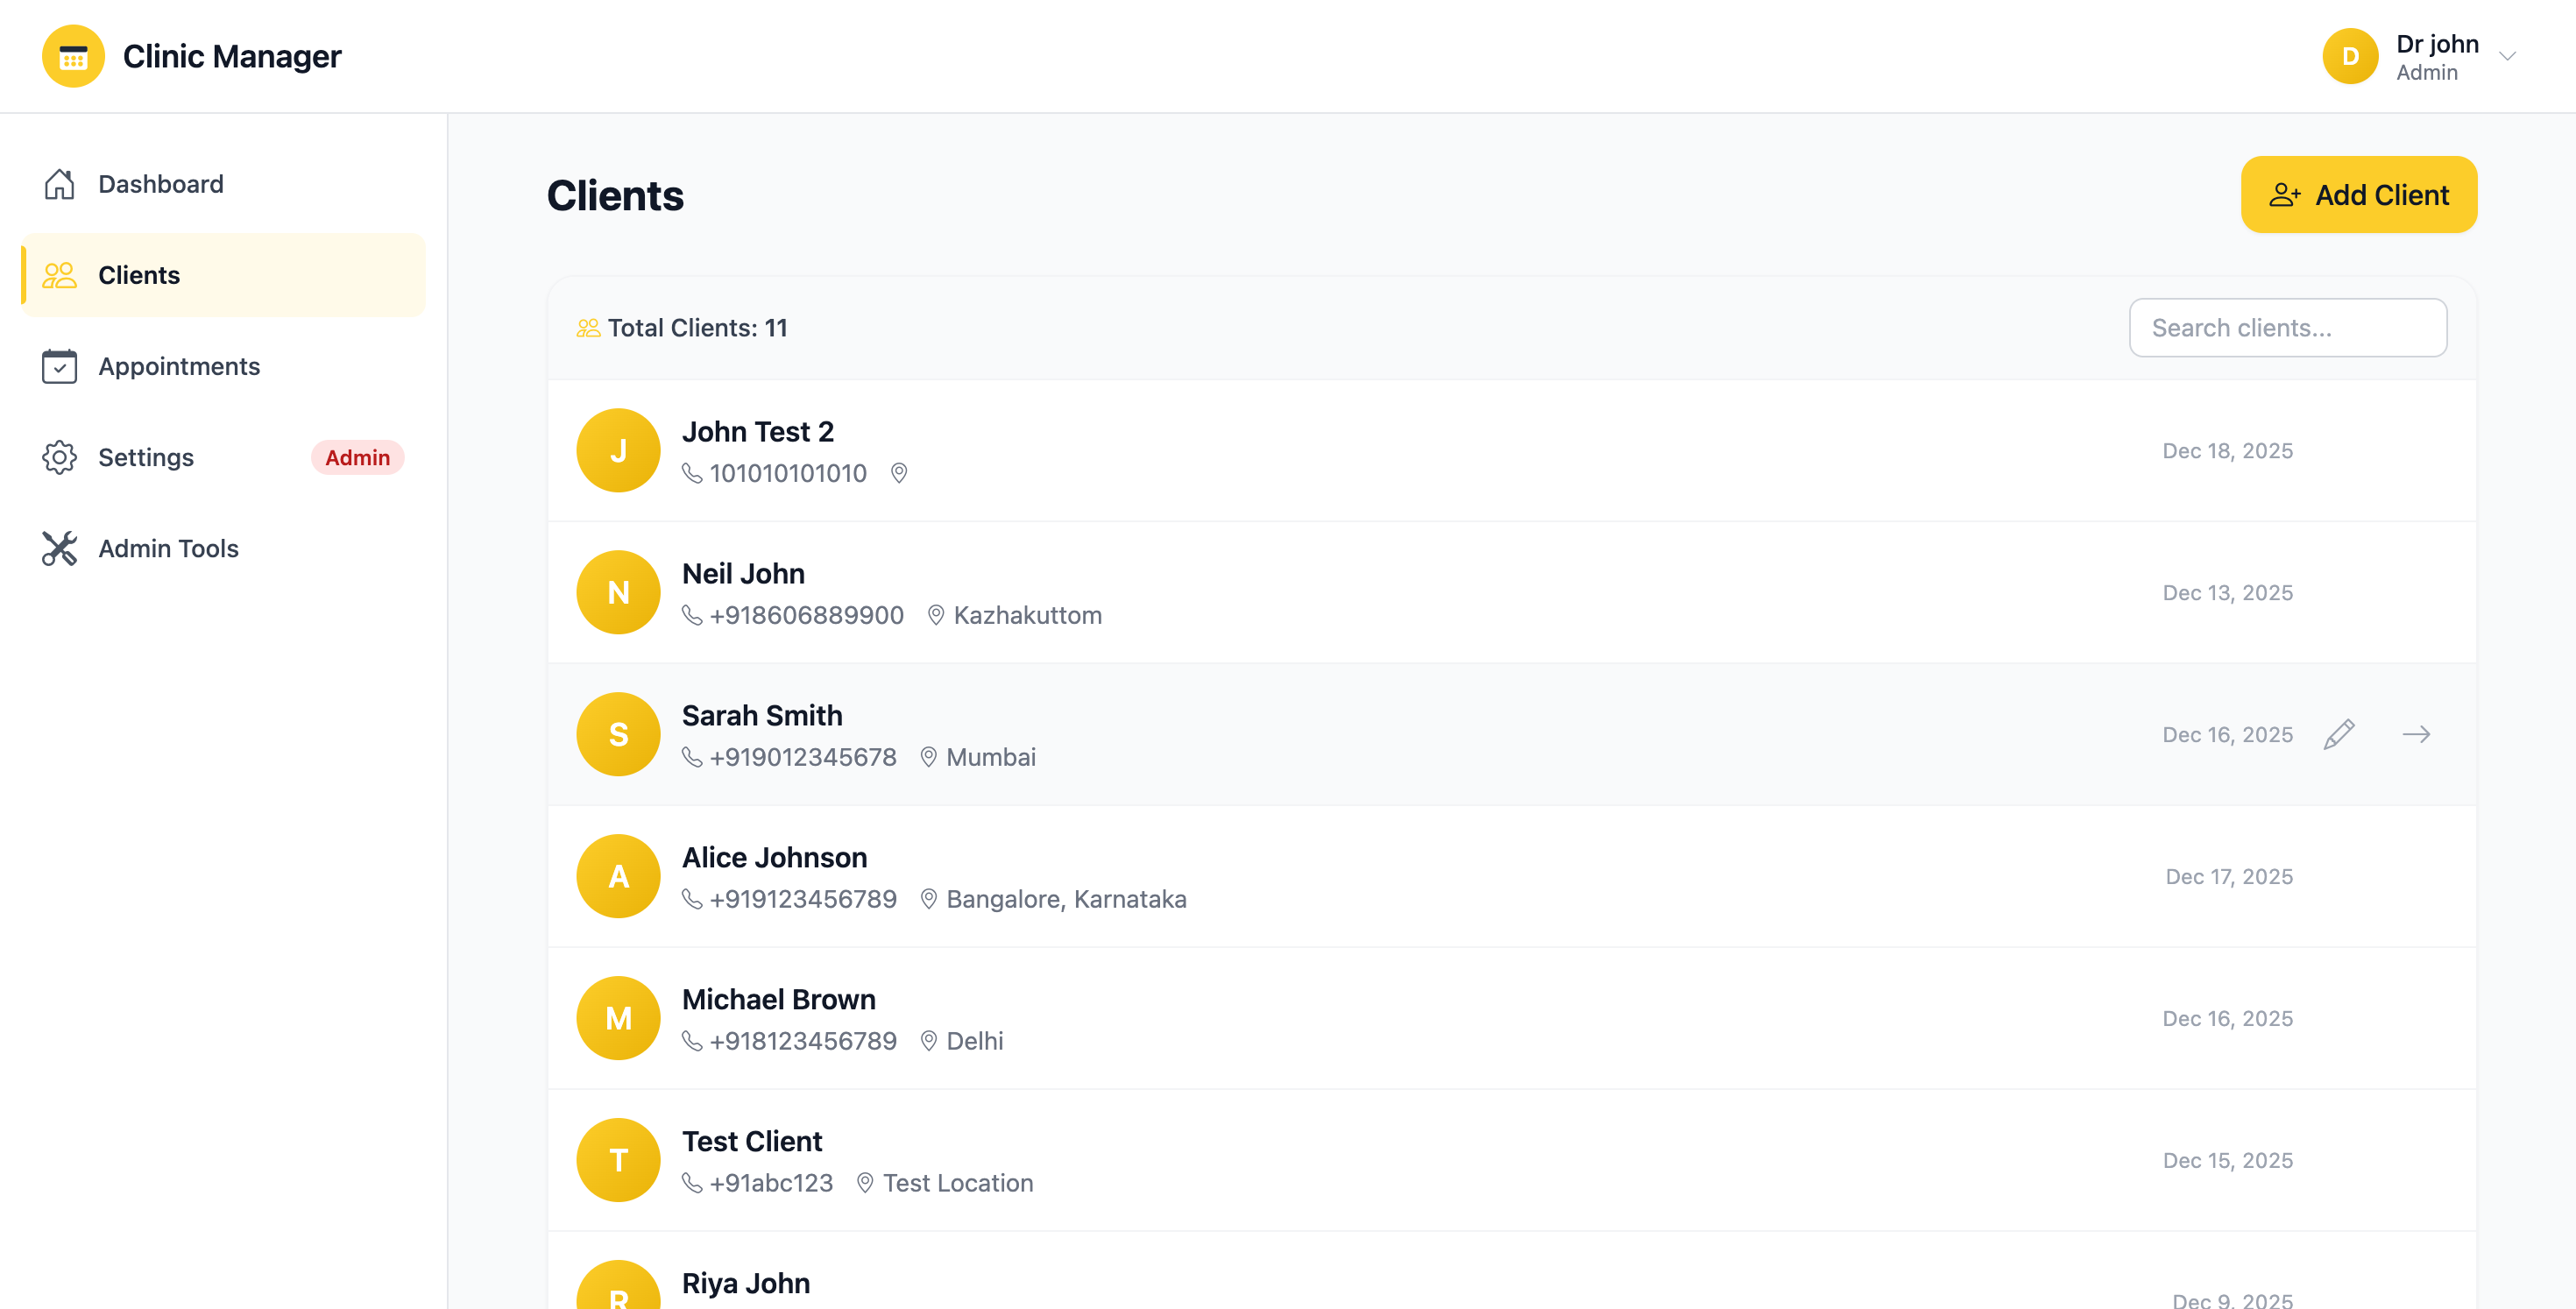
Figure 5.3: Client details page showing personal information and tab navigation
5.4 Editing Client Information
To update a client's details:
- From the Clients list, click the "Edit" (pencil icon) button
- The same form used for adding clients will appear, pre-filled with current data
- Modify any fields as needed
- Click "Update" to save changes
- The updated information reflects immediately across the system
5.5 Deleting a Client Admin Only
To permanently remove a client from the system:
- From the Clients list, click the "Delete" (trash icon) button
- A confirmation dialog will appear warning that this action cannot be undone
- Type "DELETE" in the confirmation field to proceed
- Click "Confirm Delete"
- Deleting a client is permanent and irreversible
- All associated appointments, payments, and notes will also be deleted
- This action is logged in the audit trail
- Only administrators can perform client deletions
- Consider marking clients as "inactive" instead of deleting if you need to preserve historical records
5.6 Client Appointments Tab
View all appointments for a specific client:
- Open client details and click the "Appointments" tab
- See chronological list of all past and upcoming appointments
- Information shown: Date, Time, Type, Consultant, Status
- Click any appointment to view full details or reschedule
- Use the "+ Schedule Appointment" button to book a new appointment for this client
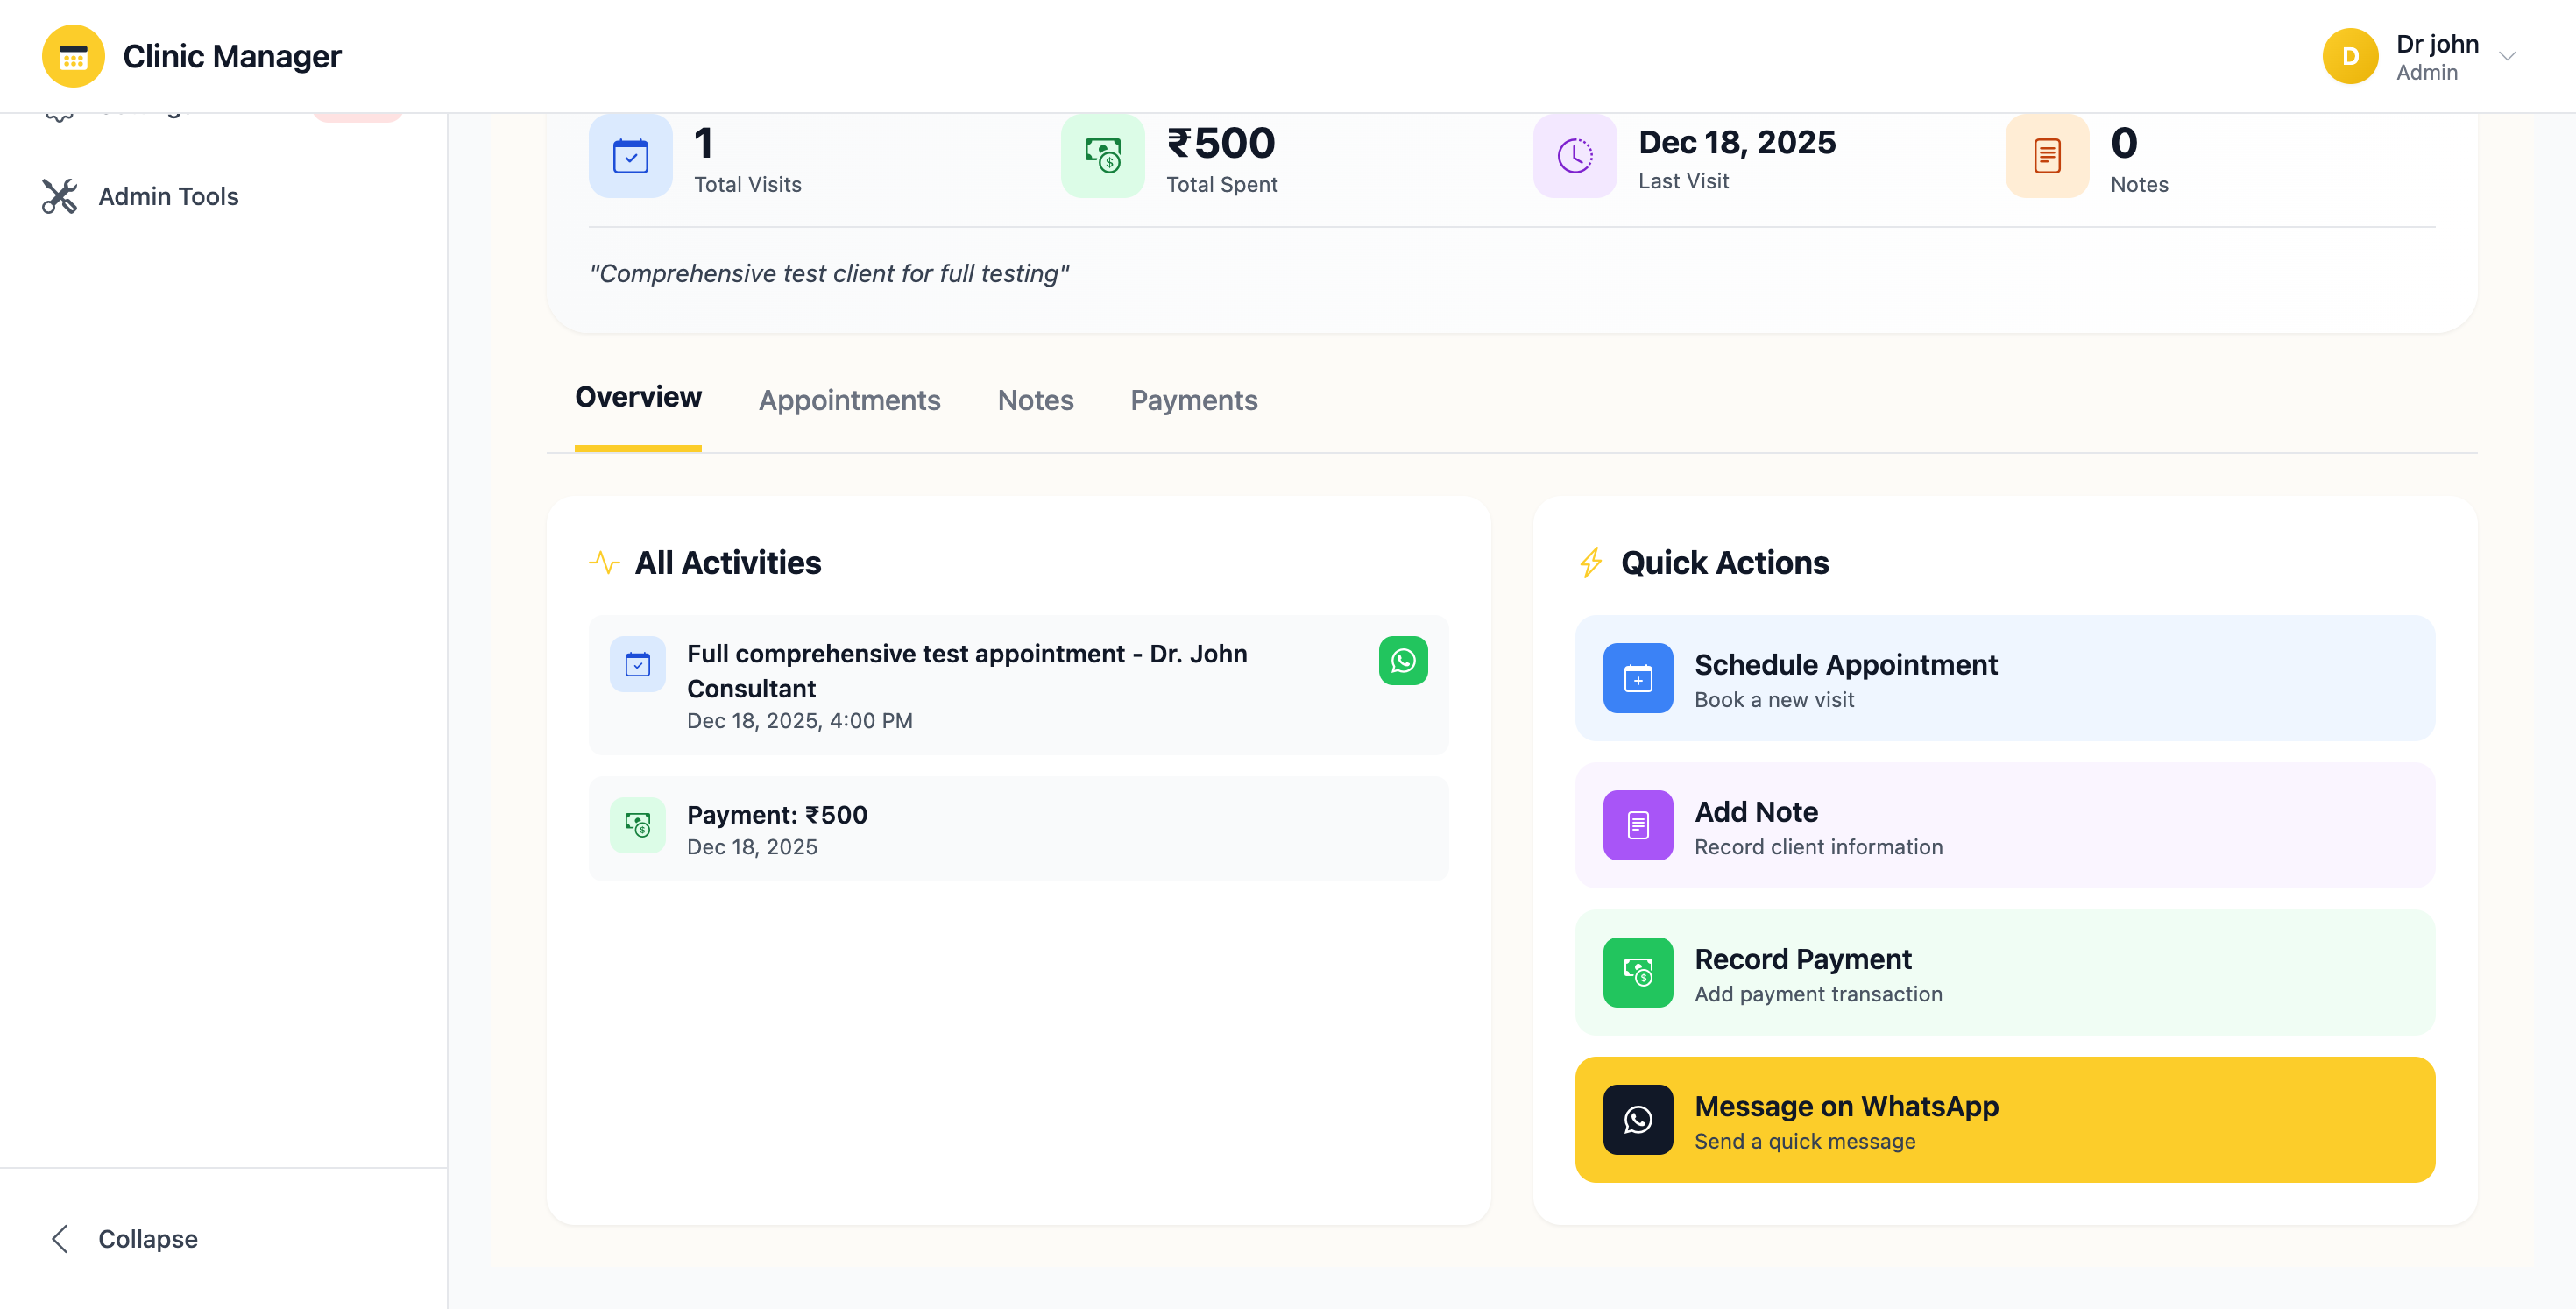
Figure 5.4: Client appointments tab showing complete appointment history
5.7 Client Payments Tab
Track all financial transactions for a client:
- Open client details and click the "Payments" tab
- View complete payment history with dates, amounts, and methods
- See total amount paid by this client
- Click "+ Record Payment" to add a new payment for this client
- Role access: Staff members cannot view payment information
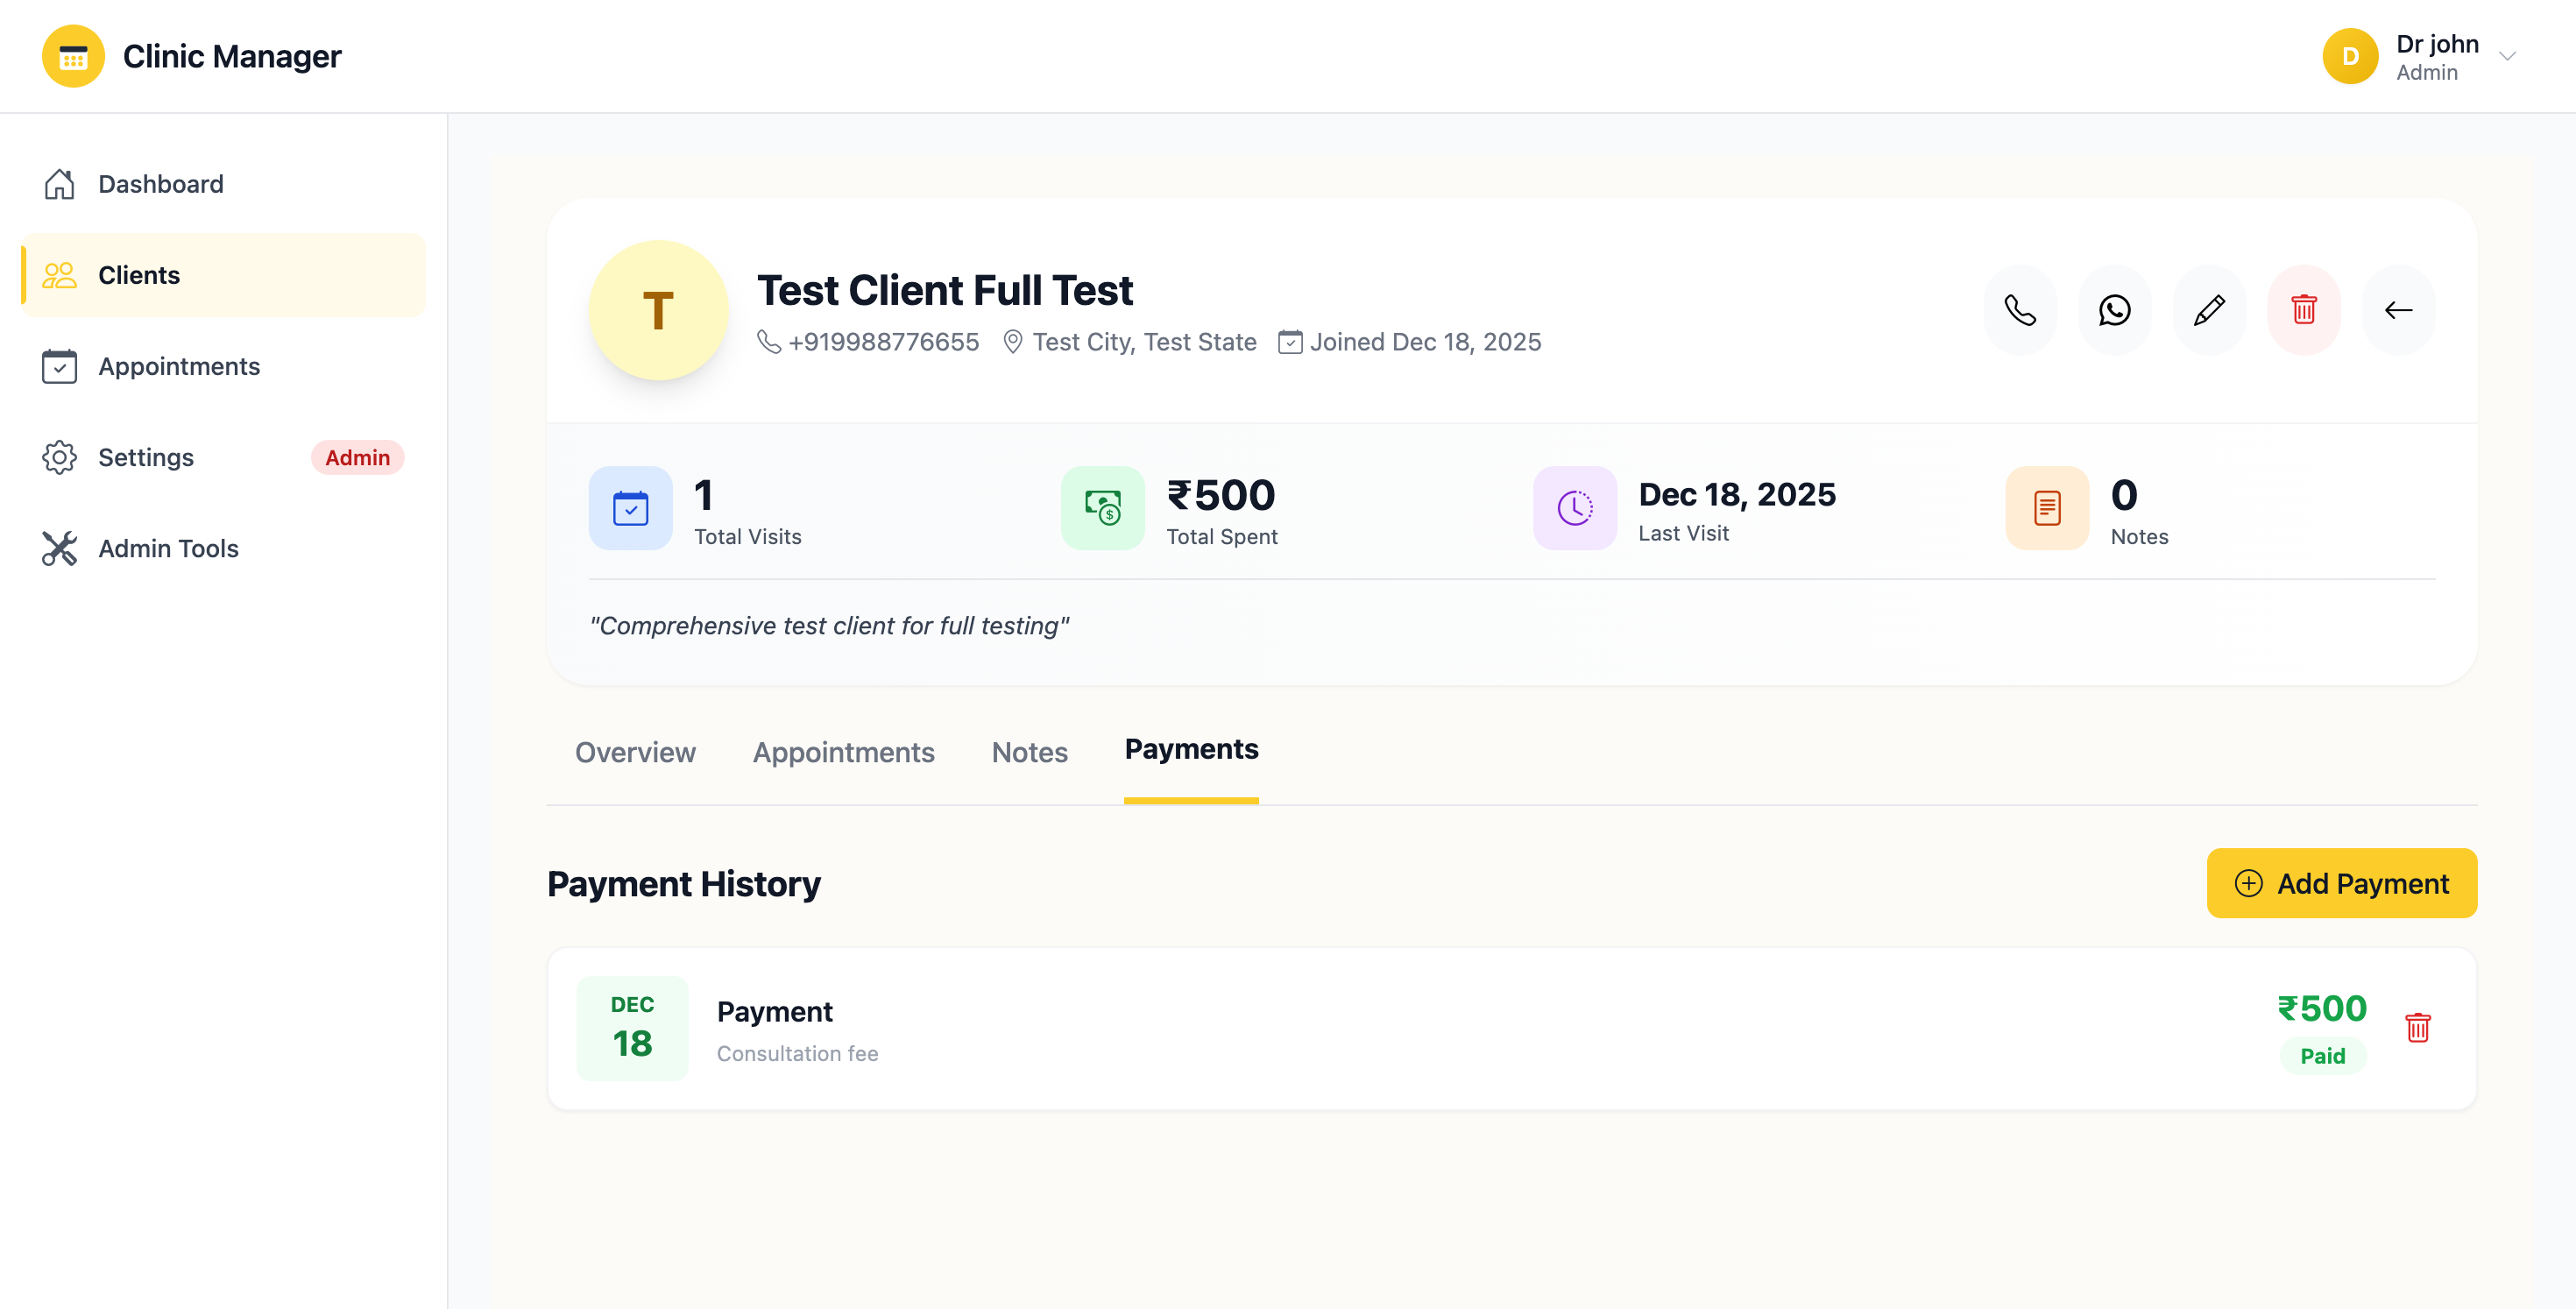
Figure 5.5: Client payments tab showing payment history and total amount
5.8 Client Notes Tab
Add and manage clinical notes for a client:
- Open client details and click the "Notes" tab
- View all existing notes in chronological order (newest first)
- To add a new note:
- Click "+ Add Note"
- Enter your note in the text area (supports up to 5000 characters)
- Click "Save Note"
- Each note shows:
- Note content
- Author name (who created the note)
- Date and time created
- Edit/Delete options (only for note author)
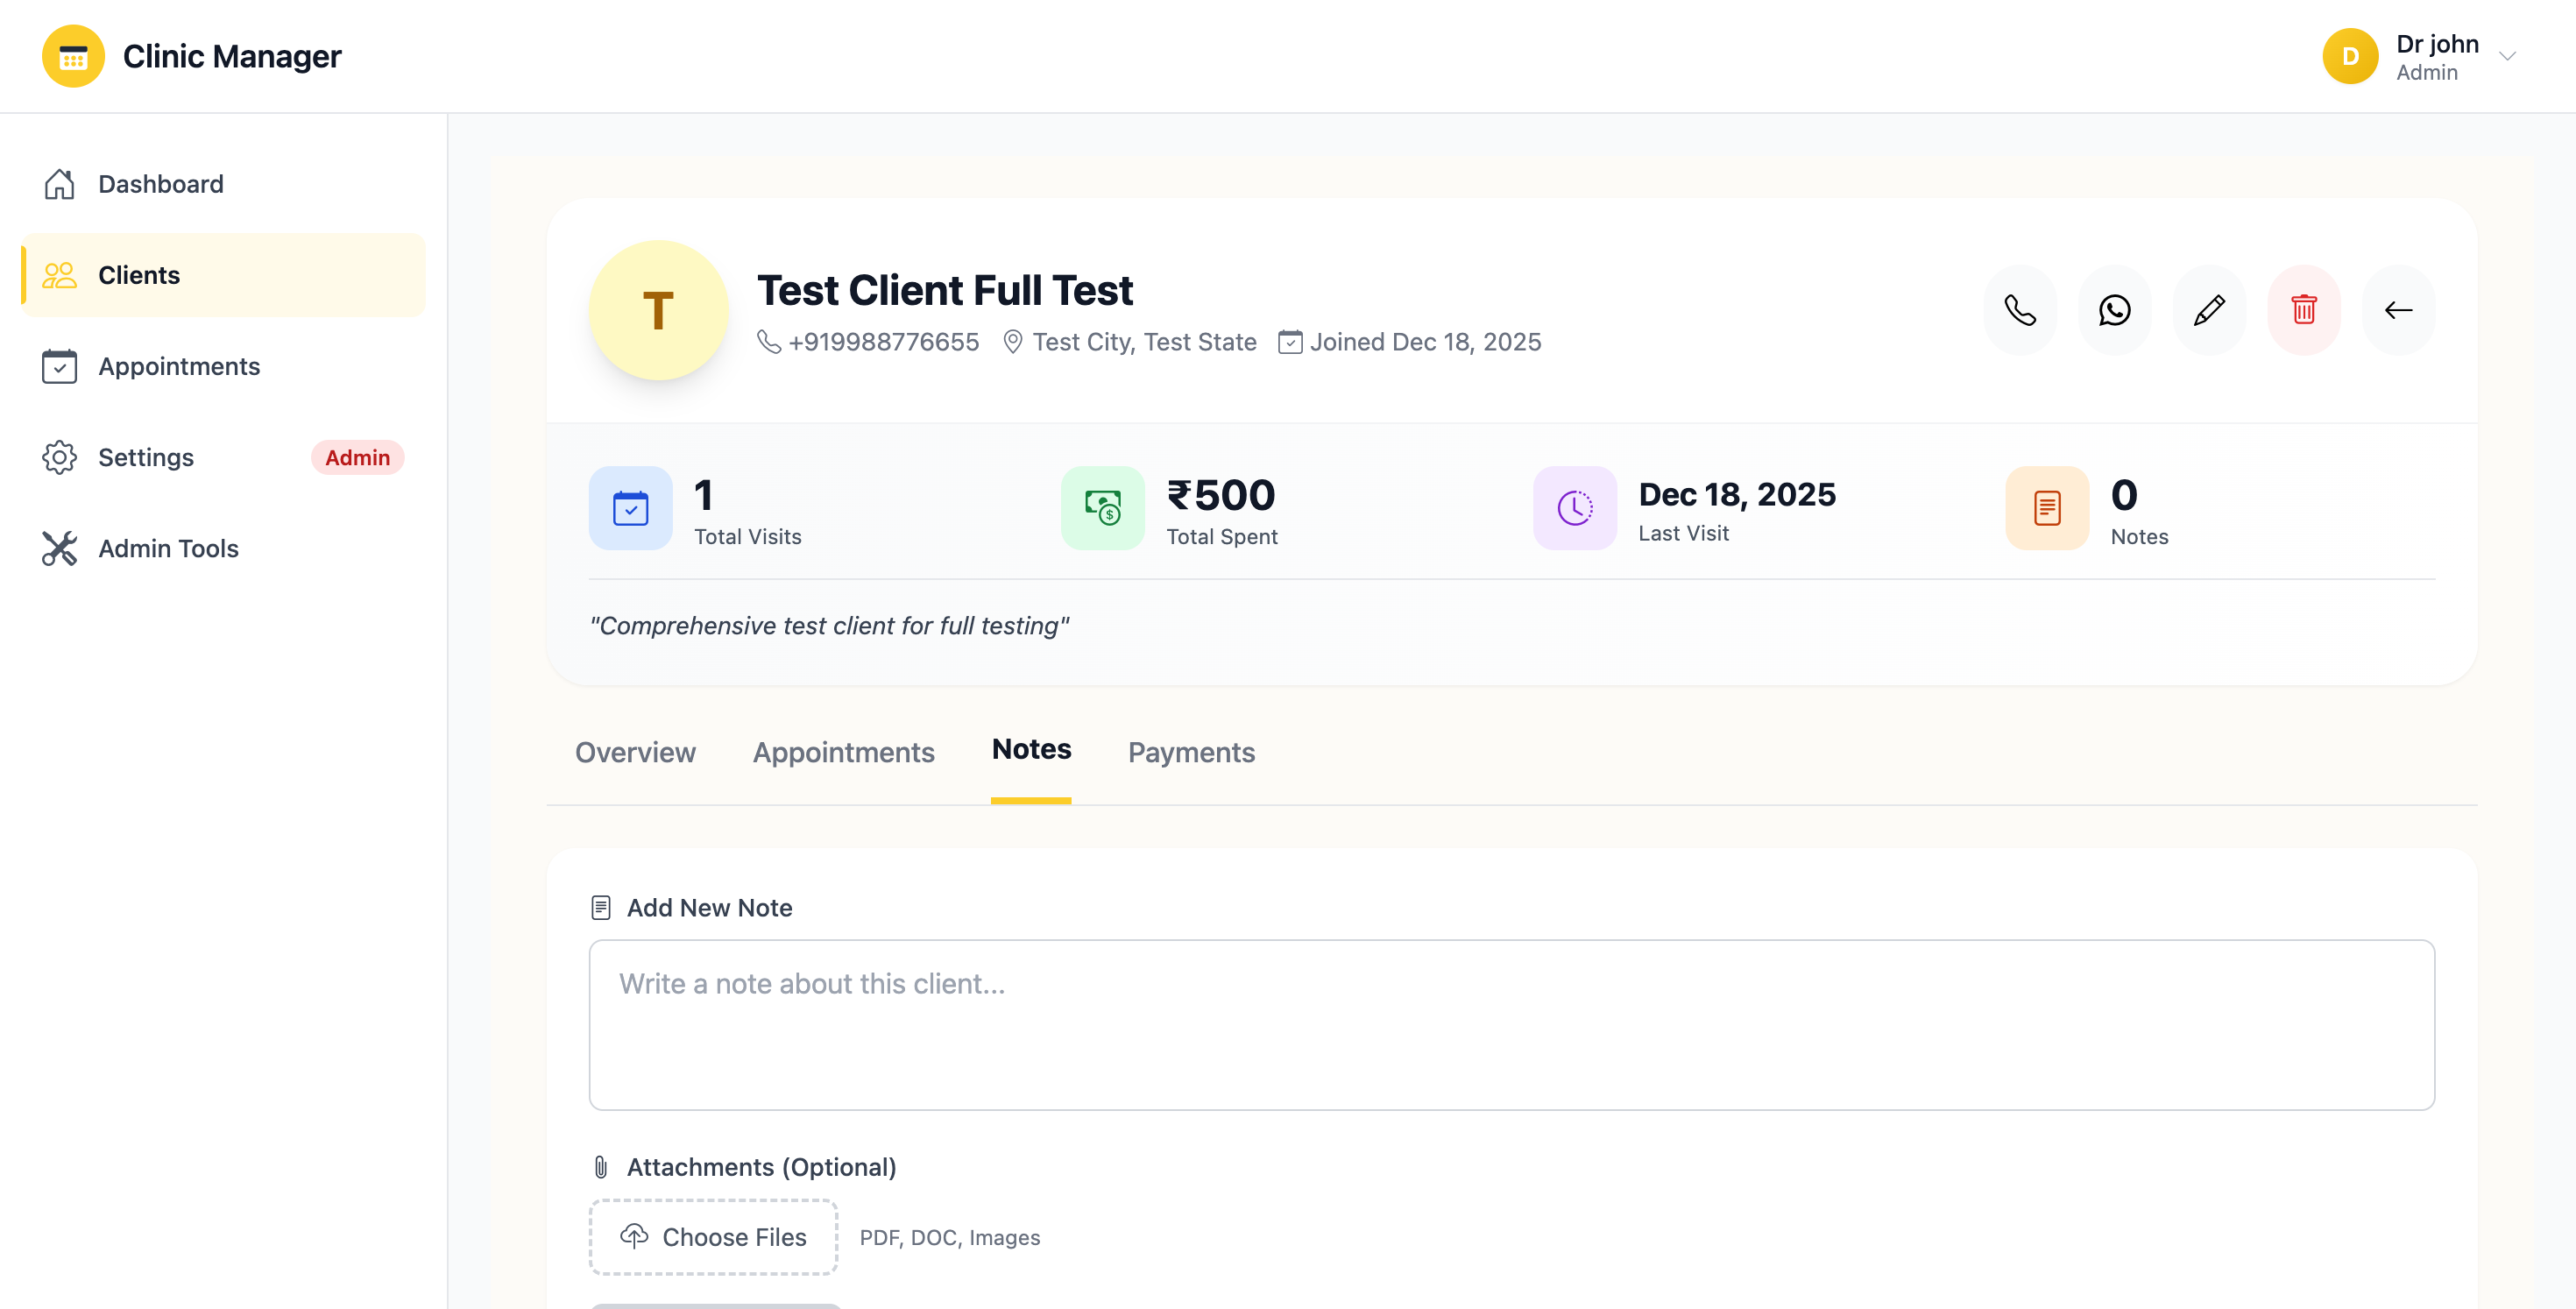
Figure 5.6: Client notes tab for adding clinical observations and follow-up reminders
5.9 Best Practices for Client Management
- ✅ Always verify client information (especially contact details) before saving
- ✅ Update medical history whenever the client reports changes
- ✅ Use the Notes tab to document important observations after appointments
- ✅ Double-check email addresses to avoid appointment reminder failures
- ✅ Keep emergency contact information current
- ❌ Don't create duplicate client records - search first before adding
- ❌ Don't store sensitive personal information in the Notes field unless necessary
- ❌ Don't delete clients unless absolutely necessary - historical data is valuable
6. Appointment Management
The Appointment Management module is the core of the booking system. Here you can schedule, view, edit, and manage all clinic appointments with full control over time slots, consultants, and statuses.
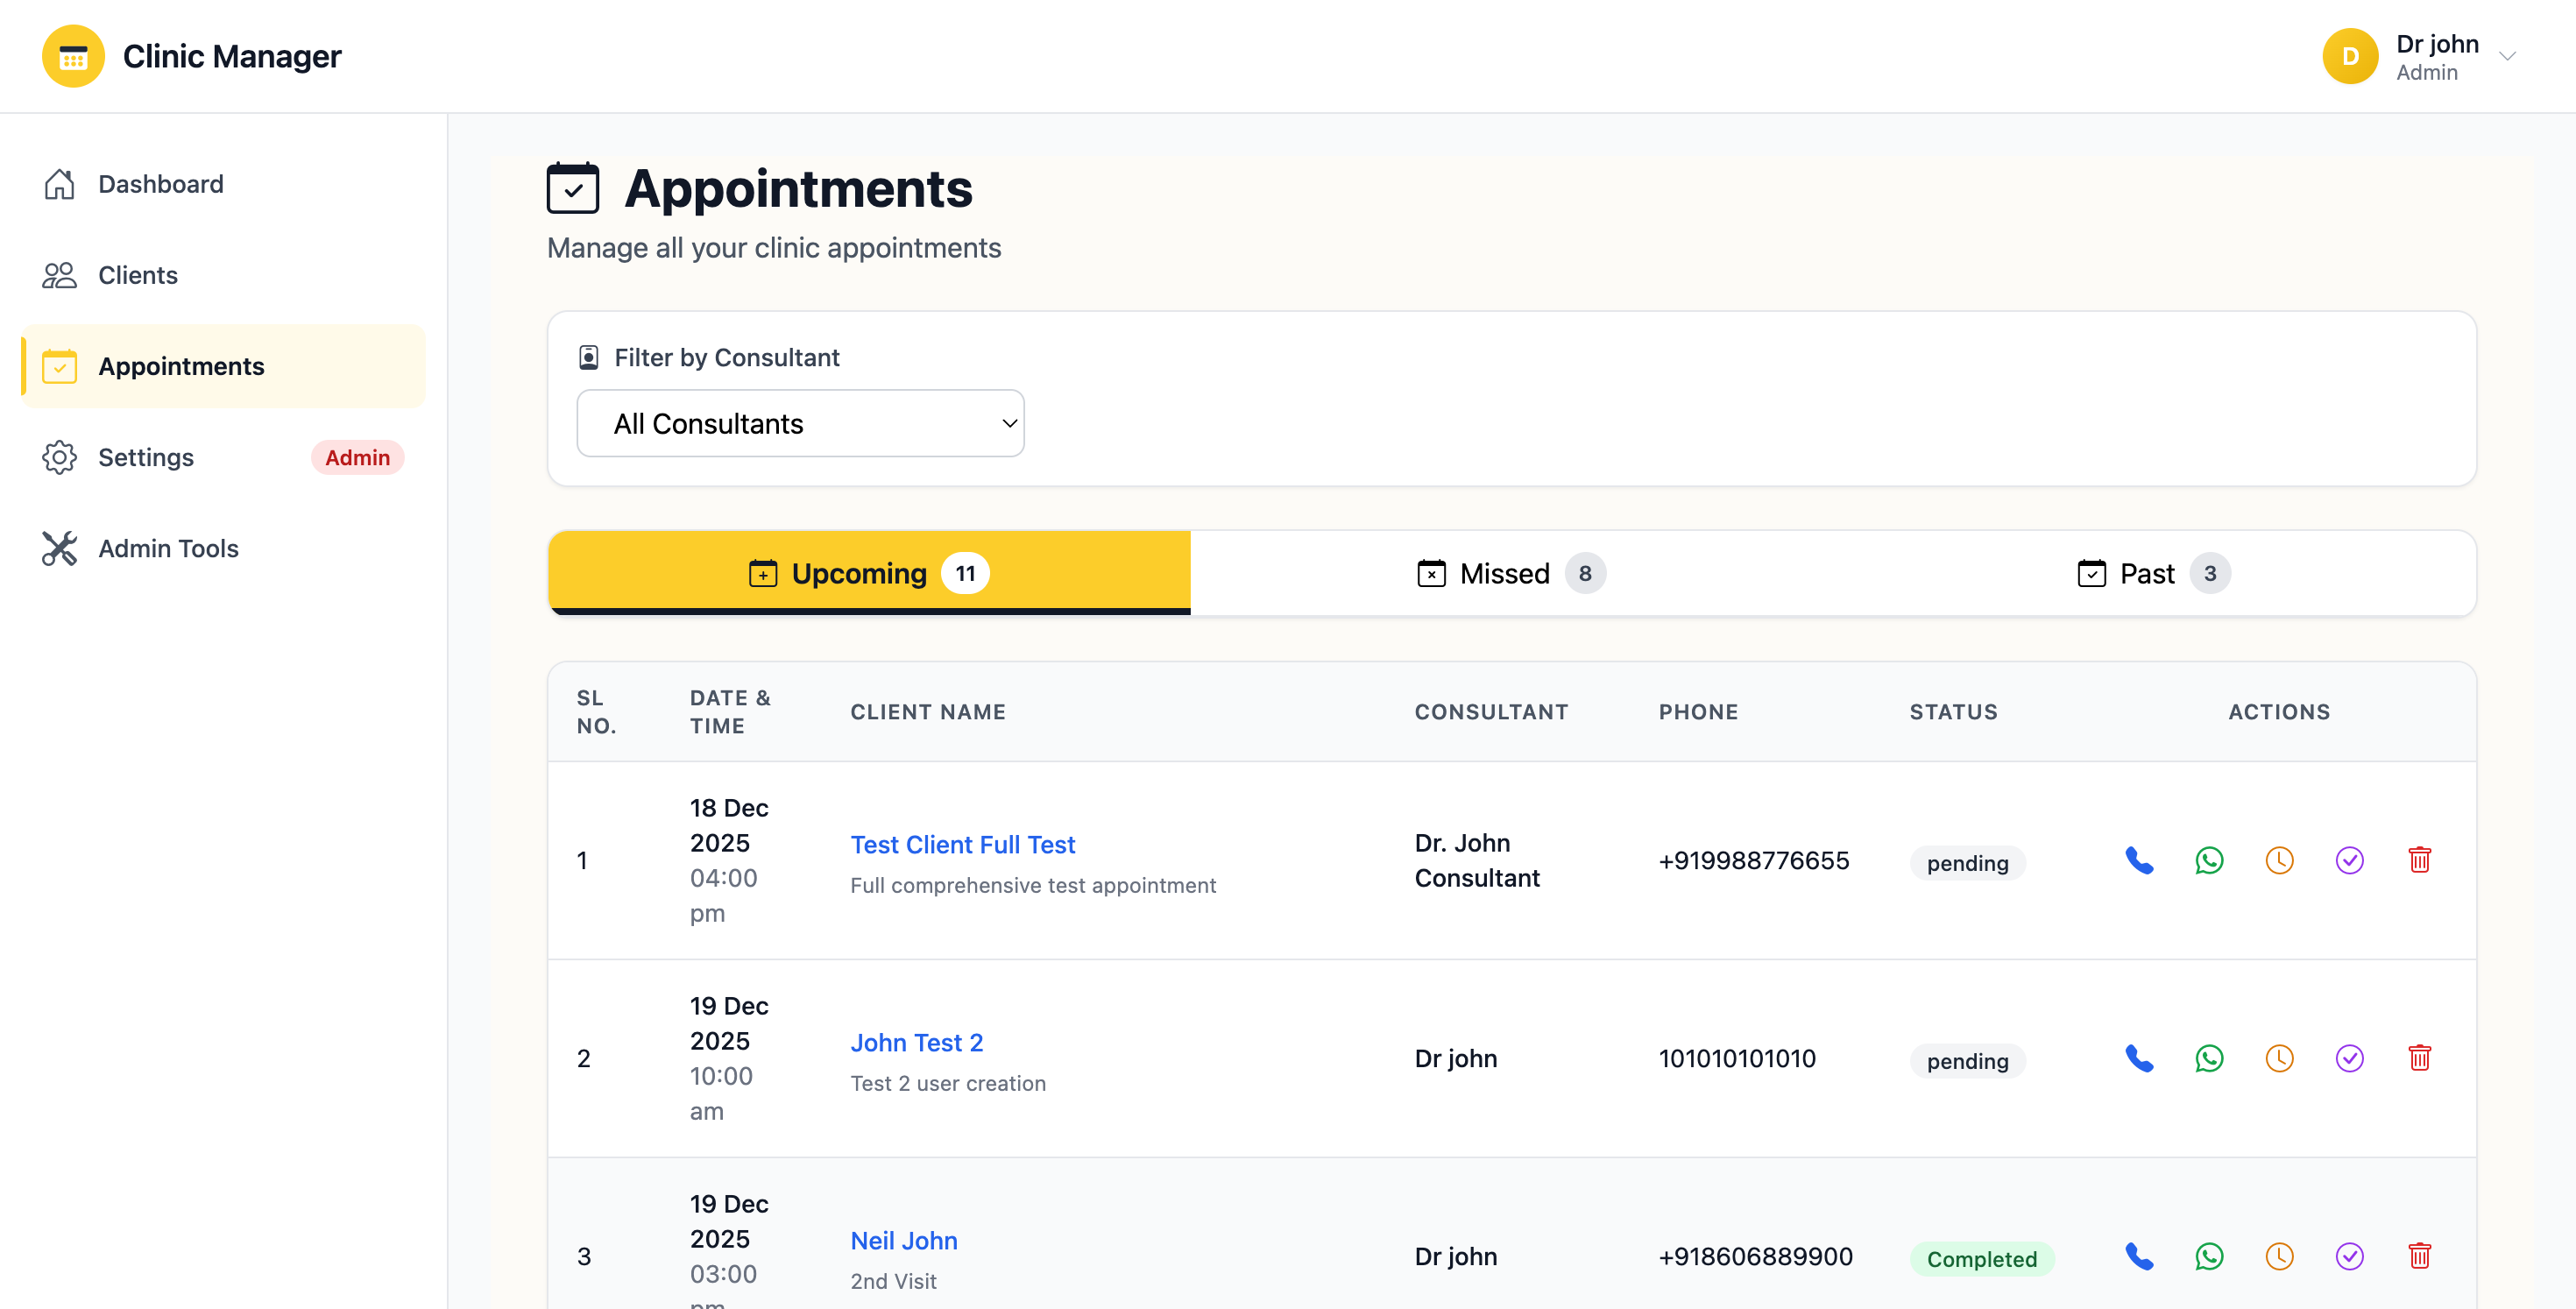
Figure 6.1: Appointments list page with filters, search, and schedule options
6.1 Viewing Appointments
To access the appointments list:
- Click "Appointments" in the left sidebar navigation
- The main table displays all appointments with columns:
- Client Name
- Consultant Name
- Date & Time
- Appointment Type
- Status (color-coded badges)
- Actions
- Color-coded status badges:
- Blue - Scheduled: Appointment is booked and confirmed
- Green - Completed: Appointment has been finished
- Red - Cancelled: Appointment was cancelled by client or clinic
- Orange - No-Show: Client did not attend scheduled appointment
6.2 Filtering and Searching Appointments
Use the filter options at the top of the page:
- Search bar: Type client name, consultant name, or appointment type to filter results
- Date range: Select "From" and "To" dates to view appointments within a specific period
- Status filter: Dropdown to show only Scheduled, Completed, Cancelled, or No-Show appointments
- Consultant filter: Filter by specific consultant (useful for clinics with multiple consultants)
- Clear filters: Click "Reset" to remove all filters and show all appointments
6.3 Scheduling a New Appointment
To book a new appointment:
- Click the "+ Schedule Appointment" button in the top-right corner
- A modal form opens with the following fields:
- Client (required) - Select from dropdown or search by name
- Consultant (required) - Choose the consultant for this appointment
- Date (required) - Use date picker to select appointment date
- Time (required) - Select from available time slots
- Appointment Type (required) - Choose from:
- Consultation
- Follow-up
- Treatment
- Procedure
- Check-up
- Other
- Duration (required) - Default is 30 minutes, can be changed
- Notes (optional) - Any special instructions or reason for visit
- The system will check availability in real-time as you select date/time
- If a conflict exists, you'll see a warning message
- Click "Schedule" to confirm the appointment
- A success notification appears and the appointment is added to the list
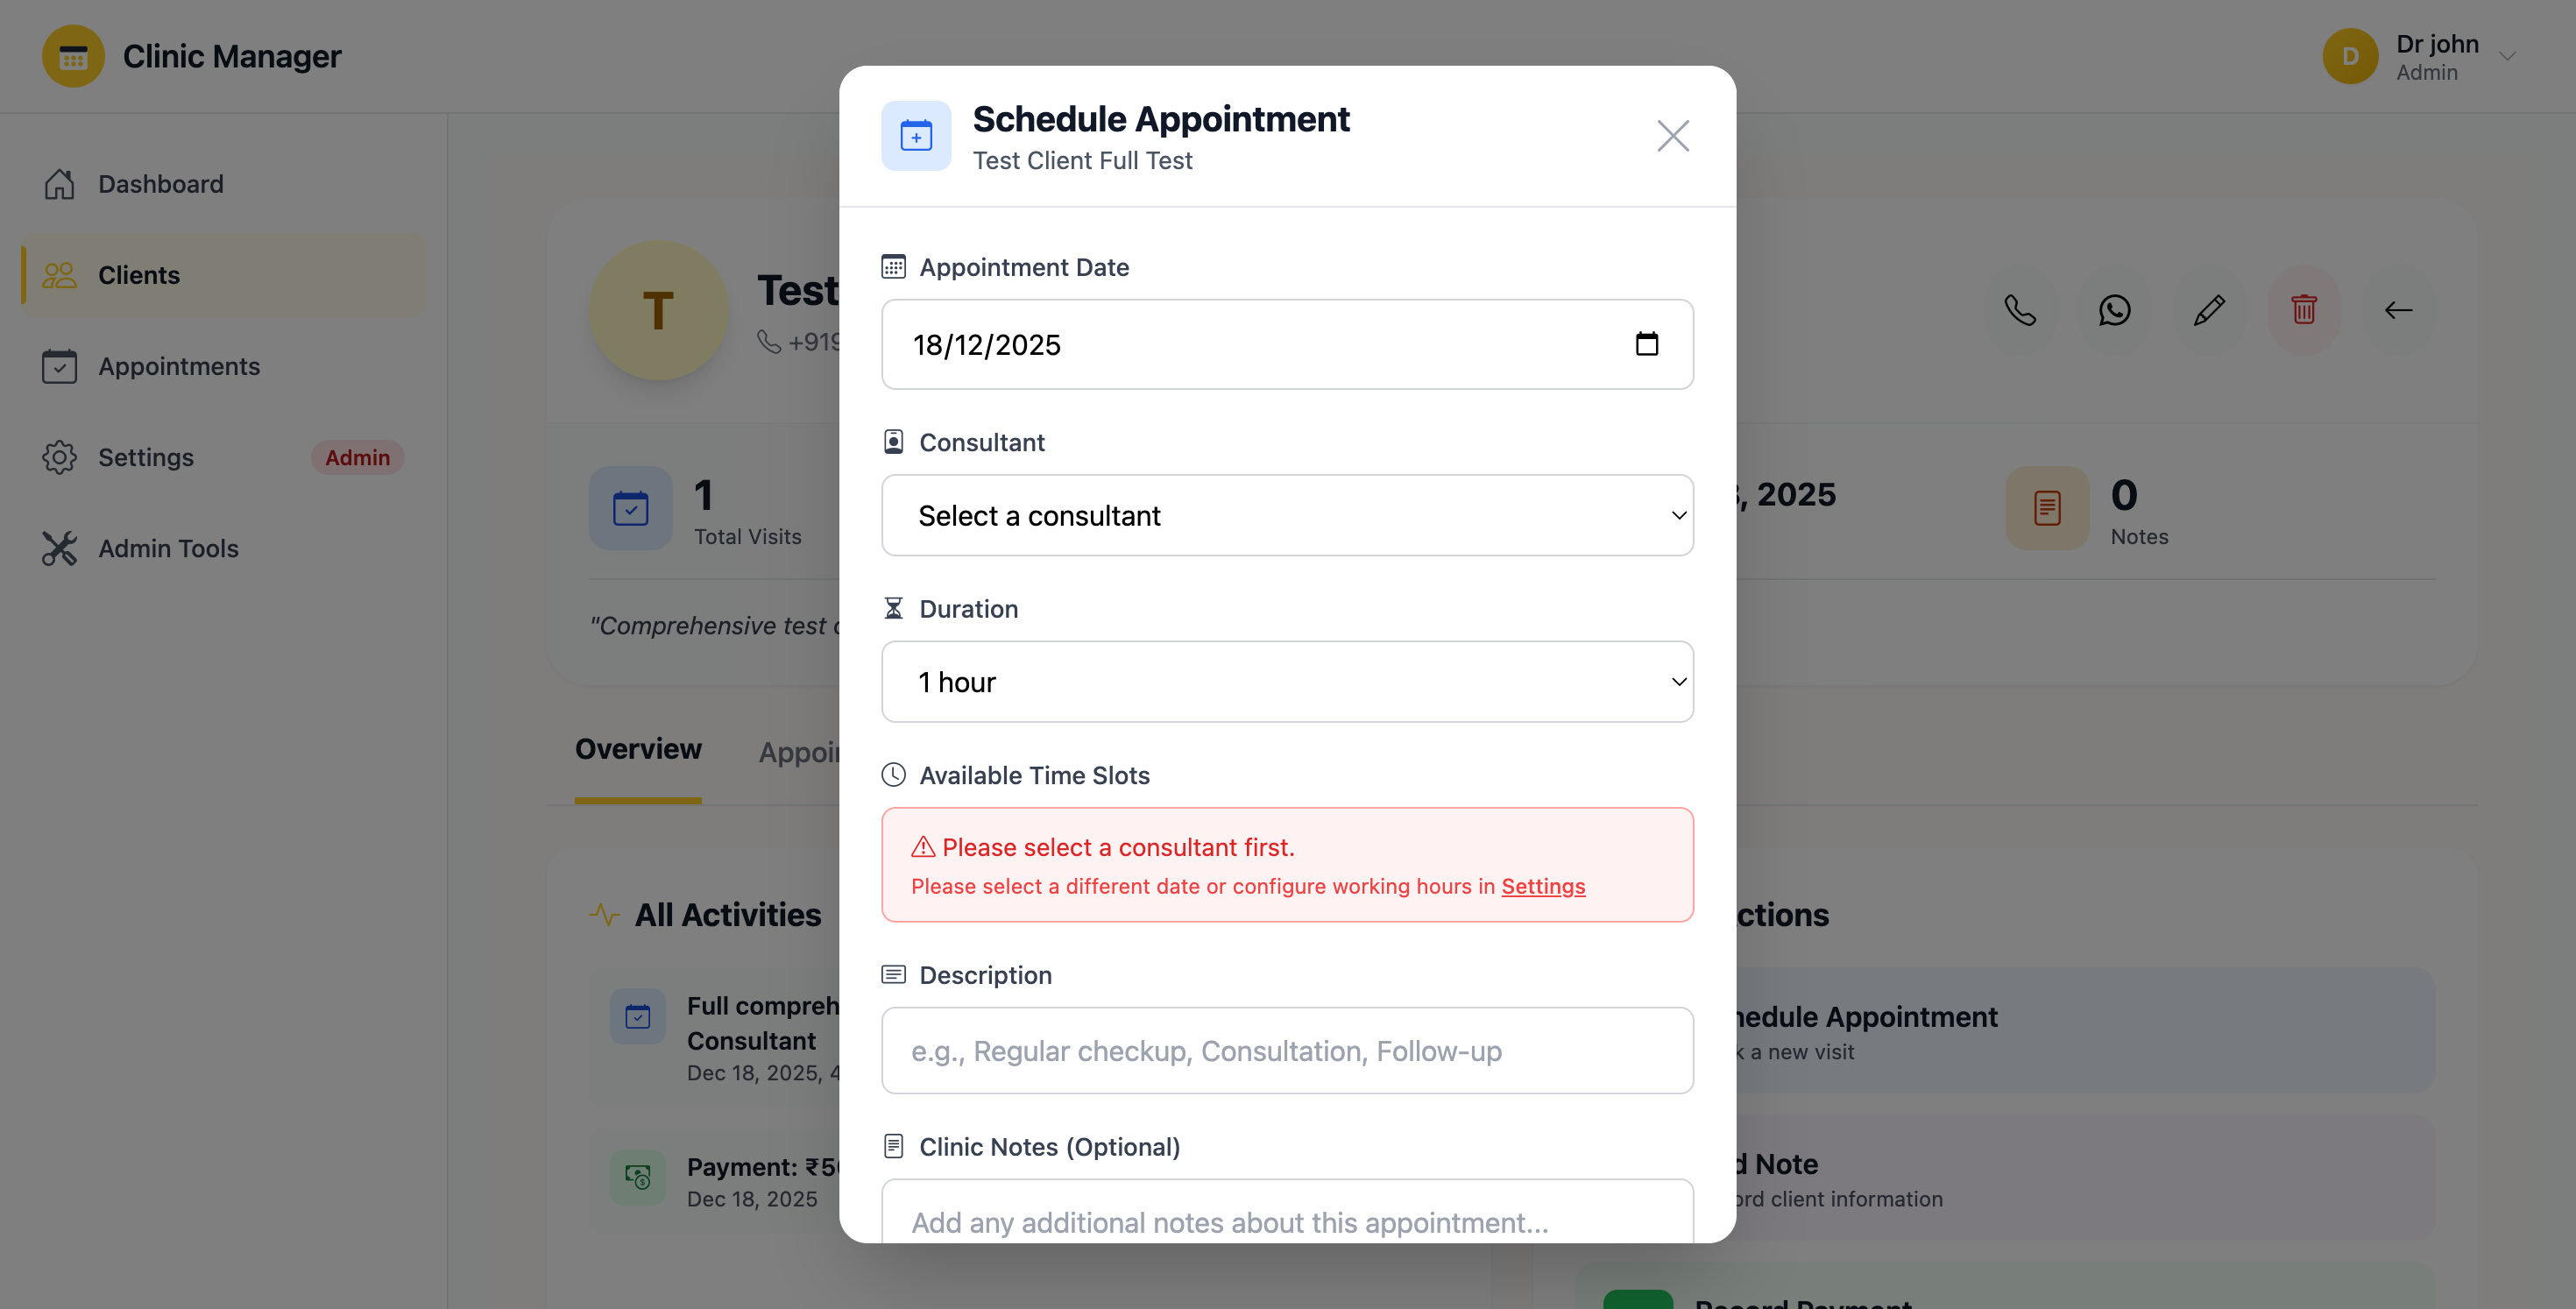
Figure 6.2: Schedule new appointment form with all fields and availability checking
6.4 Time Slot Availability
The system intelligently manages time slot availability:
- Working hours: Only time slots within clinic working hours are shown
- Consultant schedule: Respects individual consultant availability settings
- Conflicts: Time slots already booked for the selected consultant appear disabled
- Slot intervals: Configurable by Admin (default: 30-minute intervals)
- Same-day booking: Allowed, but past time slots are automatically disabled
- Future limit: You can book appointments up to 6 months in advance
6.5 Editing an Appointment
To modify an existing appointment:
- From the Appointments list, click the "Edit" (pencil icon) button
- The appointment form opens with current details pre-filled
- You can modify:
- Date and time (with availability checking)
- Consultant assignment
- Appointment type
- Duration
- Notes
- Cannot modify: The client cannot be changed (cancel and create new instead)
- Click "Update" to save changes
- The system validates new time slot availability before confirming
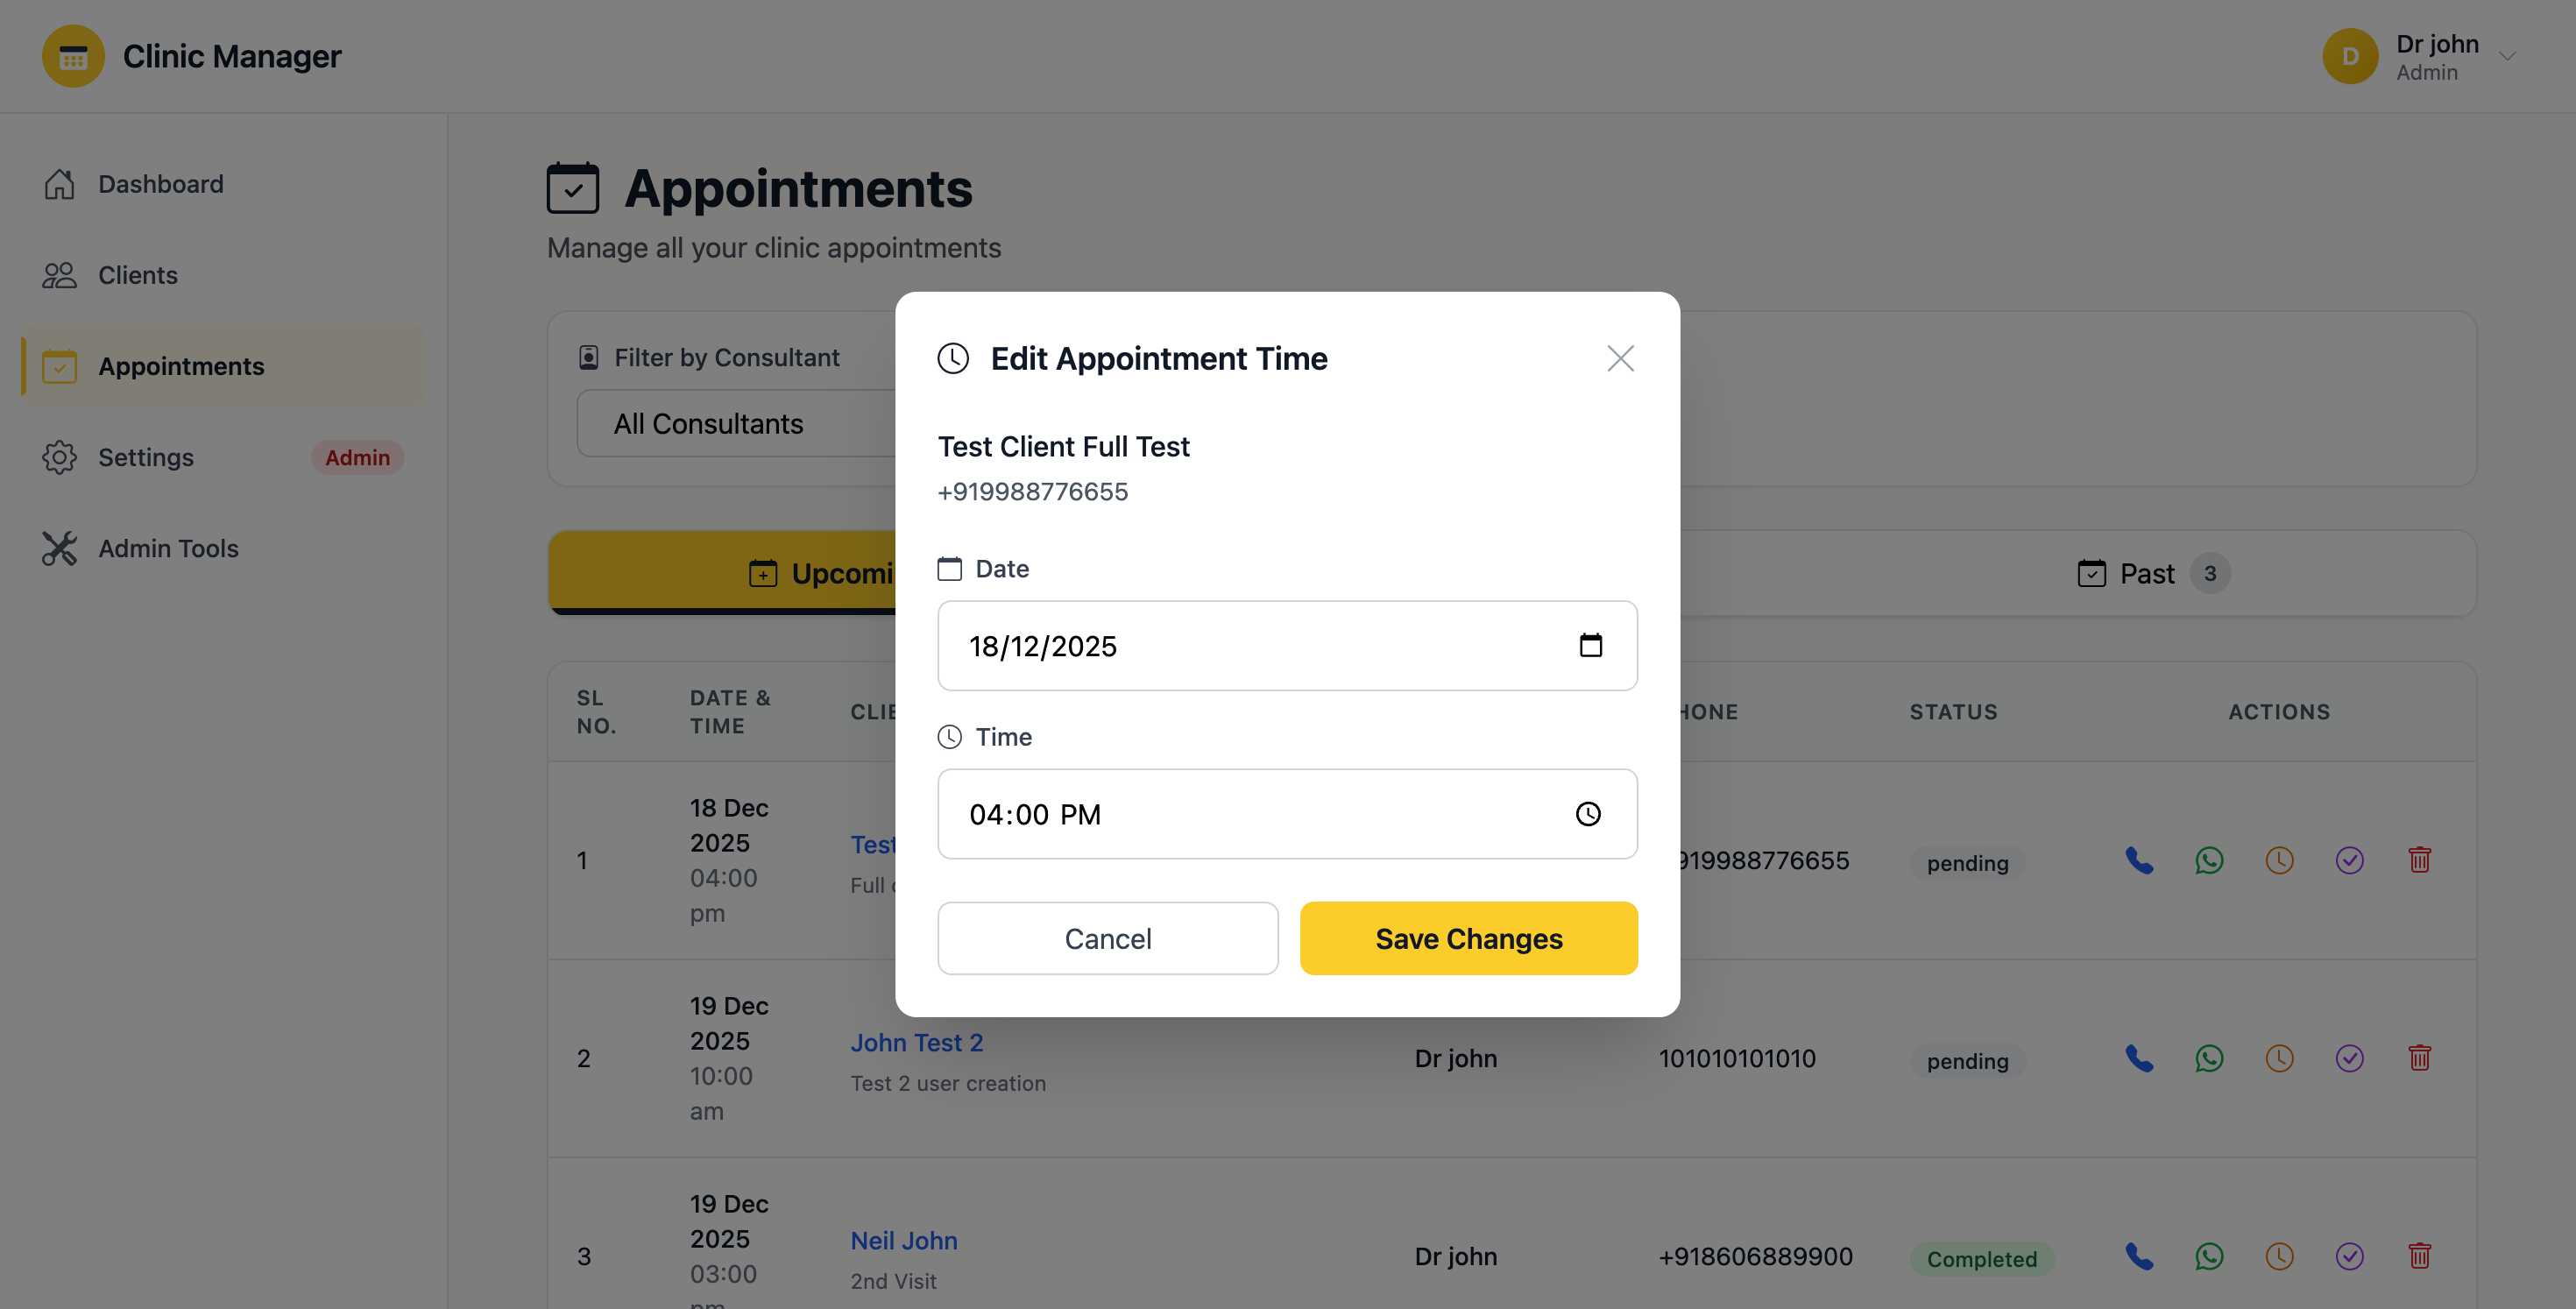
Figure 6.3: Edit appointment form showing modification options
6.6 Updating Appointment Status
To change an appointment's status:
- Click the "Status" dropdown in the Actions column
- Select the new status:
- Scheduled: Default status for newly booked appointments
- Completed: Mark when appointment is finished successfully
- Cancelled: Use if client cancels or clinic needs to cancel
- No-Show: Mark when client fails to attend scheduled appointment
- A confirmation dialog may appear depending on the status change
- Click "Confirm" to apply the new status
- The status badge updates immediately with the corresponding color
- Completed: Only mark as completed after the client has left and all documentation is done
- Cancelled: Add a note explaining the reason for cancellation (helps with reporting)
- No-Show: Use this carefully as it may affect client statistics and future booking policies
- Status changes are logged in the audit trail and cannot be undone
6.7 Appointment Actions Menu
Each appointment has a three-dot menu with additional actions:
- View Details: Open full appointment information page
- View Client: Jump directly to the client's profile
- Record Payment: Quick link to add payment for this appointment
- Add Note: Attach clinical notes to this appointment
- Print Receipt: Generate printable appointment confirmation
- Send Reminder: Admin Manual email/SMS reminder to client
- Delete: Admin Permanently remove appointment
6.8 Conflict Detection and Prevention
The system includes advanced conflict detection:
- Real-time checking: As you select date/time, availability is verified instantly
- Consultant overlap: Prevents booking two appointments for the same consultant at overlapping times
- Client overlap: Warns if client already has an appointment at the same time
- Working hours: Blocks times outside clinic operating hours
- Holiday blocking: Admin Admins can mark dates as unavailable
- Visual indicators:
- ✅ Green checkmark = Slot is available
- ⚠️ Yellow warning = Potential conflict (client busy)
- ❌ Red X = Slot is occupied (consultant busy)
6.9 Appointment Reminders
Automatic reminder system (if configured by Admin):
- Email reminders: Sent 24 hours before appointment
- SMS reminders: Sent 2 hours before appointment (if SMS service enabled)
- Content includes: Date, time, consultant name, clinic address
- Opt-out: Clients can opt out of reminders in their profile settings
- Manual send: Admins can manually trigger reminders anytime
6.10 Best Practices for Appointment Management
- ✅ Always update appointment status immediately after completion
- ✅ Add notes for any special circumstances or client requests
- ✅ Check consultant availability before promising times to clients on phone
- ✅ Mark no-shows consistently to track client reliability
- ✅ Use appropriate appointment types for accurate reporting
- ✅ Reschedule instead of cancelling when possible (preserves history)
- ❌ Don't schedule appointments outside working hours without admin approval
- ❌ Don't delete appointments unless absolutely necessary (affects statistics)
- ❌ Don't forget to inform clients when you reschedule their appointments
7. Payment Management
The Payment Management module allows you to record, track, and manage all financial transactions. Payments can be linked to appointments and clients, providing a complete financial overview.
7.1 Recording a New Payment
To add a payment to the system:
- Navigate to "Payments" from the sidebar menu
- Click the "+ Record Payment" button in the top-right corner
- A modal form appears with the following fields:
- Client (required) - Select the client who made the payment from dropdown
- Amount (required) - Enter payment amount in LKR (e.g., 5000.00)
- Payment Date (required) - Use date picker (defaults to today)
- Payment Method (required) - Select one:
- Cash
- Credit/Debit Card
- Bank Transfer
- Insurance
- Other
- Related Appointment (optional) - Link payment to specific appointment
- Description (optional) - Purpose of payment (e.g., "Consultation Fee", "Treatment Session 2")
- Receipt Number (optional) - Physical receipt number for record keeping
- Notes (optional) - Any additional payment details
- Fill in all required fields (marked with red asterisk *)
- Review the payment details carefully
- Click "Save Payment" to record the transaction
- A success message confirms the payment has been recorded
- The dashboard revenue statistics update immediately
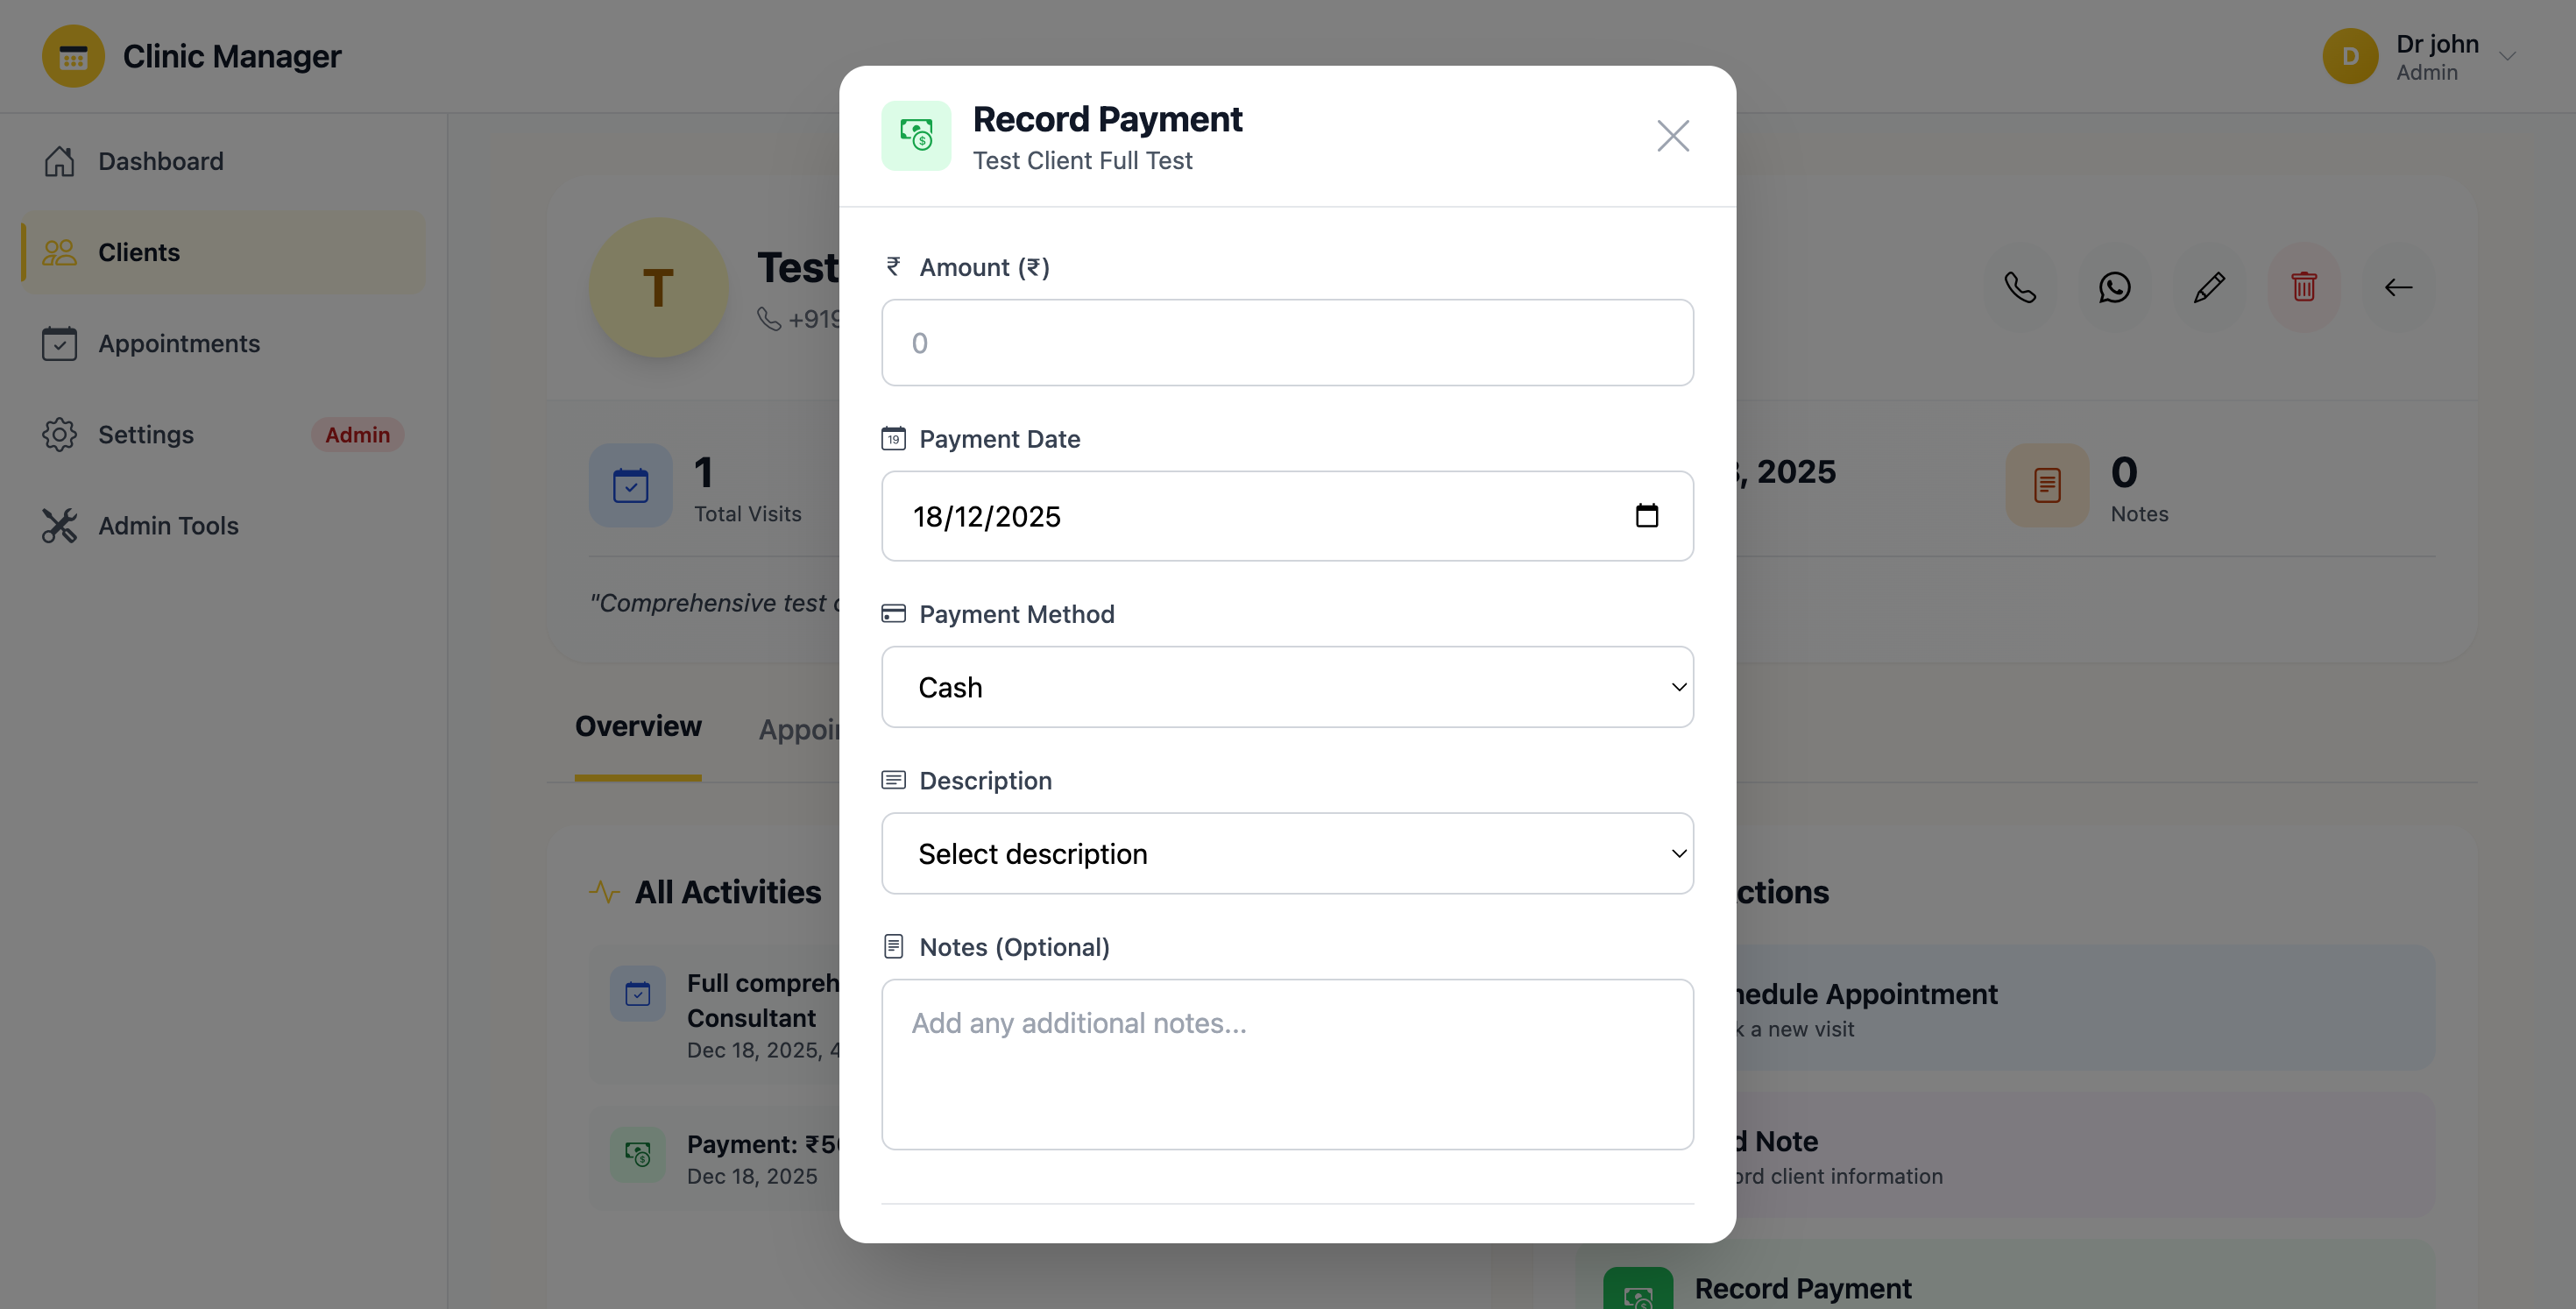
Figure 7.1: Record new payment form with amount, method, and description fields
- Double-check the amount before saving - payment corrections require admin intervention
- Always specify the payment method accurately for accounting purposes
- Link payments to appointments whenever possible for better tracking
- Use the Description field to clearly identify what the payment is for
- Payment records cannot be edited once saved (only deleted by Admin)
7.2 Viewing Payment History
To see all payment records:
- Click "Payments" in the sidebar navigation
- The main table displays all payments with columns:
- Client Name (clickable to view client details)
- Amount (formatted in LKR currency)
- Payment Date
- Payment Method (with color-coded badges)
- Description
- Recorded By (username of staff who entered payment)
- Actions (View, Delete)
- Search: Use the search bar to filter by client name or description
- Date filter: Select date range to view payments within specific period
- Method filter: Filter by payment method (Cash, Card, etc.)
- Sort: Click column headers to sort by date, amount, or client
- Export: Click "Export to CSV" to download payment records for accounting
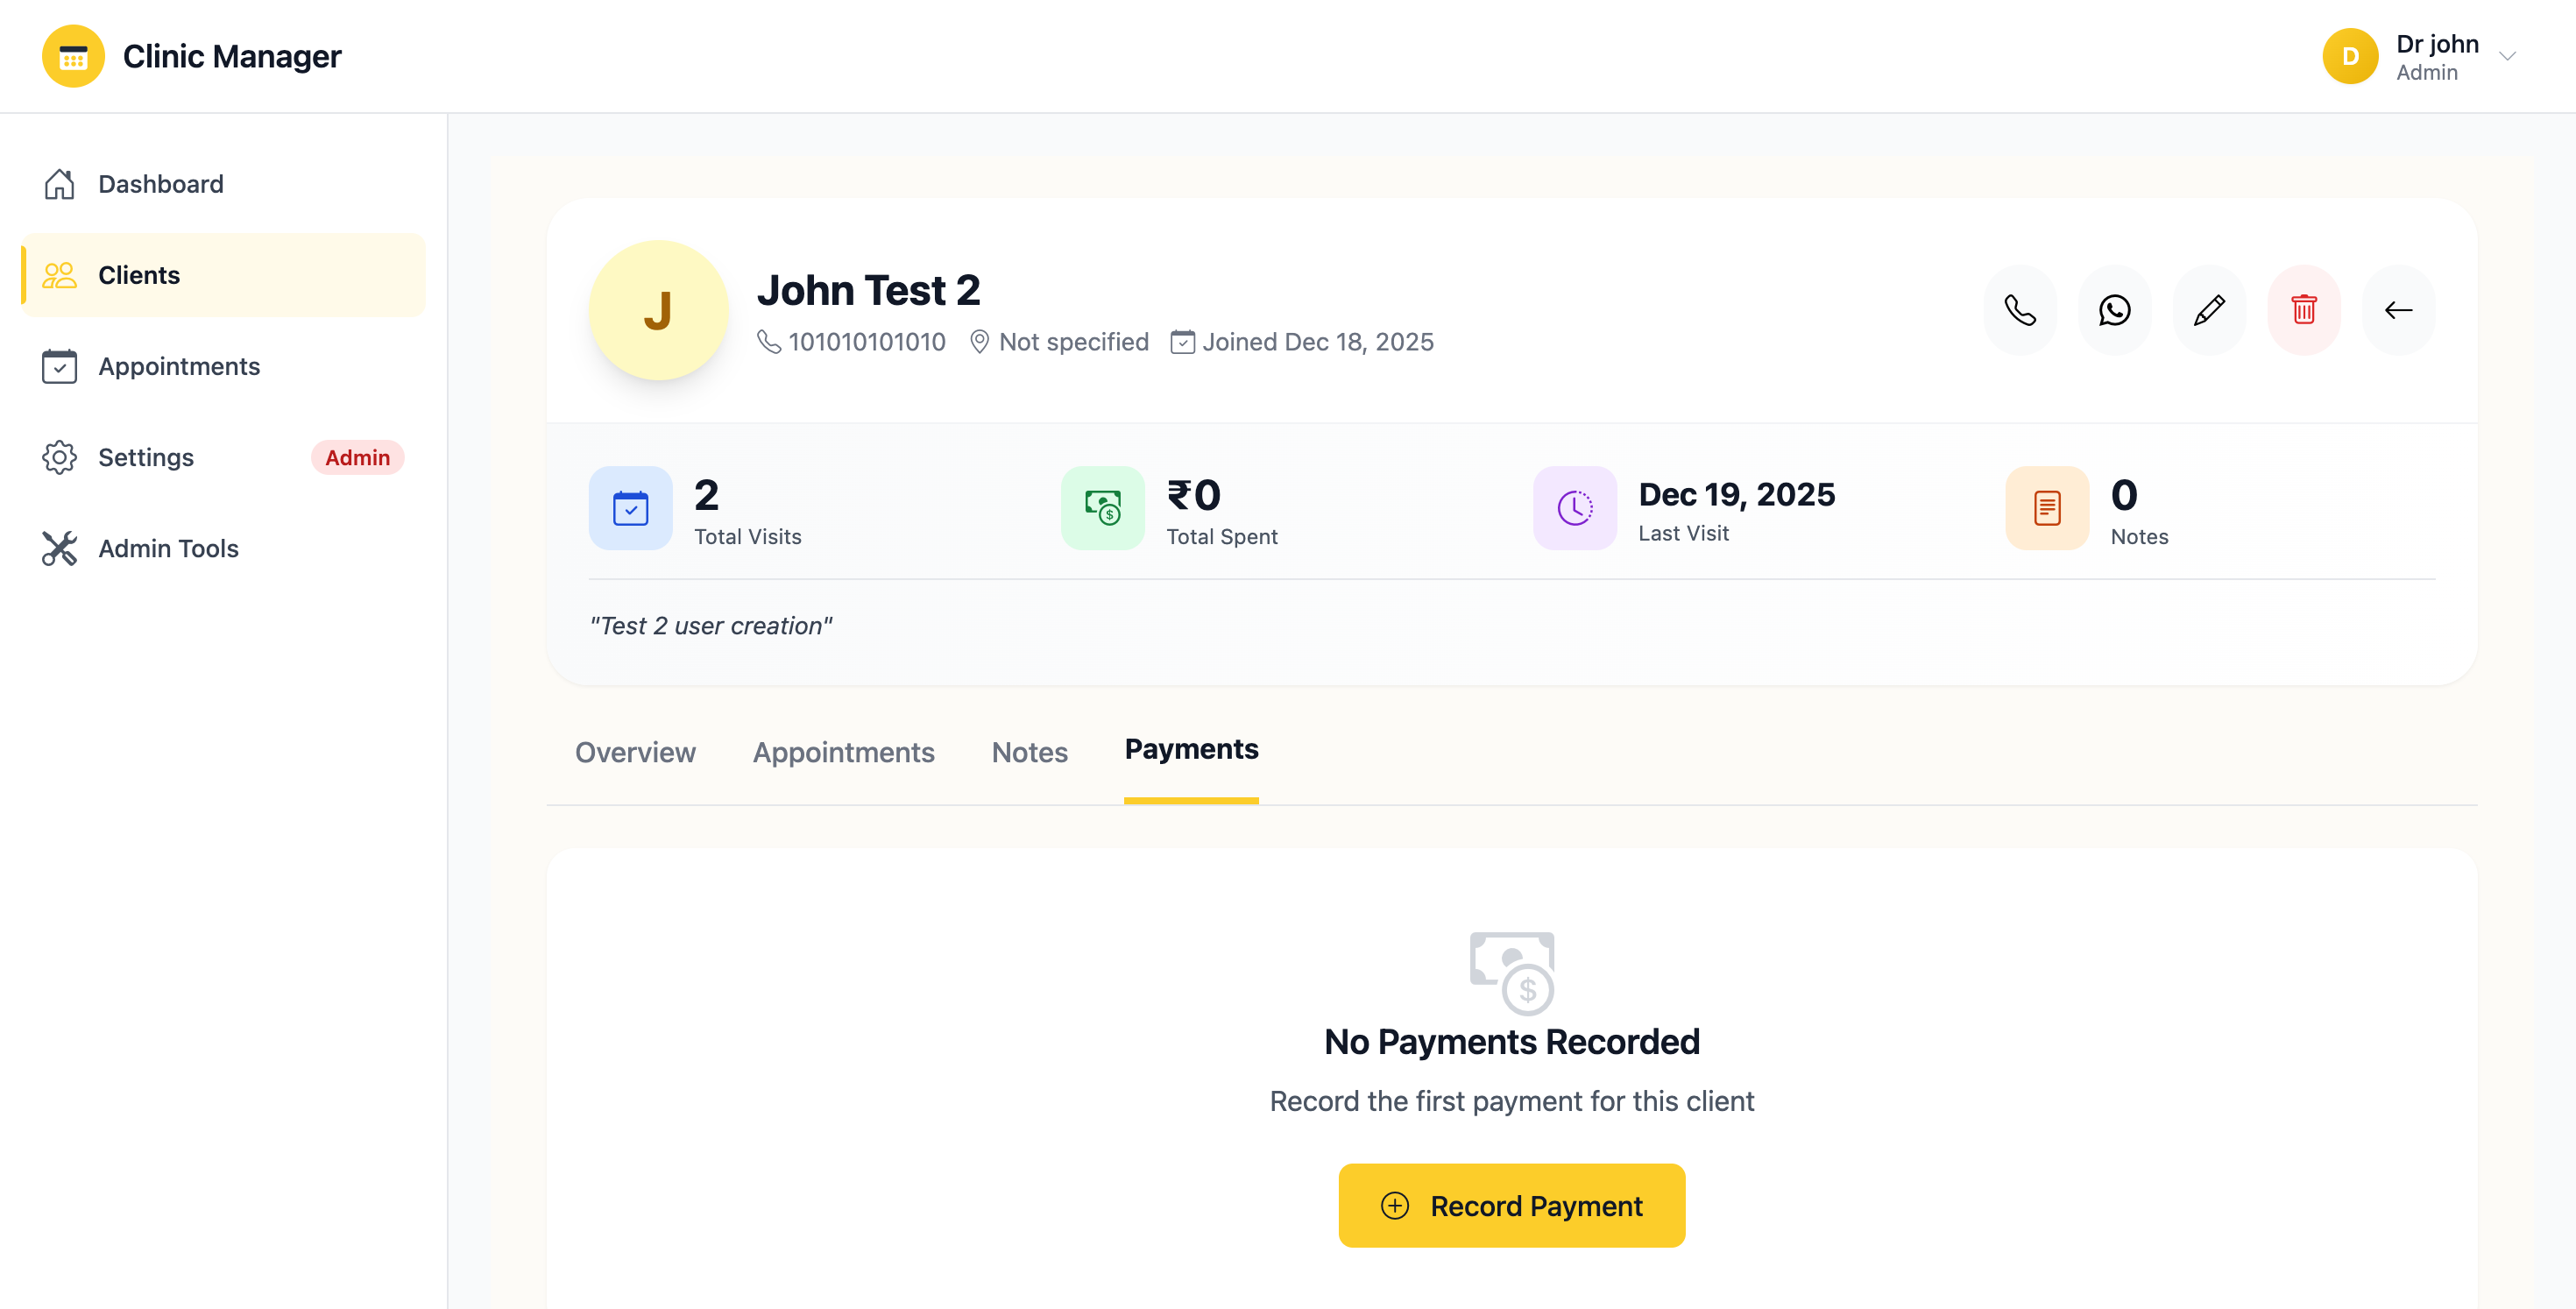
Figure 7.2: Payment history table with filters and export options
7.3 Payment Method Icons and Colors
Each payment method is displayed with a distinctive badge:
- Cash - Green badge
- Credit/Debit Card - Blue badge
- Bank Transfer - Purple badge
- Insurance - Orange badge
- Other - Gray badge
7.4 Linking Payments to Appointments
Best practice is to associate payments with appointments:
- Method 1 - From Appointment:
- Go to Appointments page
- Click the three-dot menu on any appointment
- Select "Record Payment"
- The payment form opens with client and appointment pre-selected
- Method 2 - From Payment Form:
- Open the Record Payment form normally
- Select the client first
- The "Related Appointment" dropdown populates with that client's appointments
- Choose the relevant appointment
- Benefits of linking:
- Complete financial tracking per appointment
- Easier to identify unpaid appointments
- Better revenue analysis by appointment type
- Client payment history shows appointment context
7.5 Deleting a Payment Admin Only
To remove an incorrect payment record:
- From the Payments list, click the "Delete" (trash icon) button
- A confirmation dialog appears warning about data integrity
- Enter the payment amount in the confirmation field to verify
- Click "Confirm Delete"
- The payment is permanently removed
- Dashboard revenue statistics update immediately
- Payment deletion is permanent and cannot be undone
- Deleting affects revenue reports and statistics
- All deletions are logged in the audit trail with reason
- Only administrators can delete payments
- If payment was recorded incorrectly, delete and re-record correctly
7.6 Payment Reports
Generate financial reports from payment data:
- Daily Summary: Total payments received today
- Monthly Summary: Revenue breakdown by month
- Payment Method Analysis: Compare Cash vs Card vs Transfer
- Client Payment History: Total paid by each client
- Outstanding Payments: Appointments without linked payments
- Access these reports from the Reports & Analytics section
7.7 Best Practices for Payment Management
- ✅ Record payments immediately after receiving them
- ✅ Always link payments to appointments when applicable
- ✅ Use consistent descriptions for similar payment types (aids reporting)
- ✅ Keep physical receipts and cross-reference with receipt numbers in system
- ✅ Reconcile daily payment totals with physical cash drawer
- ✅ Export payment data weekly for backup and accounting purposes
- ❌ Don't record future-dated payments (use actual payment date)
- ❌ Don't leave payment records unlinked when an appointment exists
- ❌ Don't use vague descriptions like "Payment" - be specific
8. Settings & Configuration
The Settings module allows you to configure clinic information, manage working hours, and customize your personal profile. Configuration options vary based on your user role.

Figure 8.1: Clinic information settings (Admin only)
8.1 Clinic Details Admin Only
To update clinic information:
- Navigate to Settings from the sidebar
- Click the "Clinic Details" tab
- Edit the following fields:
- Clinic Name - Official name displayed on all documents and communications
- Address - Full physical address
- Phone Number - Main contact number (with country code)
- Email - Official clinic email address
- Website - Clinic website URL (optional)
- Registration Number - Business/Medical registration ID
- Logo URL - URL to clinic logo image (appears on reports and receipts)
- Description - Brief about the clinic (max 500 characters)
- Click "Save Changes" to update
- Changes reflect across the entire system immediately
8.2 Working Hours Configuration Admin Only
To set clinic operating hours:
- Go to Settings → "Working Hours" tab
- For each day of the week, configure:
- Is Open: Toggle checkbox to mark day as open/closed
- Opening Time: When clinic starts accepting appointments (e.g., 09:00 AM)
- Closing Time: When clinic stops accepting appointments (e.g., 06:00 PM)
- Lunch Break: Optional break time (e.g., 01:00 PM - 02:00 PM)
- Set up multiple shifts if needed (e.g., morning and evening clinics)
- Mark holidays or special closure days in the calendar below
- Click "Save Working Hours" to apply changes
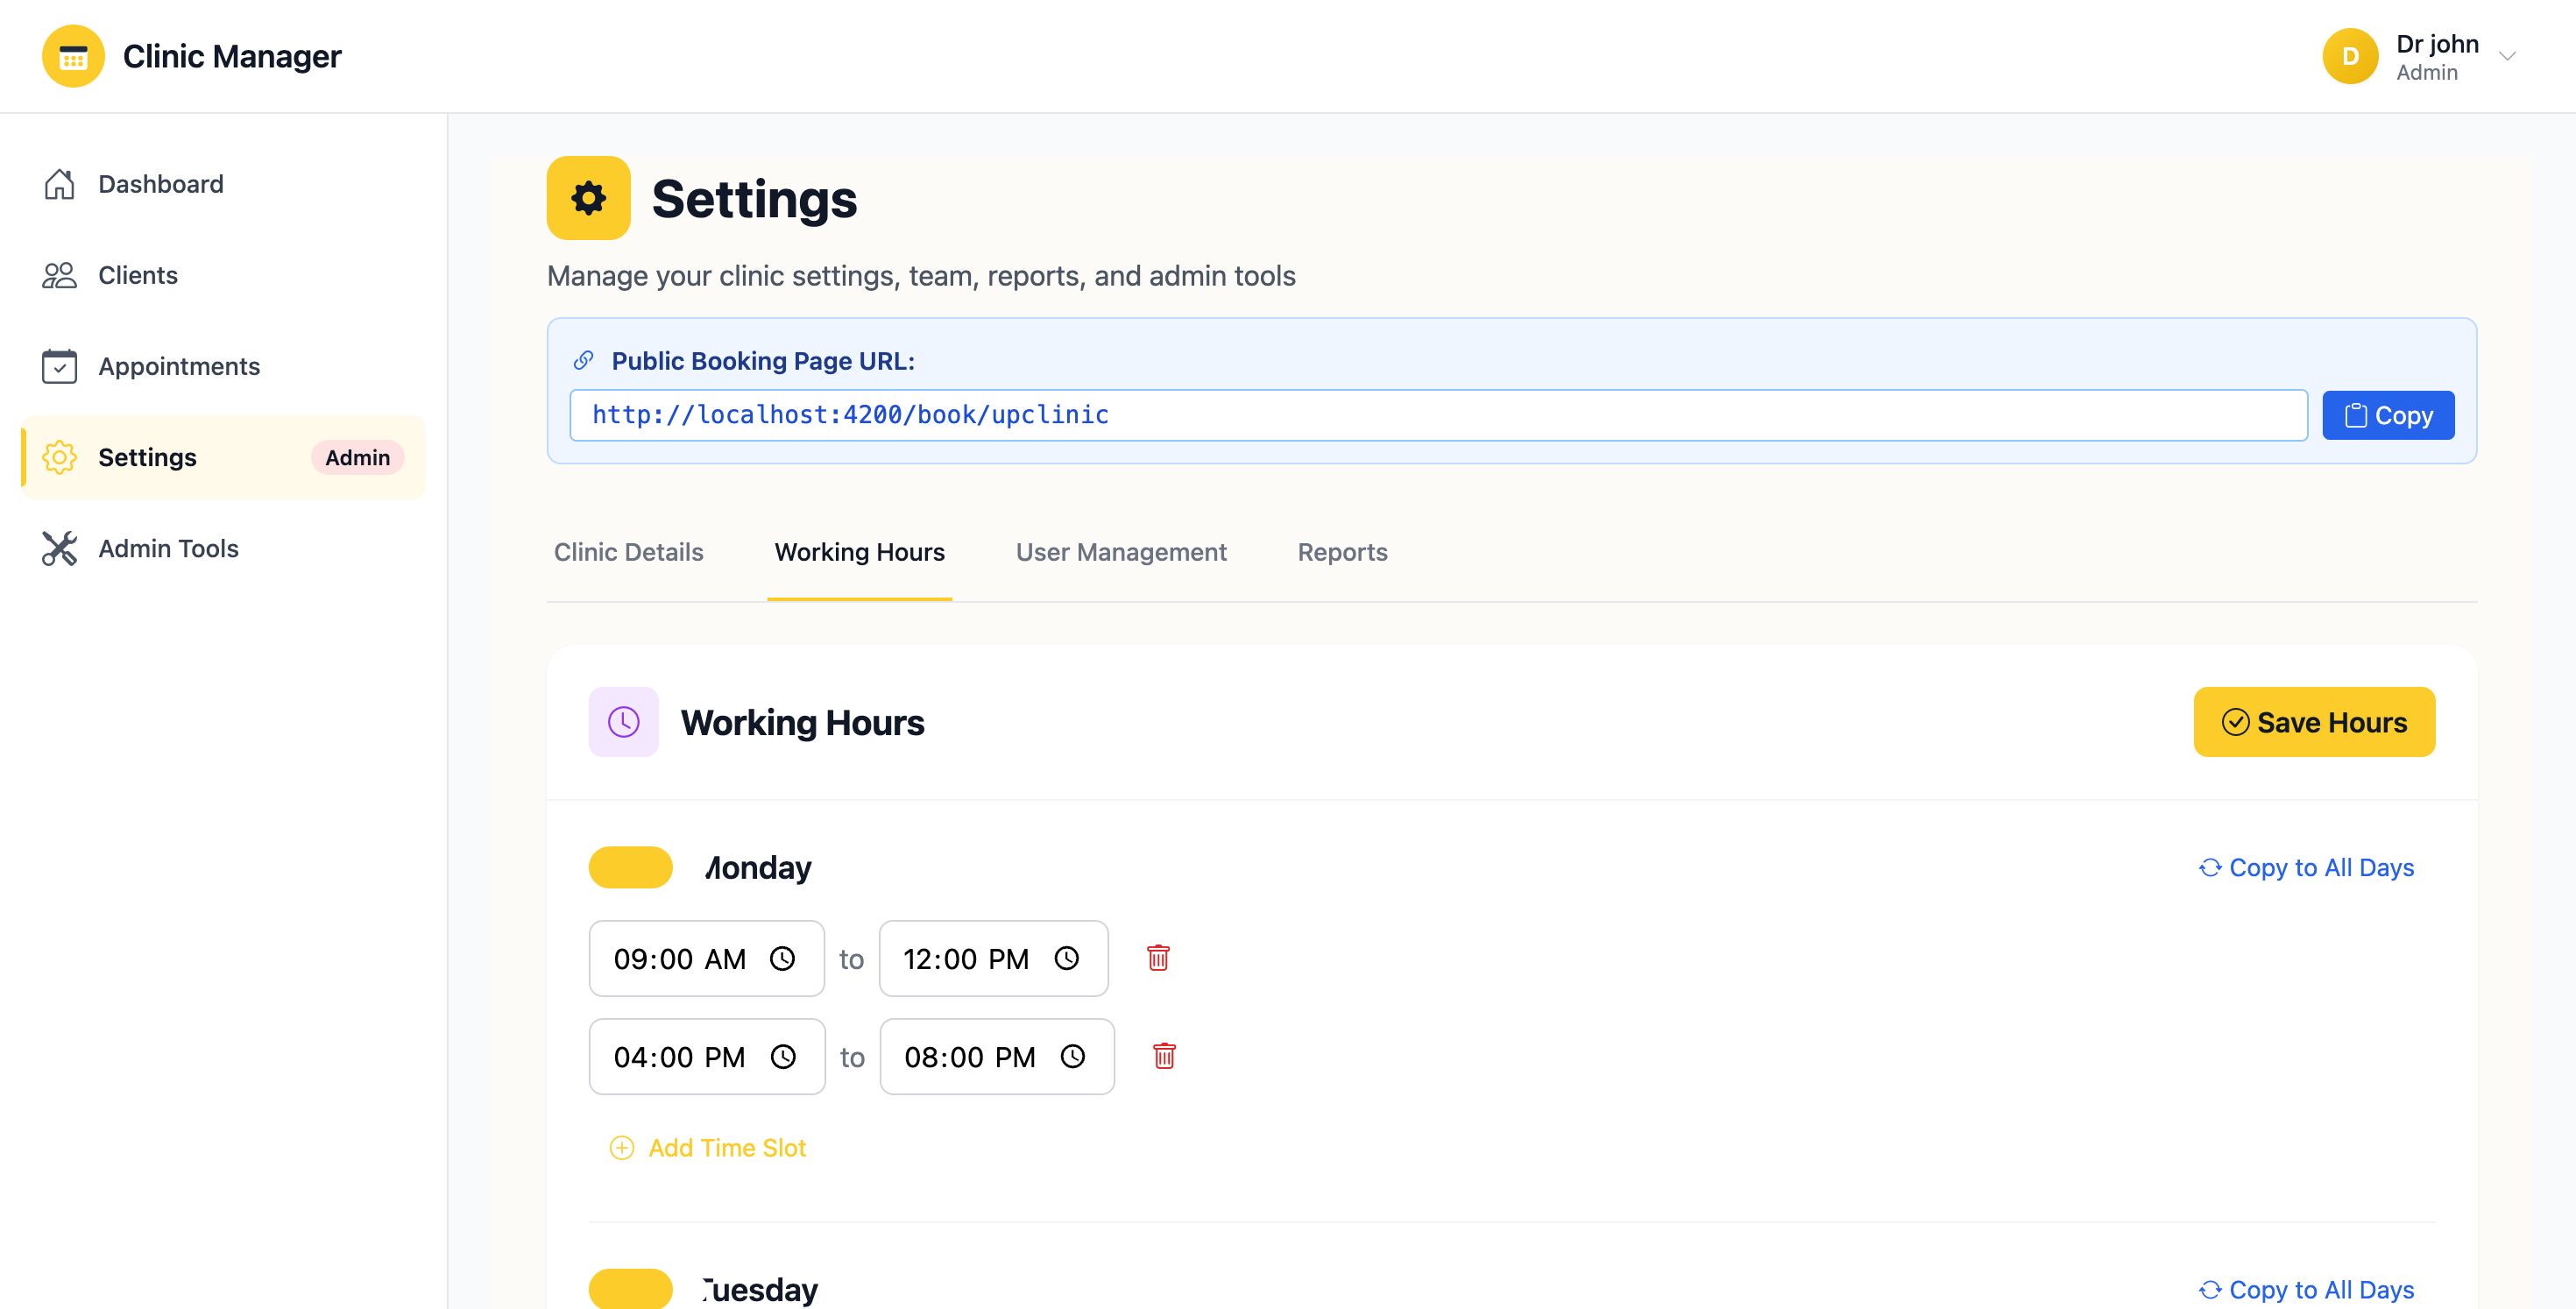
Figure 8.2: Working hours configuration with day-wise time slots
8.3 Appointment Slot Intervals Admin Only
Configure how time slots are divided:
- Go to Settings → Working Hours → "Slot Configuration"
- Choose slot interval duration:
- 15 minutes (for quick consultations)
- 30 minutes (default, most common)
- 45 minutes
- 60 minutes (for detailed procedures)
- This determines how many appointments can be booked per hour
- Example: 30-minute intervals = 2 slots per hour (10:00 AM, 10:30 AM)
- Changes apply to future bookings only
8.4 User Profile Settings
All users can manage their personal profile:
- Click your profile icon in the top-right corner
- Select "Profile Settings" from dropdown
- Update editable fields:
- Display Name - How your name appears in the system
- Email - Your login email (requires verification if changed)
- Phone Number - Contact number
- Profile Photo - Upload image (max 2MB, JPG/PNG)
- Bio - Brief description (consultants only, shows on public booking)
- Specialization - Medical specialty (consultants only)
- Language Preference - Interface language
- Timezone - Affects time displays and scheduling
- Click "Update Profile" to save
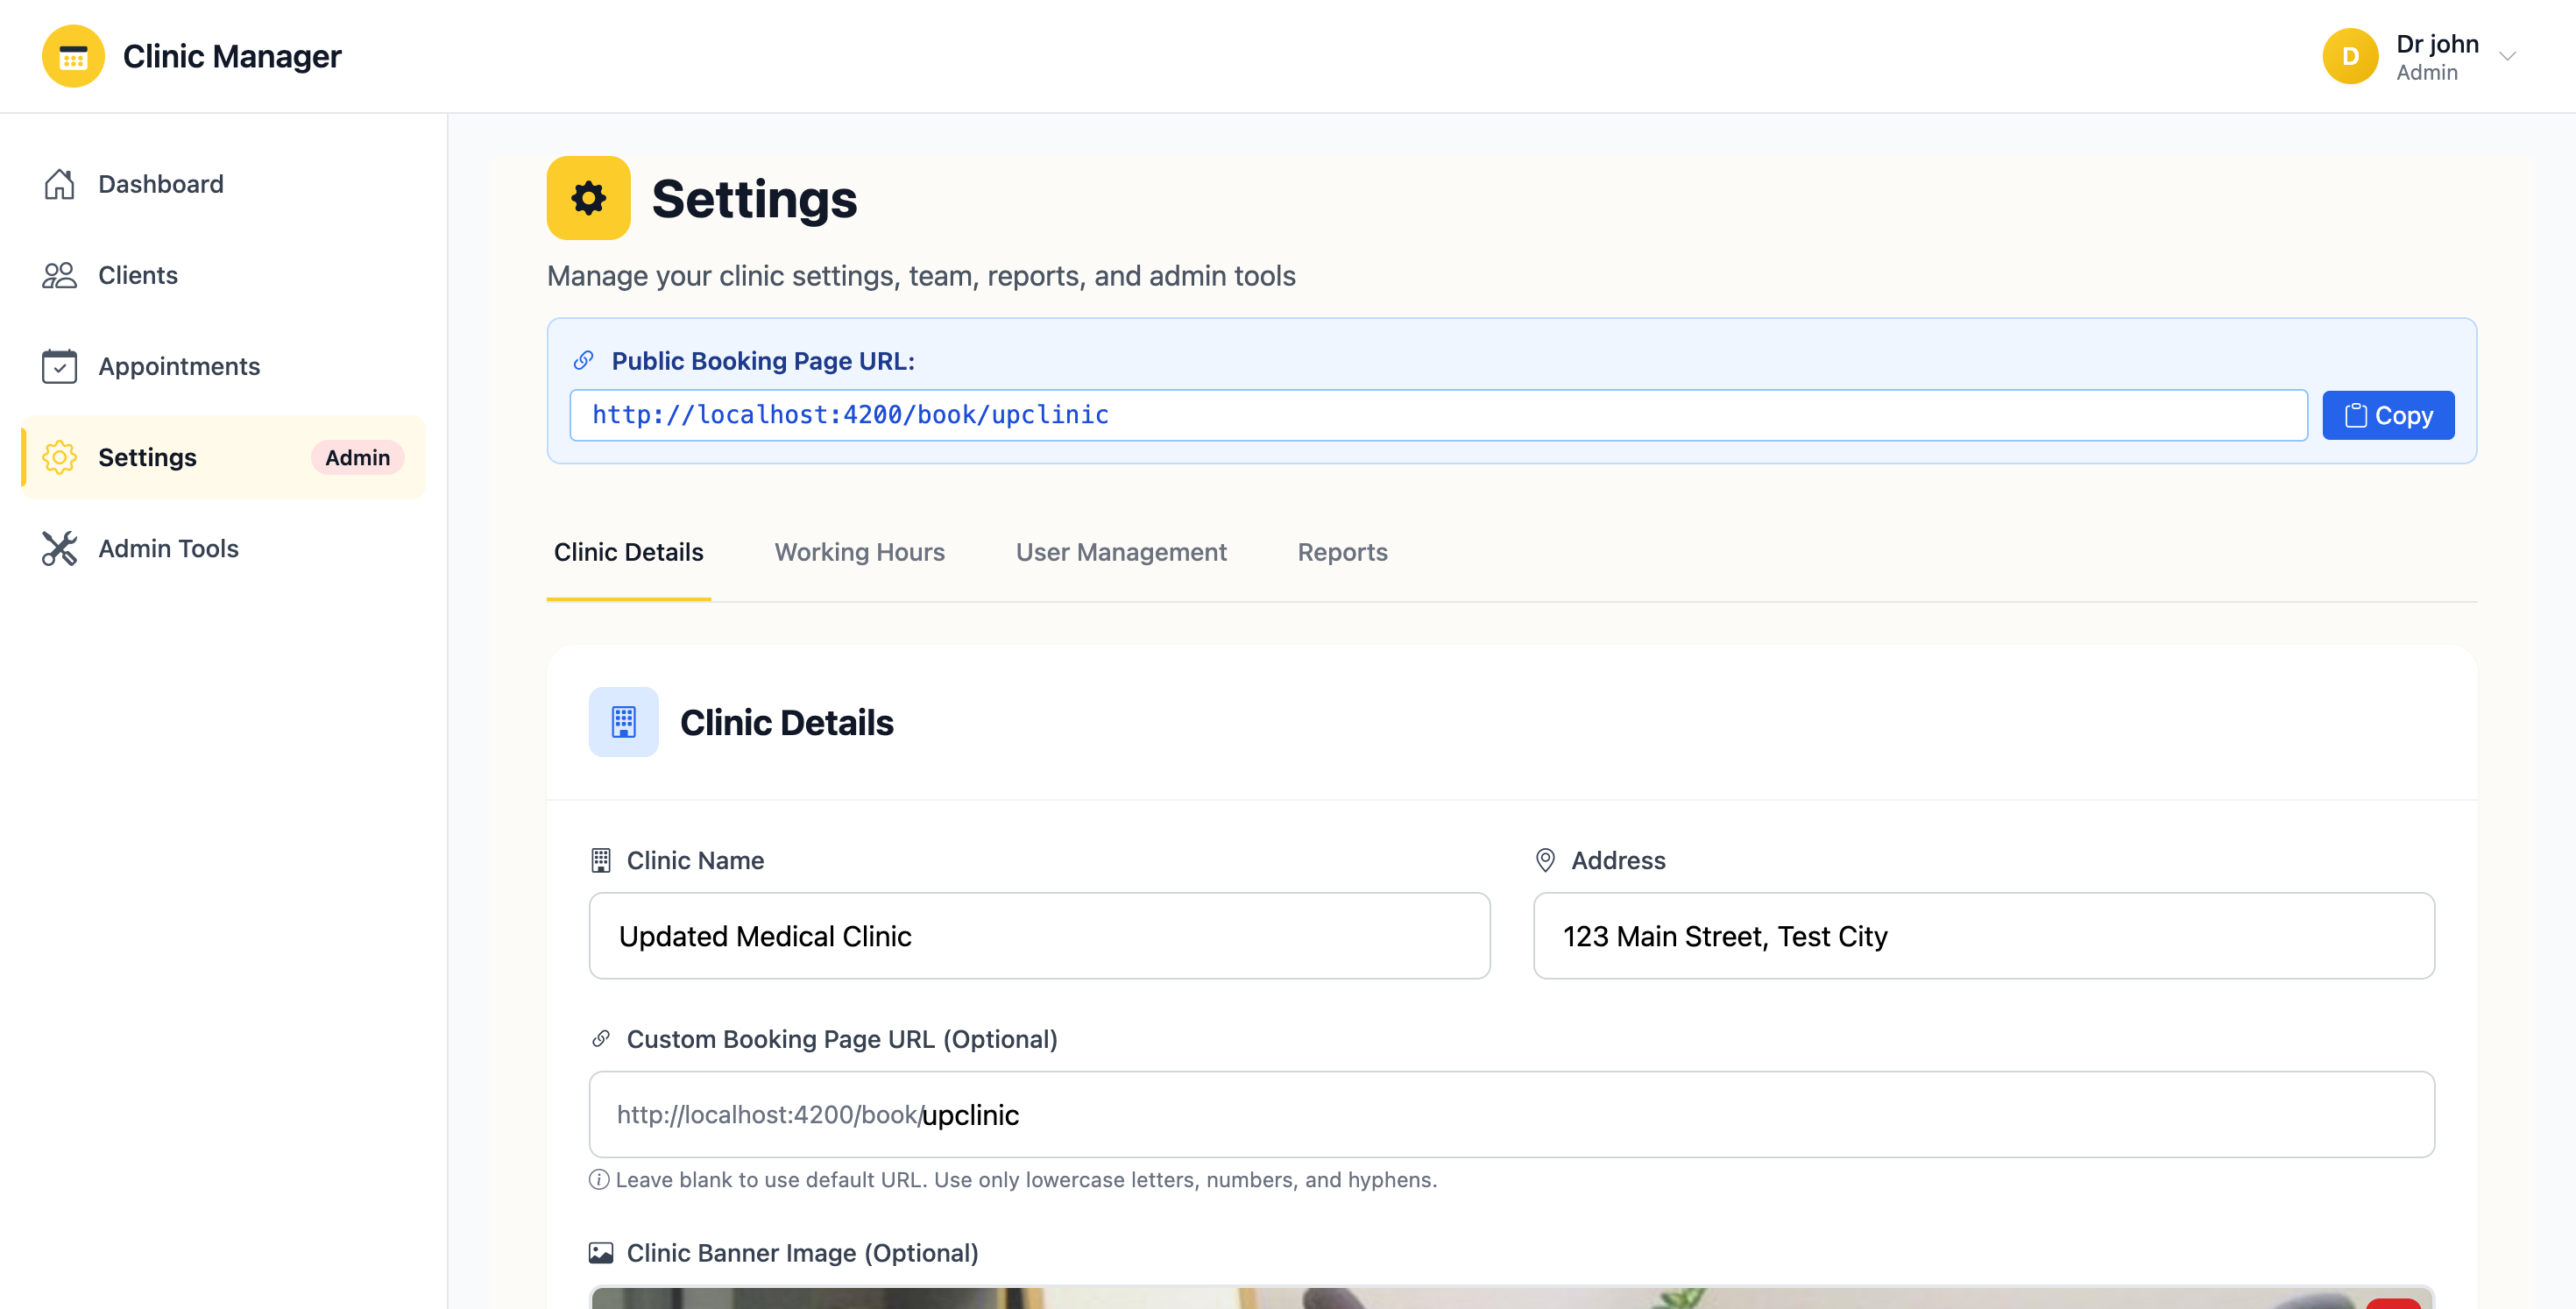
Figure 8.3: User profile settings with personal information and preferences
8.5 Changing Your Password
To update your password:
- Go to Profile Settings → "Security" tab
- Click "Change Password" button
- Enter:
- Current Password
- New Password (minimum 8 characters)
- Confirm New Password
- Password strength indicator shows if password is weak/medium/strong
- Click "Update Password"
- You'll be logged out and need to sign in with new password
- Minimum 8 characters
- At least one uppercase letter
- At least one number
- At least one special character (!@#$%^&*)
- Cannot be same as last 3 passwords
- Should not contain your name or email
8.6 Notification Preferences
Customize what notifications you receive:
- Go to Profile Settings → "Notifications" tab
- Toggle preferences for:
- Email notifications: Appointment confirmations, cancellations, reminders
- SMS notifications: Critical updates only
- Browser notifications: Real-time alerts when logged in
- Daily summary: Receive end-of-day email with statistics
- Weekly report: Comprehensive weekly performance email
- Click "Save Preferences"
8.7 Consultant Availability Settings
If you're a consultant, manage your personal schedule:
- Go to Settings → "My Availability" tab
- Set your available days and times (within clinic working hours)
- Mark personal leave dates:
- Select date range
- Add reason (optional)
- System automatically blocks appointments during leave
- Configure recurring unavailability (e.g., every Wednesday afternoon)
- Changes affect appointment booking availability immediately
8.8 System Preferences Admin Only
Advanced system configuration:
- Date Format: Choose DD/MM/YYYY or MM/DD/YYYY
- Time Format: 12-hour (AM/PM) or 24-hour
- Currency: Display currency (default: LKR)
- Language: System-wide default language
- Appointment Reminders: Enable/disable automatic reminders
- Reminder Timing: Set when reminders are sent (e.g., 24 hours before)
- Booking Lead Time: Minimum advance notice required for booking
- Cancellation Policy: Rules for cancelling appointments
8.9 Email and SMS Configuration Admin Only
Set up automated communications:
- Go to Settings → "Communications" tab
- Configure email templates:
- Appointment confirmation email
- Reminder email
- Cancellation notification
- Welcome email for new clients
- Each template supports variables like {clientName}, {appointmentDate}, {clinicName}
- Test emails before activating
- Configure SMTP settings for email sending
- Set up SMS gateway integration (optional, requires third-party service)
8.10 Data Backup Settings Admin Only
Configure automated backups:
- Go to Settings → "Backup & Security"
- Automatic backups: Enable daily backups to Firebase
- Manual backup: Click "Download Backup" to export all data as JSON
- Backup retention: Choose how long to keep backups (7, 30, 90 days)
- Backup notification: Receive email when backup completes
8.11 Cache and Performance Settings Admin Only
Optimize system performance:
- Clear Availability Cache: Refresh appointment slot calculations
- Clear User Cache: Force reload of user permissions
- Rebuild Indexes: Optimize database query performance
- System Health Check: Run diagnostics on Firebase connection and data integrity
- Use these tools if you experience slow loading or booking conflicts
9. User Management Admin Only
The User Management module allows administrators to create, view, and manage system users. You can assign roles, set permissions, and control who has access to the clinic booking system.
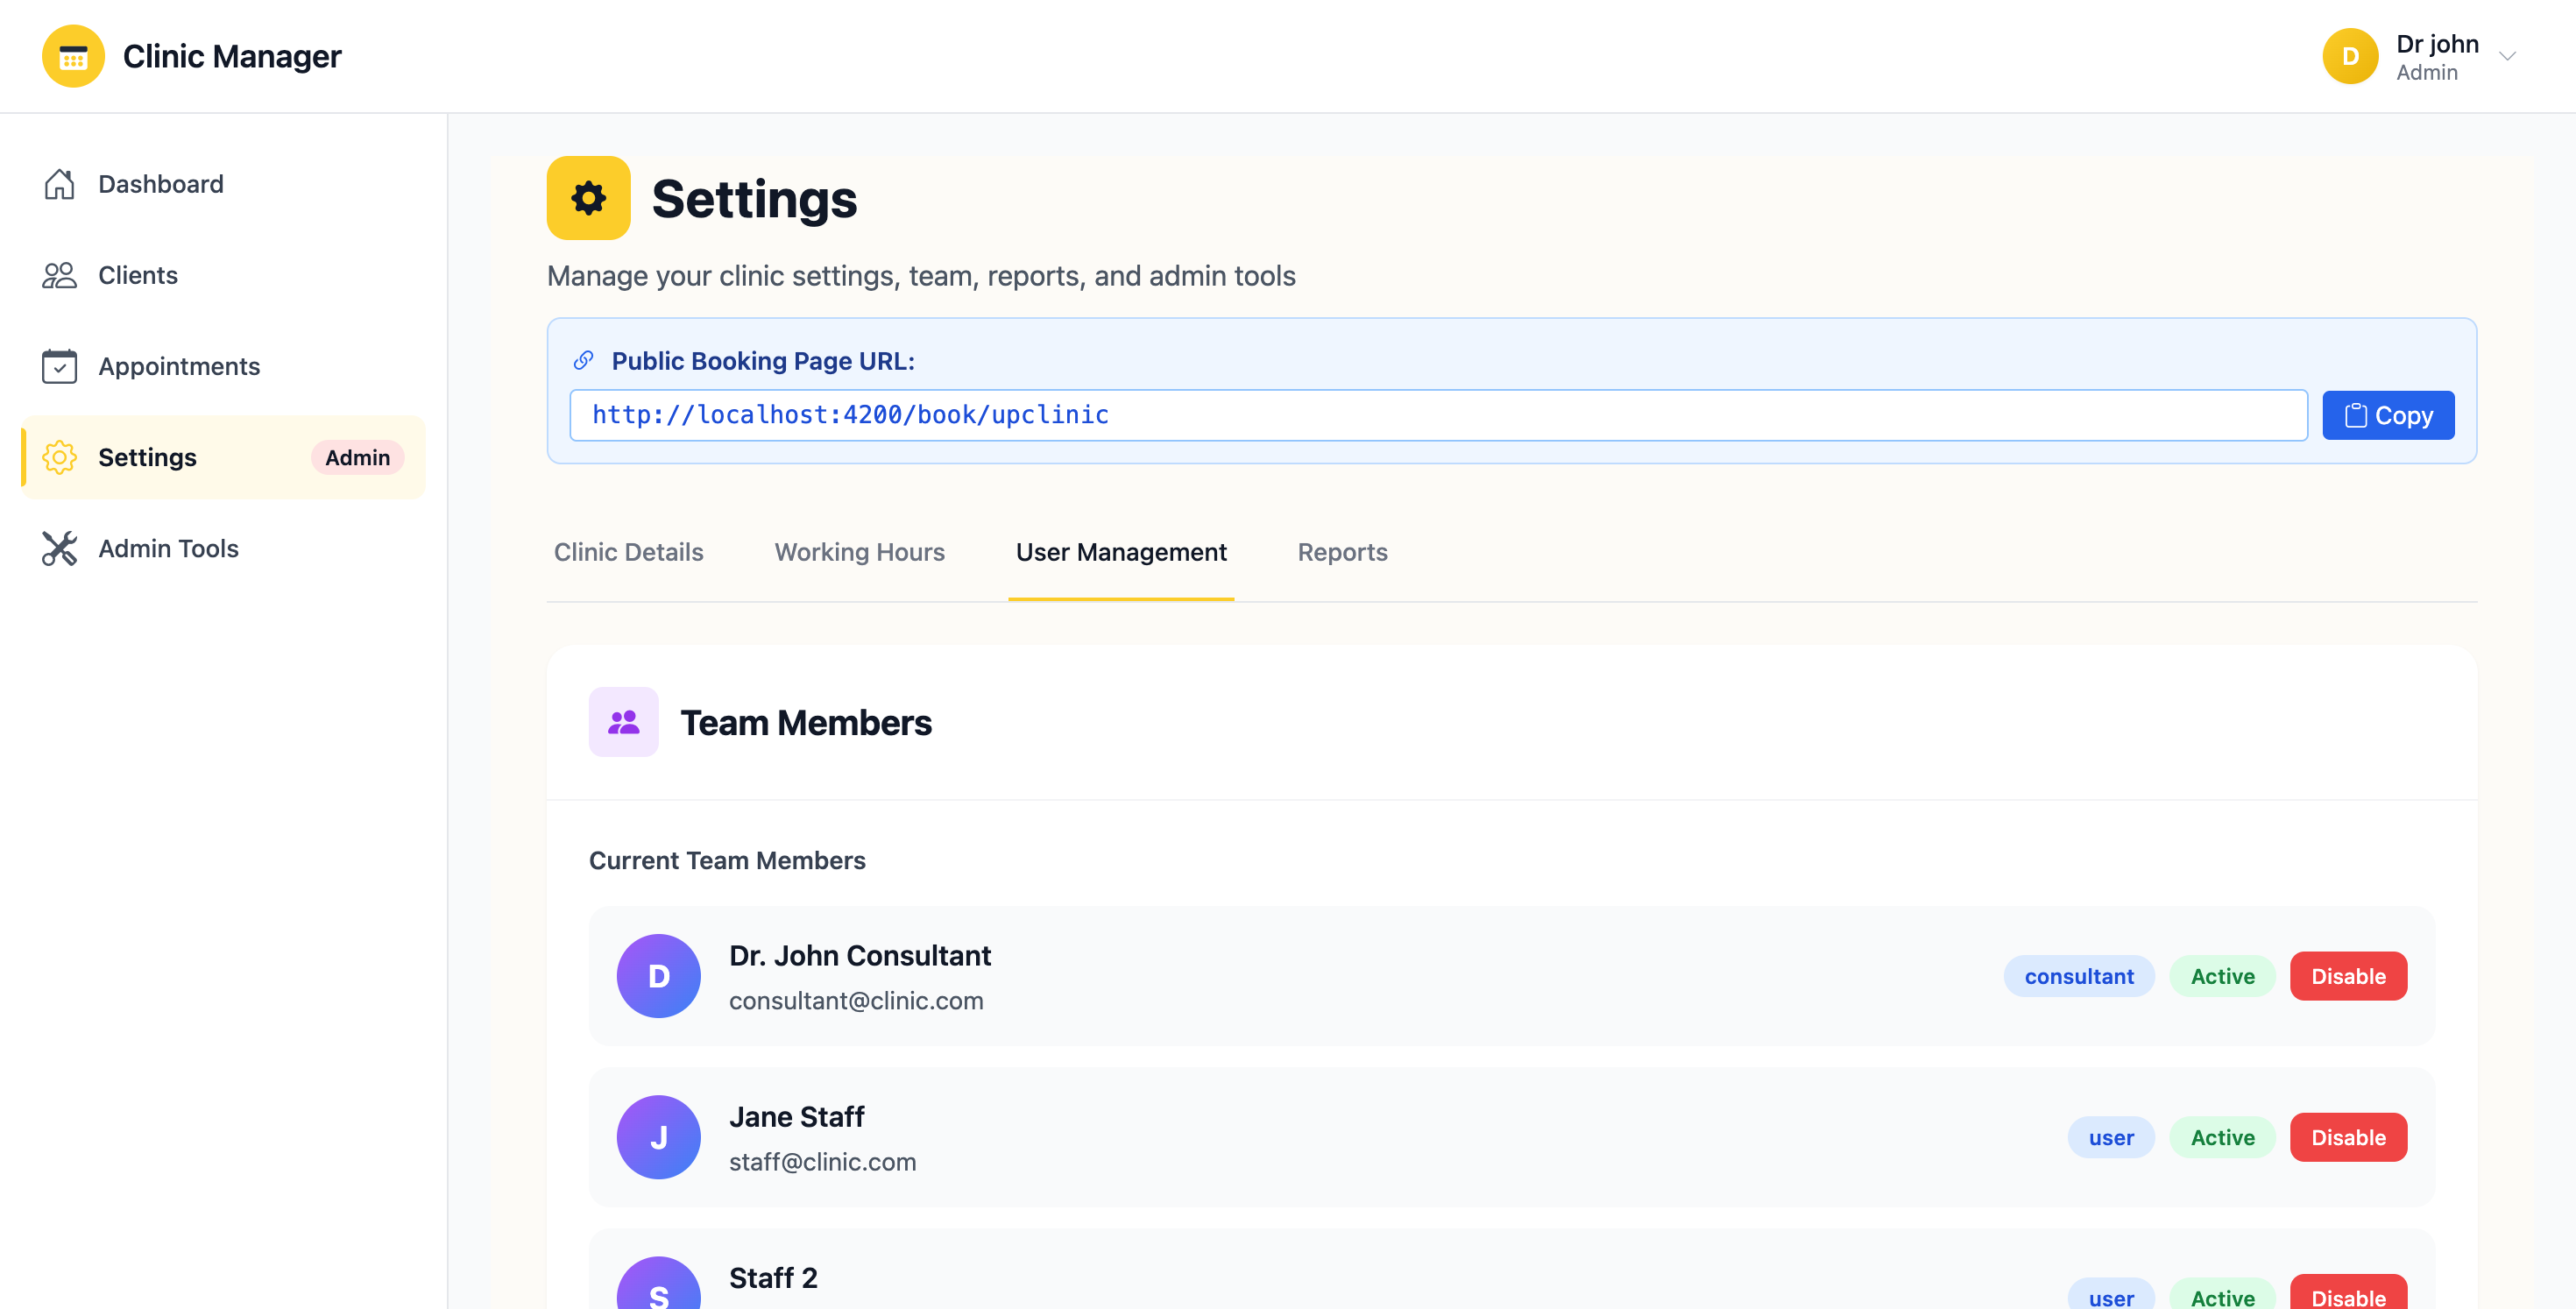
Figure 9.1: User management page showing all system users with roles
9.1 Creating a New User
To add a new user to the system:
- Navigate to "User Management" from the sidebar (only visible to admins)
- Click the "+ Create User" button in the top-right corner
- A form appears with the following fields:
- Full Name (required) - User's complete name as it will appear in the system
- Email Address (required) - Must be unique, will be used for login
- Password (required) - Minimum 6 characters
- Confirm Password (required) - Must match password
- Role (required) - Select from dropdown:
- Admin - Full system access
- Consultant - Limited to own appointments and assigned clients
- User (Staff) - Can manage all appointments but limited admin features
- Phone Number (optional) - Contact number
- Specialization (optional, for consultants) - Medical specialty
- Fill in all required fields (marked with red asterisk *)
- Select the appropriate role based on the user's responsibilities
- Click "Create User" to save
- The new user receives a welcome email with login credentials (if email service is configured)
- The user appears in the user list immediately
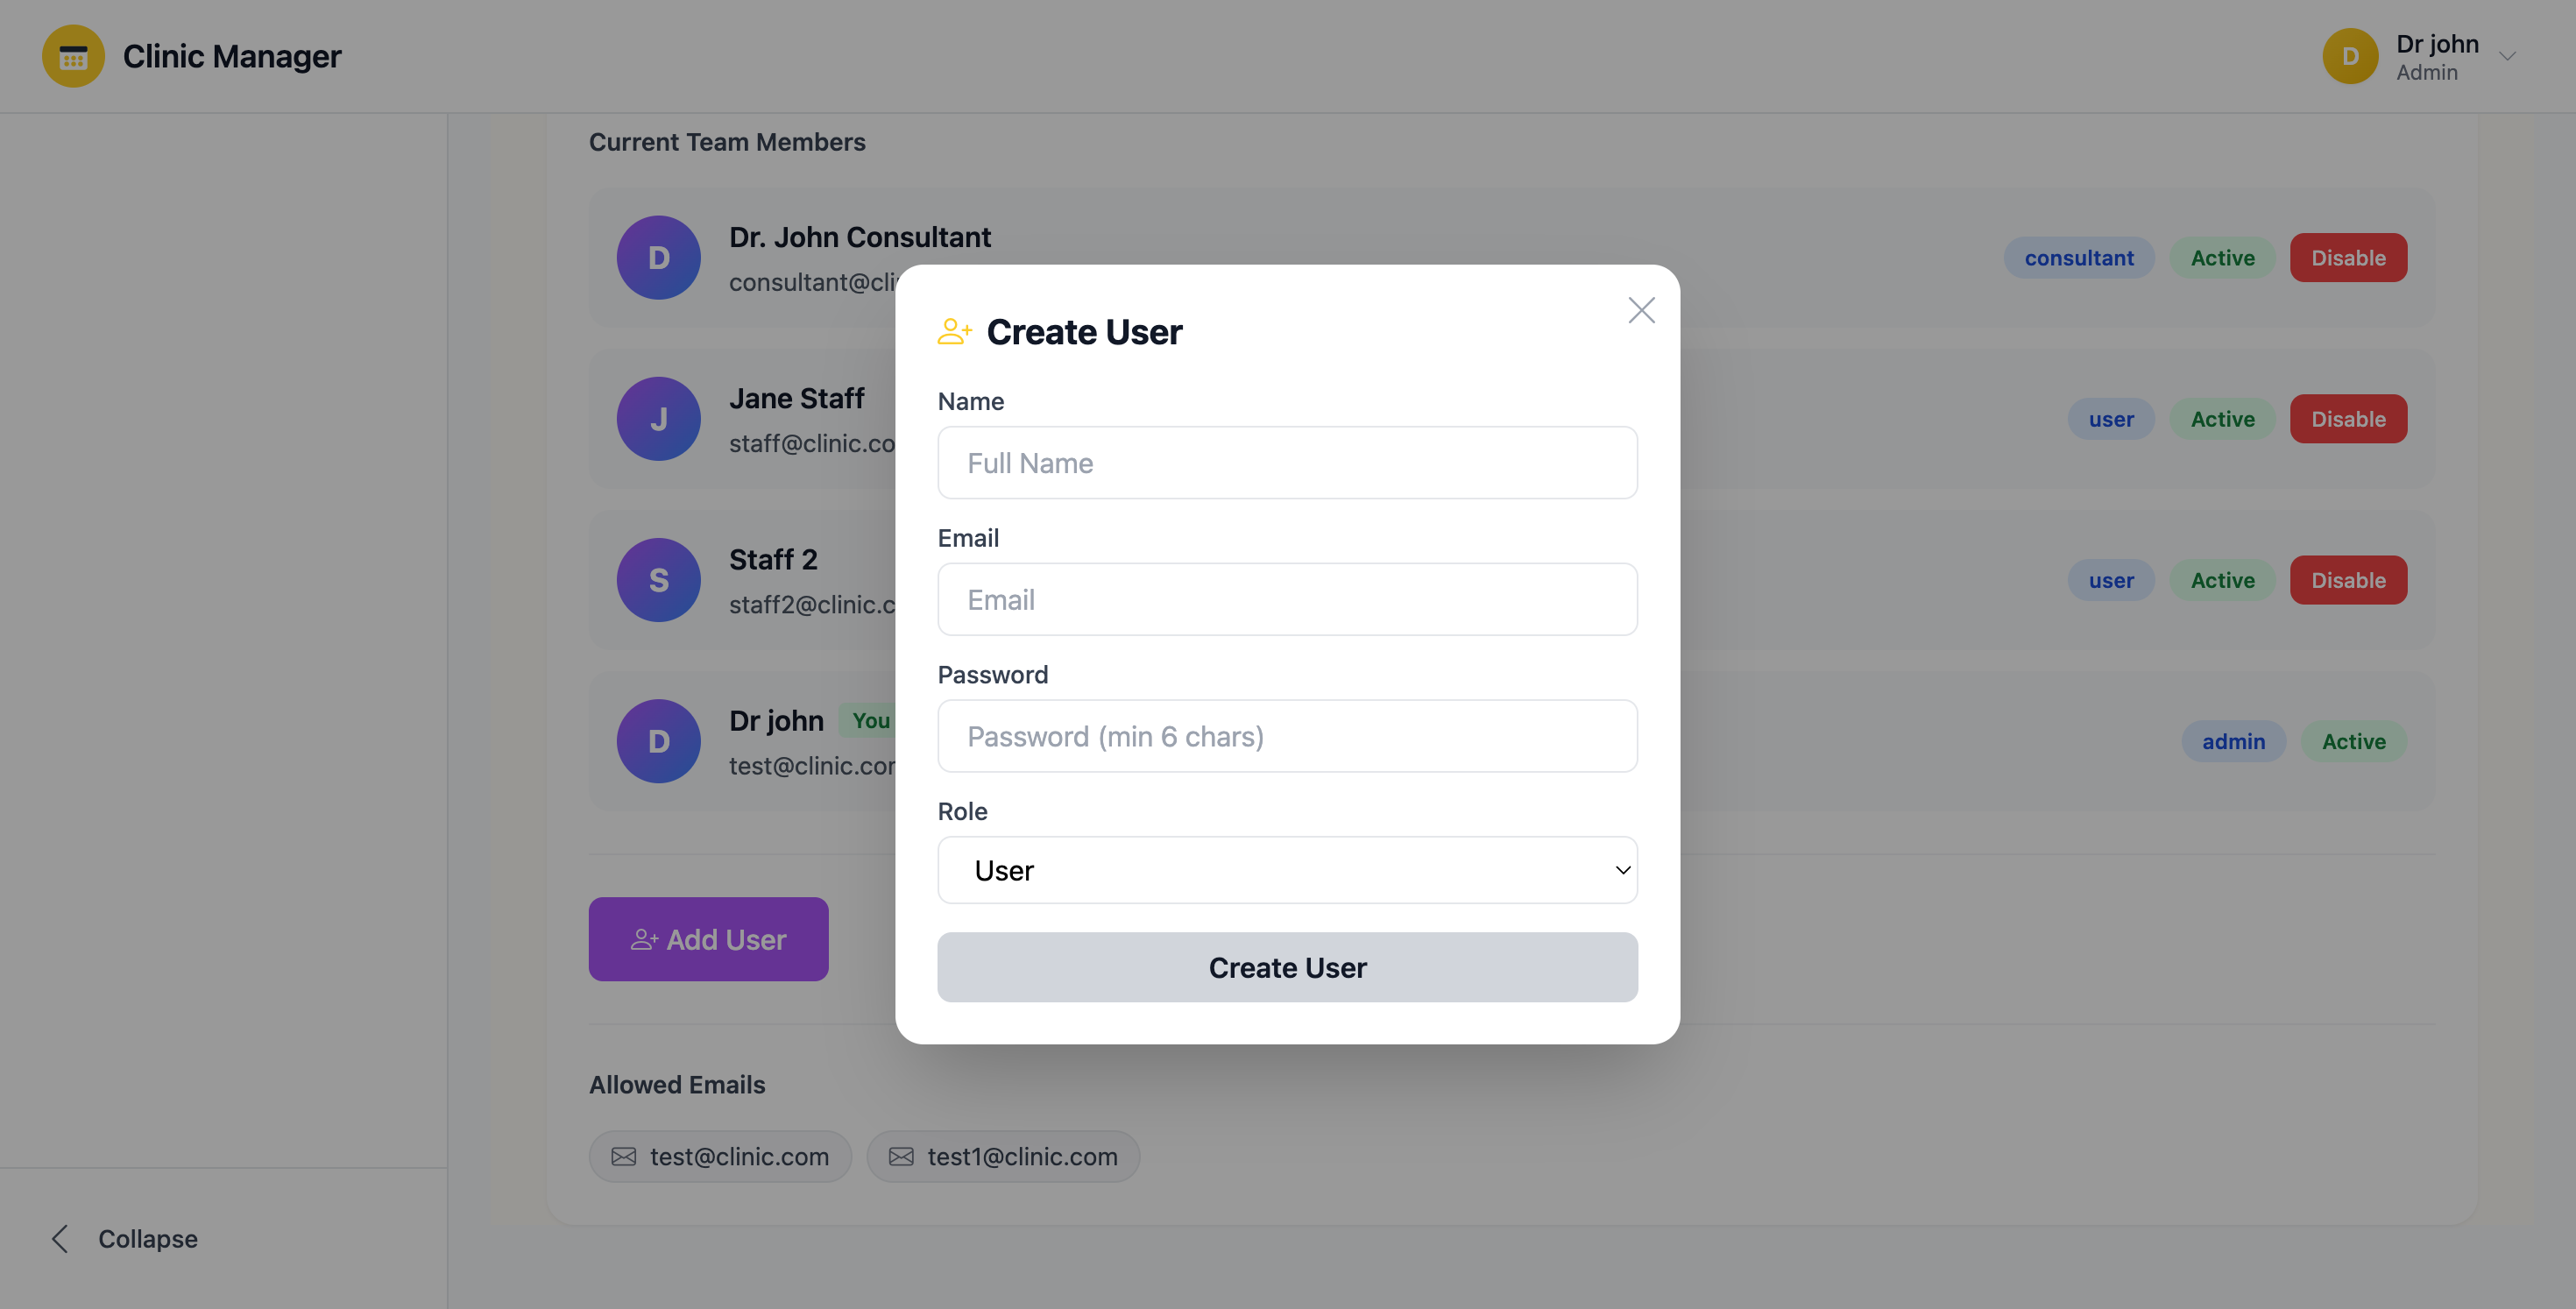
Figure 9.2: Create new user form with role selection and credentials
- Minimum 6 characters (recommended: 8+ characters)
- Should include a mix of letters and numbers
- Avoid common passwords like "password123"
- Users can change their password after first login from Profile Settings
9.2 Viewing All Users
The User Management page displays a table with all system users:
- Name: Full name of the user
- Email: Login email address
- Role: Color-coded badge showing user role
- 🔴 Admin - Red badge
- 🔵 Consultant - Blue badge
- 🟢 User (Staff) - Green badge
- Created Date: When the user account was created
- Last Login: Most recent login timestamp (if available)
- Status: Active/Inactive indicator
- Actions: Edit, Delete, Reset Password buttons
9.3 User Role Assignment
Choosing the correct role is critical for system security and functionality:
👑 Administrator Role
Best for: Clinic owners, practice managers, IT administrators
- ✅ Full access to all features and data
- ✅ Can create, edit, and delete users
- ✅ Can configure system settings and working hours
- ✅ Can delete clients, appointments, and payments
- ✅ Access to admin tools and data cleansing features
- ✅ Can view audit logs and system reports
- ✅ Can manage all appointments regardless of consultant
👨⚕️ Consultant Role
Best for: Doctors, physicians, medical consultants, therapists
- ✅ Can view and manage own appointments only
- ✅ Can view clients assigned to their appointments
- ✅ Can record payments for their services
- ✅ Can view own performance reports
- ✅ Can manage personal availability schedule
- ⚠️ Limited access to system settings (profile only)
- ⚠️ Cannot view other consultants' appointments (privacy)
- ❌ Cannot create or delete users
- ❌ Cannot access admin tools
- ❌ Cannot delete clients or appointments
👥 User (Staff) Role
Best for: Receptionists, administrative staff, assistants
- ✅ Can view and manage all appointments (scheduling, editing)
- ✅ Can view and manage all clients (add, edit, view details)
- ✅ Can add notes and upload files to client records
- ✅ Can update appointment statuses
- ✅ Full access to client management features
- ❌ Cannot view or record payments (financial privacy)
- ❌ Cannot access revenue statistics on dashboard
- ❌ Cannot change system settings
- ❌ Cannot create or delete users
- ❌ Cannot delete clients or appointments
9.4 Editing User Information
To update a user's details:
- From the User Management page, click the "Edit" button next to the user
- You can modify:
- Full Name
- Phone Number
- Role (changing role affects permissions immediately)
- Specialization (for consultants)
- Active/Inactive status
- Cannot modify: Email address (this is the user's login ID)
- Click "Update User" to save changes
- If you changed the role, the user's permissions update on their next login
9.5 Resetting User Password
If a user forgets their password or needs a reset:
- Locate the user in the User Management table
- Click the "Reset Password" button in the Actions column
- Choose reset method:
- Send Reset Email: User receives password reset link via email
- Generate Temporary Password: System creates a random password you can share with user
- Confirm the password reset
- Inform the user about the reset (if using temporary password)
- User should change password immediately after logging in
9.6 Deactivating/Deleting Users
When a staff member leaves or no longer needs access:
Option 1: Deactivate (Recommended)
- Click "Edit" on the user
- Change status to "Inactive"
- User cannot log in but historical data is preserved
- Can be reactivated later if needed
- Appointments and notes created by this user remain intact
Option 2: Delete (Permanent)
- Click the "Delete" button next to the user
- A warning dialog appears about data implications
- Type "DELETE" in the confirmation field
- Click "Confirm Delete"
- ⚠️ Warning: User account is permanently removed
- Historical data (appointments, notes) remains but shows "[Deleted User]" as creator
9.7 User Activity Monitoring
Track user activity and system usage:
- Last Login: See when each user last accessed the system
- Activity Log: View actions performed by each user (if audit logging is enabled)
- Appointment Count: Number of appointments created/managed by each user
- Session History: Track login sessions and IP addresses (admin tools)
9.8 Bulk User Operations
For clinics with many users:
- Bulk Role Assignment: Select multiple users and change roles at once
- Bulk Deactivation: Deactivate multiple users simultaneously
- Export User List: Download CSV of all users for record-keeping
- Send Notification: Email all users or users of specific role
9.9 Best Practices for User Management
- ✅ Review user list regularly and deactivate accounts no longer in use
- ✅ Assign roles based on job responsibilities, not seniority
- ✅ Create separate accounts for each person - never share login credentials
- ✅ Use strong passwords and enforce password changes every 90 days
- ✅ Document who has admin access and why
- ✅ Deactivate users immediately when they leave the organization
- ✅ Regularly audit user permissions to ensure they're still appropriate
- ❌ Don't create "test" accounts with admin privileges
- ❌ Don't give everyone admin access "just in case"
- ❌ Don't leave old/unused accounts active
10. Reports & Analytics
The Reports & Analytics module provides comprehensive insights into clinic performance, appointment trends, and revenue analysis. Generate custom reports for specific date ranges and export data for further analysis.
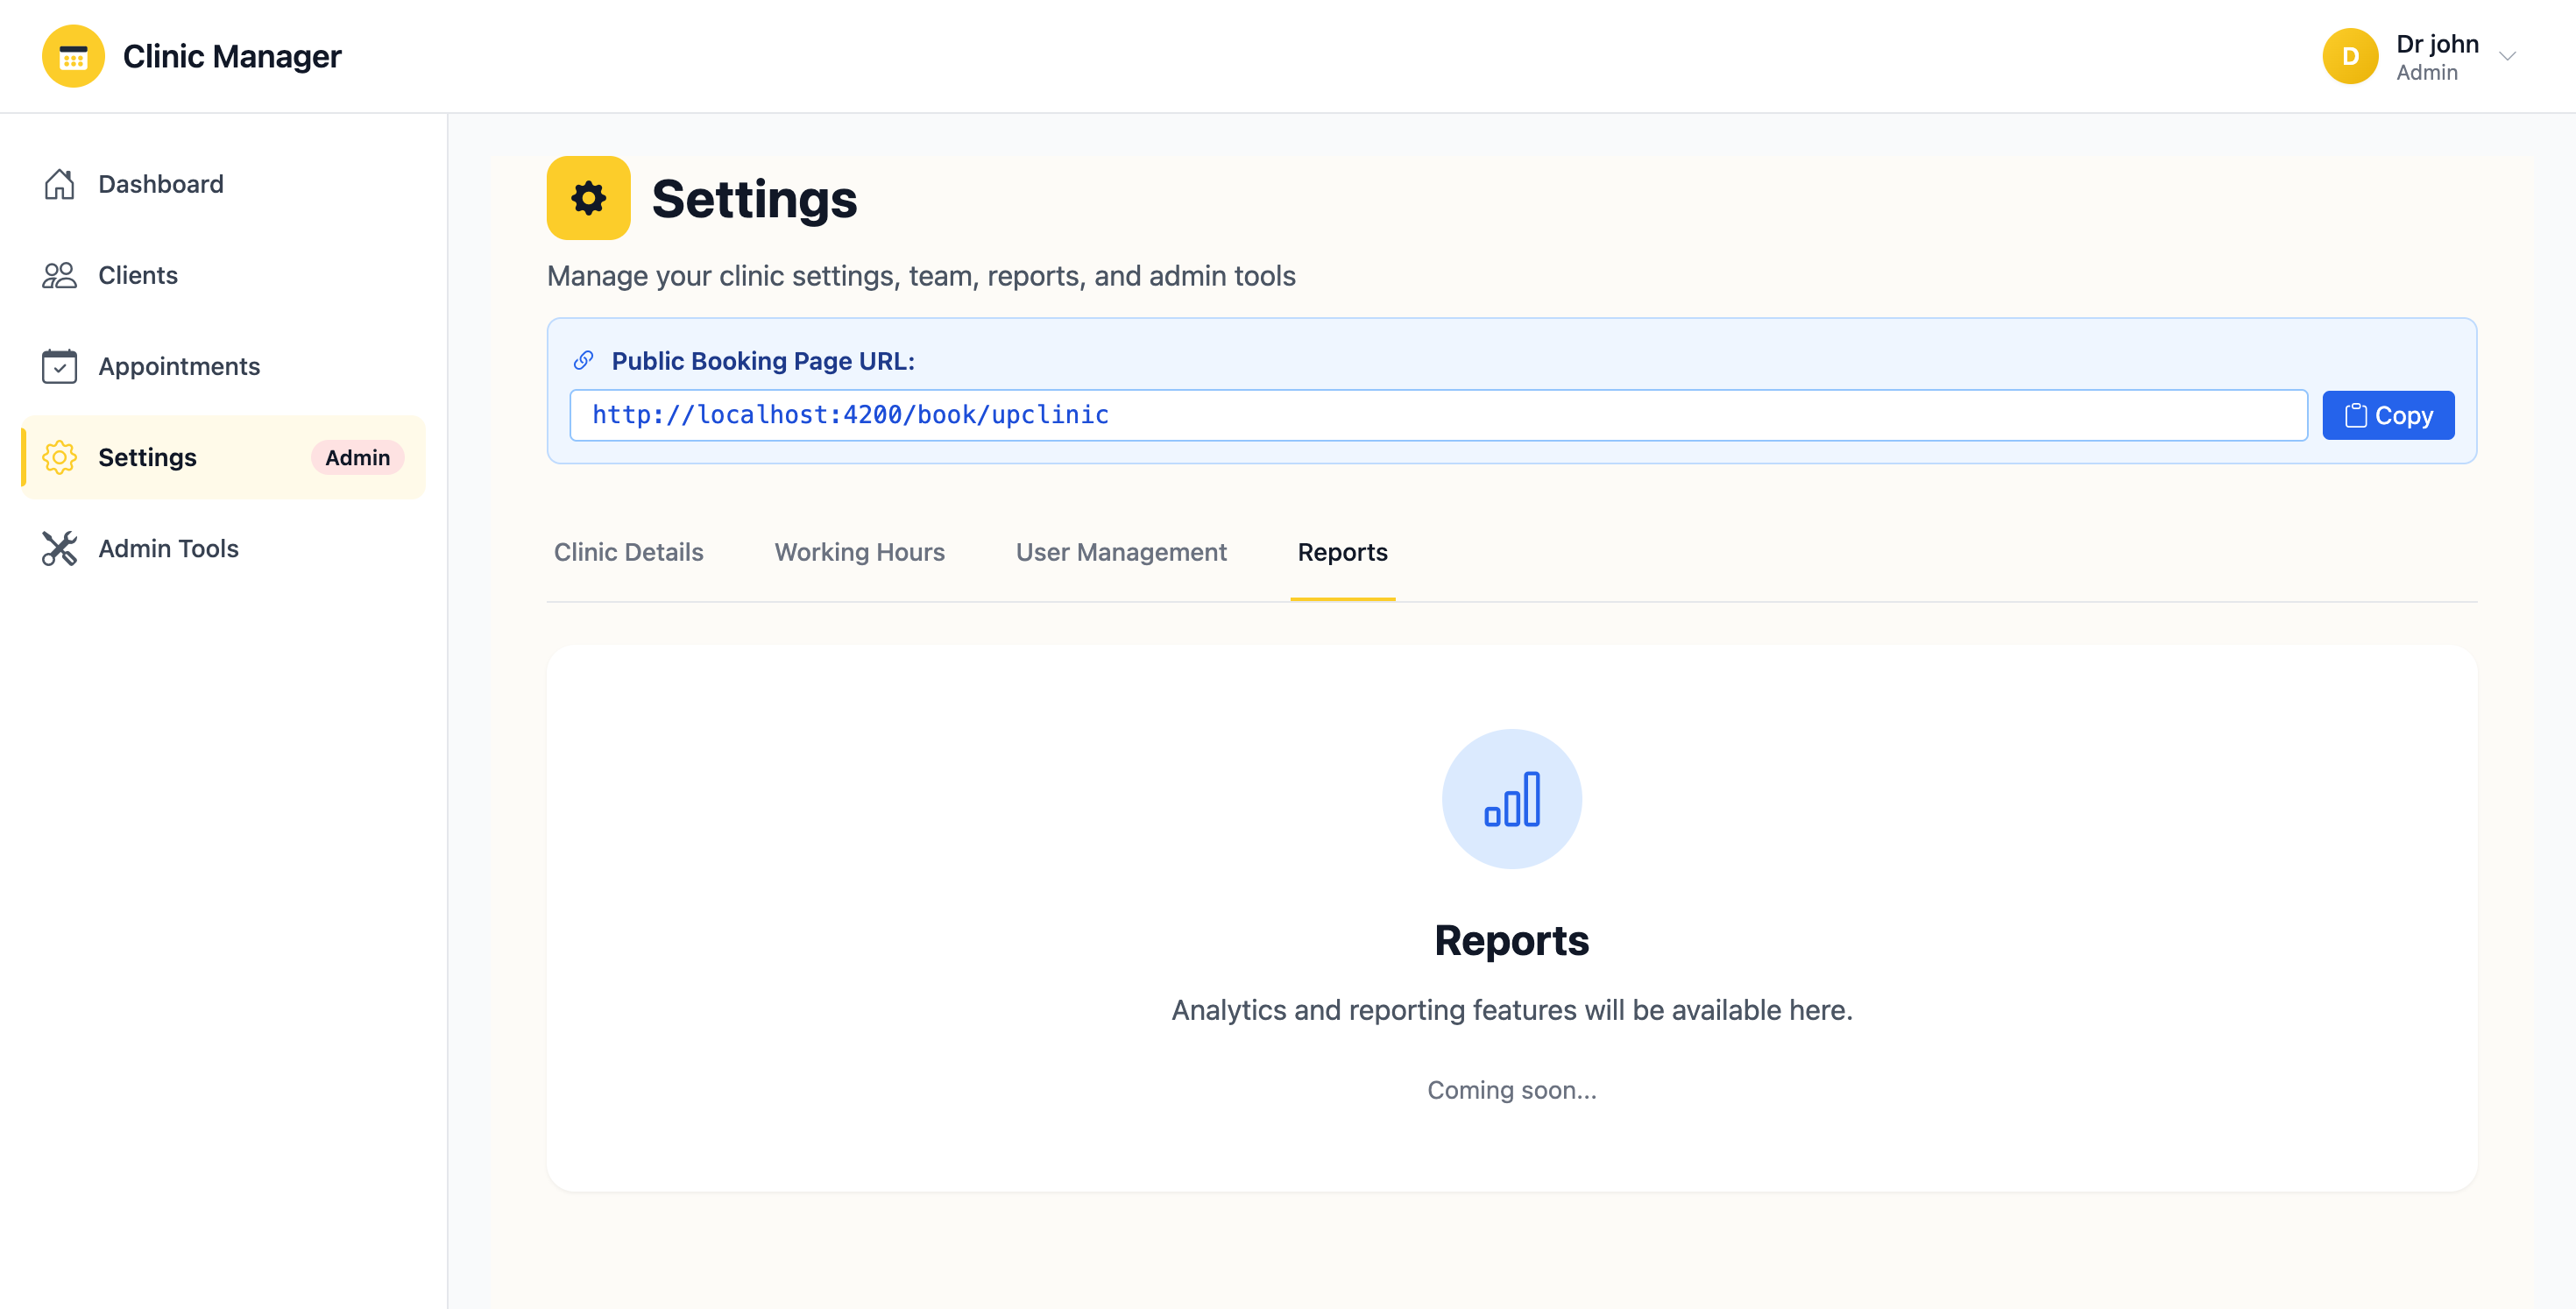
Figure 10.1: Reports & Analytics page with date filters and summary cards
10.1 Accessing Reports
To view reports:
- Click "Reports" in the left sidebar navigation
- The Reports page loads with default date range (last 30 days)
- Admin users: See data for all consultants and all appointments
- Consultant users: See only data for appointments assigned to them
- Summary cards appear at the top showing key metrics
- Detailed tables below show appointments and payments breakdown
10.2 Date Range Filtering
Customize the report period to analyze specific timeframes:
- At the top of the Reports page, locate the date filter section
- Click the "From Date" picker and select start date
- Click the "To Date" picker and select end date
- Click "Apply Filter" button
- All reports, charts, and tables update to show data within selected range
- The date range displays at the top: "Showing data from Jan 1, 2025 to Jan 31, 2025"

Figure 10.2: Date range filter with from/to date pickers
- Today: Current day only
- This Week: Monday to Sunday of current week
- This Month: 1st to last day of current month
- Last 30 Days: Rolling 30-day period (default)
- Last 90 Days: Rolling 90-day period
- This Year: January 1 to December 31 of current year
- Custom: Select specific start and end dates
10.3 Summary Cards Overview
The top of the Reports page displays four key performance cards:
💰 Total Revenue Card
- Displays: Sum of all payments in selected date range (formatted in LKR)
- Calculation: Includes all payment methods (Cash, Card, Bank Transfer, Insurance)
- Comparison: Shows percentage change vs previous period
- Icon: Green up arrow (increase) or red down arrow (decrease)
- Access: Admin and Consultant only (Staff cannot see revenue)
📅 Total Appointments Card
- Displays: Count of all appointments in date range
- Includes: All statuses (Scheduled, Completed, Cancelled, No-Show)
- Breakdown: Shows count by status below the total
- Consultant view: Shows only appointments assigned to logged-in consultant
✅ Completed Appointments Card
- Displays: Number of appointments marked as "Completed"
- Percentage: Shows completion rate (completed / total scheduled)
- What it means: High completion rate indicates good show-up rate
- Target: Aim for 80%+ completion rate
❌ Cancelled/No-Show Card
- Displays: Combined count of cancelled and no-show appointments
- Breakdown: Shows separate counts for cancelled vs no-show
- What it means: High numbers may indicate scheduling issues or communication gaps
- Action: Review cancellation reasons and improve reminder system
10.4 Appointments Analysis Table
Detailed appointment breakdown below the summary cards:
Table Columns:
- Date: Appointment date
- Client Name: Patient/client who booked
- Consultant: Assigned consultant (Admin view shows all, Consultant shows own)
- Type: Consultation, Follow-up, Treatment, etc.
- Status: Color-coded badge (Scheduled/Completed/Cancelled/No-Show)
- Duration: Appointment length in minutes
- Payment Status: Paid/Pending/Not Applicable
Table Features:
- Sort: Click any column header to sort ascending/descending
- Search: Use search box to filter by client or consultant name
- Filter by Status: Dropdown to show only specific status
- Filter by Type: Show only certain appointment types
- Pagination: Navigate through pages if many results
- Click row: View full appointment details
10.5 Payments Analysis Table
Financial transactions breakdown:
Table Columns:
- Date: When payment was recorded
- Client Name: Who made the payment
- Amount: Payment value in LKR
- Payment Method: Cash/Card/Bank Transfer/Insurance
- Description: Purpose of payment (Consultation fee, Treatment, etc.)
- Recorded By: Staff member who entered the payment
- Related Appointment: Linked appointment (if any)
Payment Method Breakdown Chart:
- Pie chart showing distribution of payment methods
- Helps identify preferred payment methods
- Useful for cash flow management
10.6 Revenue Trends Chart
Visual representation of revenue over time:
- Chart Type: Line graph or bar chart (toggle between views)
- X-axis: Date (daily, weekly, or monthly aggregation)
- Y-axis: Revenue amount in LKR
- Interactive: Hover over points to see exact values
- Comparison: Can overlay multiple consultants or time periods
- Export: Download chart as PNG image
10.7 Appointment Type Distribution
Understand which services are most popular:
- Doughnut chart showing percentage of each appointment type
- Helps with resource allocation and staffing decisions
- Identifies high-demand services
- Example: If 60% are Follow-ups, consider extending consultant hours
10.8 Consultant Performance Comparison (Admin Only)
Compare performance across consultants:
- Appointments per Consultant: Bar chart showing booking volume
- Revenue per Consultant: Total payments linked to each consultant
- Completion Rate: Percentage of completed appointments per consultant
- Average Appointment Duration: Time efficiency metrics
- Client Satisfaction: If feedback system is enabled
10.9 Exporting Reports
Download report data for external analysis or record-keeping:
Export Options:
- Export to CSV
- Click the "Export to CSV" button at the top of any table
- File downloads automatically (e.g., appointments_report_2025-01-31.csv)
- Open in Excel, Google Sheets, or any spreadsheet software
- Includes all columns and filtered data currently visible
- Export to PDF
- Click "Export to PDF" for printable report
- Includes summary cards, charts, and tables
- Professional formatting with clinic logo and header
- Ideal for board meetings or financial reviews
- Email Report
- Click "Email Report" button
- Enter recipient email addresses
- Report sent as PDF attachment
- Useful for scheduled monthly reports to management
- Store exported files securely (encrypted drives)
- Don't share reports via unsecured email
- Delete old exports regularly
- Follow HIPAA/GDPR compliance guidelines
- All exports are logged in the audit trail
10.10 Scheduled Reports (Admin Only)
Automate report generation and delivery:
- Go to Reports → "Scheduled Reports" tab
- Click "Create Schedule"
- Configure:
- Report Type: Appointments, Payments, Revenue, Comprehensive
- Frequency: Daily, Weekly, Monthly
- Day/Time: When to generate (e.g., Every Monday at 9 AM)
- Recipients: Email addresses to send to
- Date Range: Last 7 days, Last 30 days, Month-to-date
- Click "Save Schedule"
- Reports generate and email automatically on schedule
10.11 Key Performance Indicators (KPIs)
Track these important metrics regularly:
- Appointment Show Rate: (Completed / Scheduled) × 100 - Target: 80%+
- Cancellation Rate: (Cancelled / Total) × 100 - Target: <15%
- Revenue per Appointment: Total Revenue / Completed Appointments
- Average Daily Revenue: Total Revenue / Number of Working Days
- Client Retention: Returning clients vs new clients ratio
- Booking Efficiency: Filled slots vs available slots percentage
10.12 Best Practices for Reports & Analytics
- ✅ Review reports weekly to identify trends early
- ✅ Compare month-over-month to track growth
- ✅ Export monthly reports for accounting and tax purposes
- ✅ Share consultant-specific reports with team members
- ✅ Use data to optimize working hours and slot availability
- ✅ Set up scheduled reports for automatic monitoring
- ❌ Don't rely solely on dashboard - deep dive into reports regularly
- ❌ Don't ignore cancellation trends - investigate root causes
- ❌ Don't share detailed financial reports with staff (privacy)
11. Admin Tools
Admin Tools provide advanced system maintenance and data management utilities. These tools help keep your database consistent, migrate data structures, and perform bulk operations efficiently.
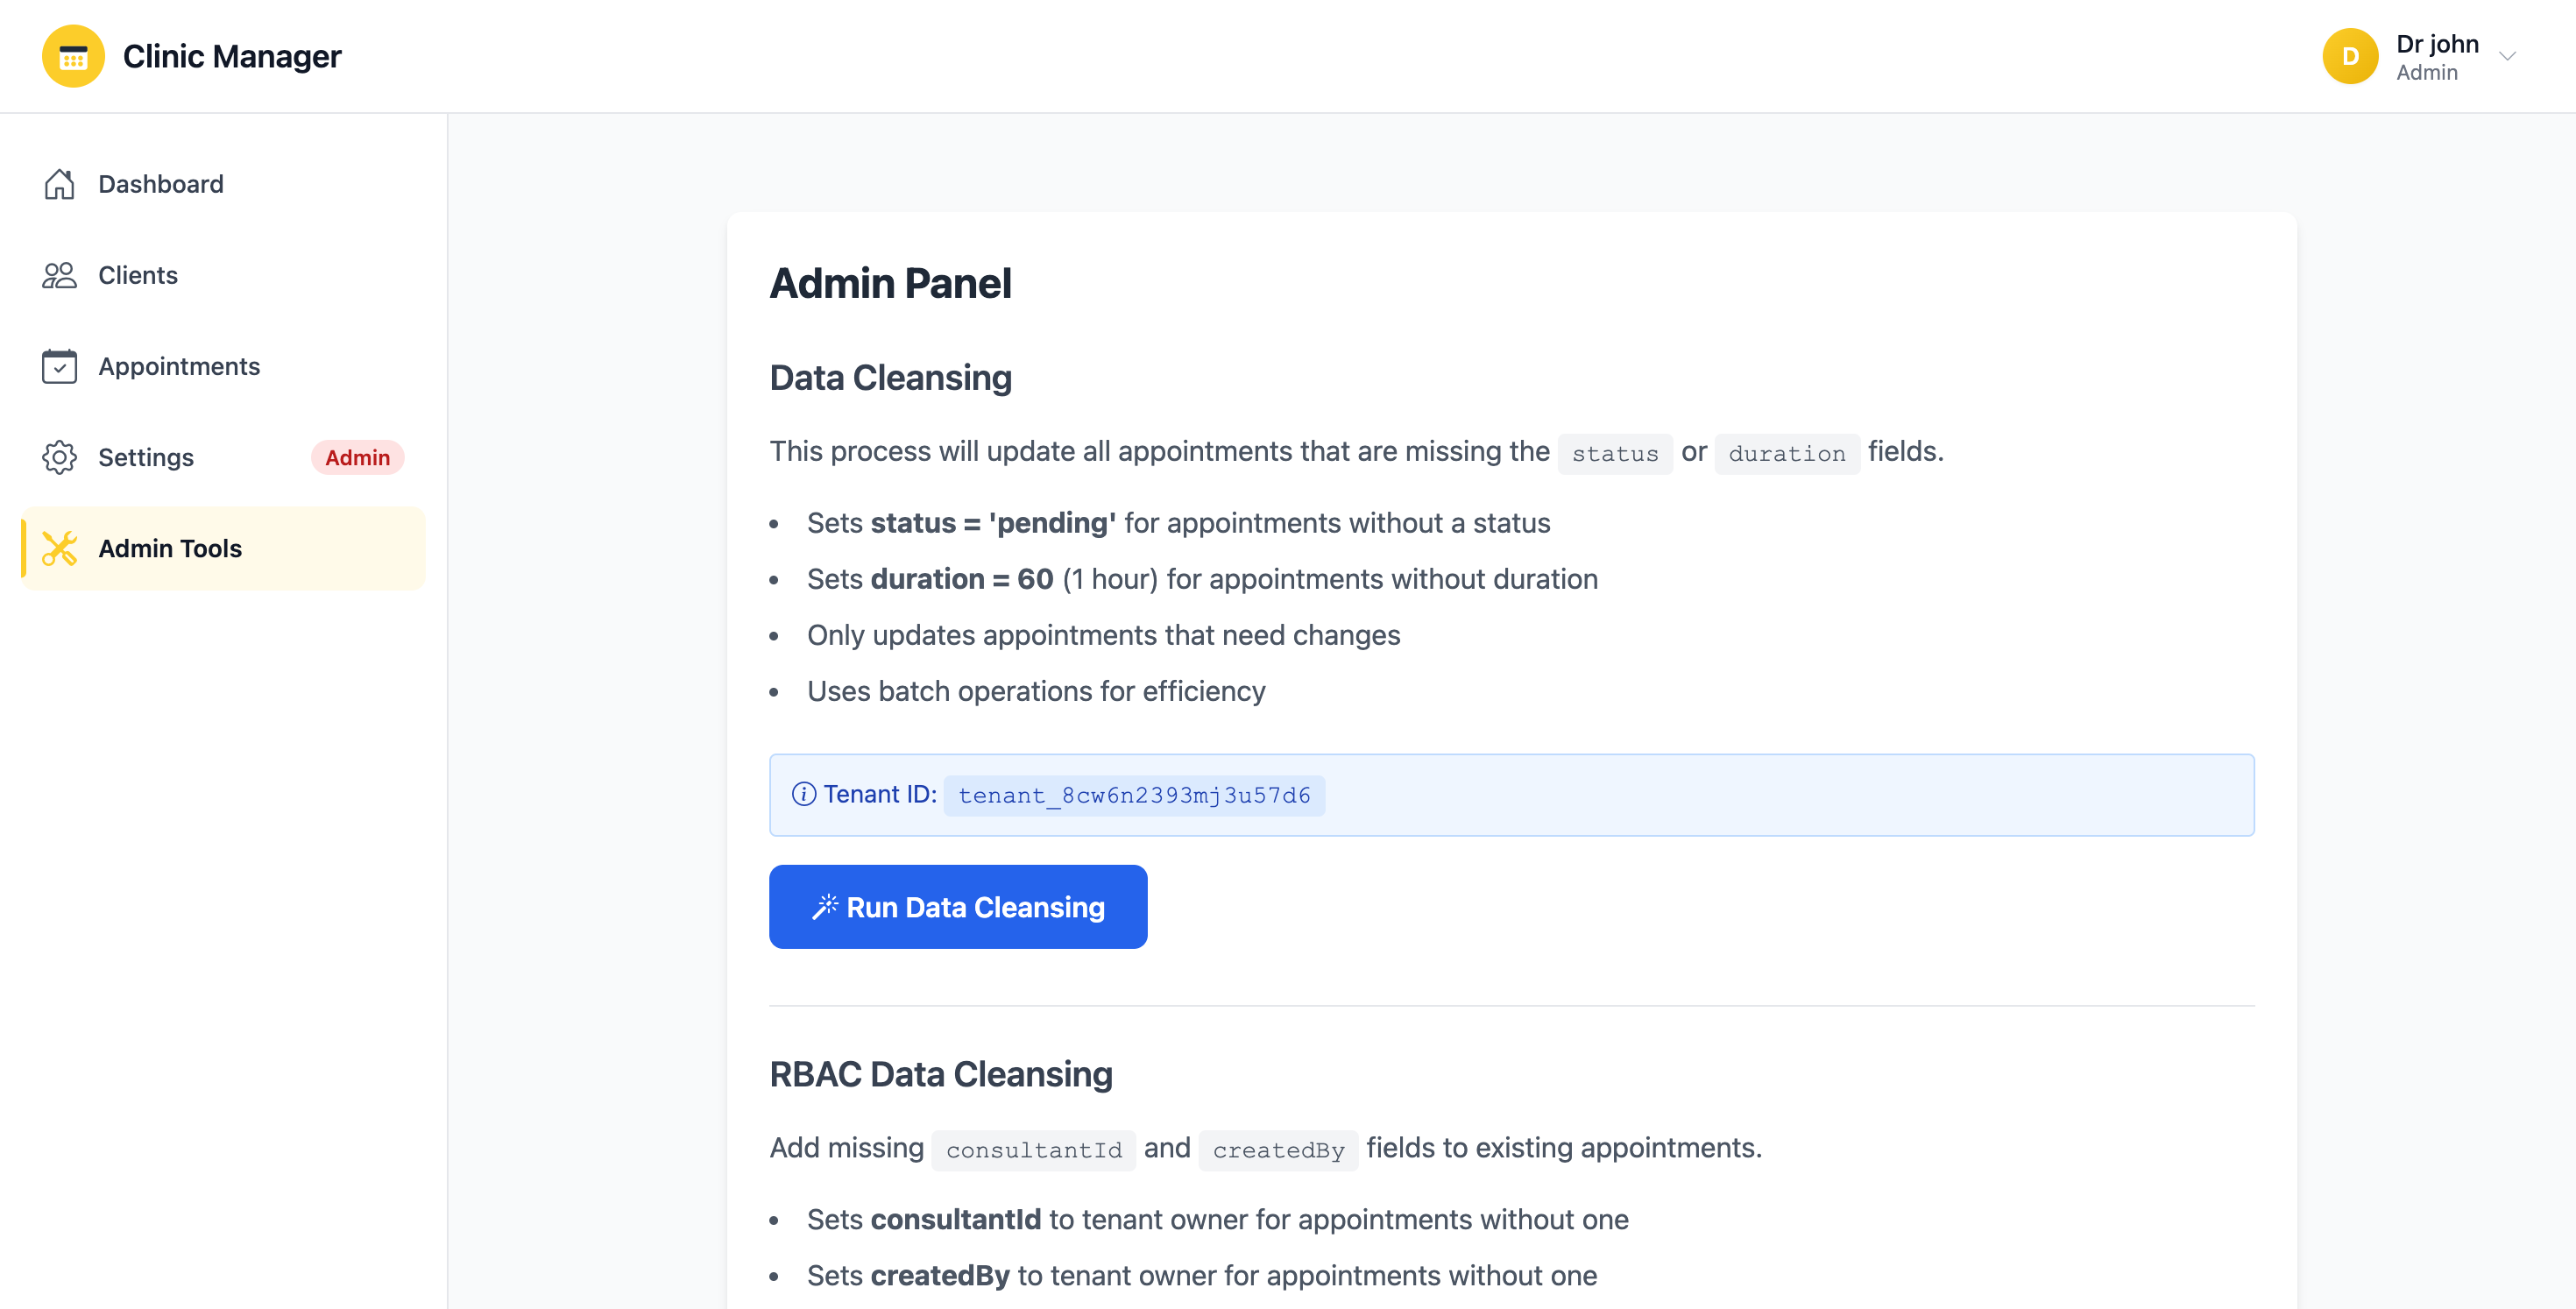
Figure 11.1: Admin tools page with data cleansing and migration options
11.1 Data Cleansing Tool
This tool updates appointments with missing or inconsistent field values.
Purpose:
- Sets default status to "pending" if missing
- Sets default duration to 60 minutes if not specified
- Standardizes date/time formats
- Removes invalid or corrupt appointment entries
- Fixes appointments created before certain fields were added to the system
When to Use:
- After importing appointments from another system
- If you notice appointments with missing status or duration
- After a system upgrade that adds new required fields
- When troubleshooting appointment display issues
How to Run Data Cleansing:
- Navigate to Admin Tools from the sidebar
- Locate the "Data Cleansing" section
- Review the estimated number of appointments that will be affected (shown in preview)
- Click "Run Data Cleansing" button
- A confirmation dialog appears: "This will update [X] appointments. Continue?"
- Click "Yes, Proceed" to confirm
- Progress bar shows update status
- The tool processes appointments in batches of 500 to avoid timeout
- Success message displays: "Data cleansing completed. [X] appointments updated."
- Review the log to see what changes were made
What Gets Updated:
| Field | Condition | Action Taken |
|---|---|---|
| status | Missing or null | Set to "pending" |
| duration | Missing, null, or 0 | Set to 60 minutes |
| appointmentDate | Invalid format | Attempt to parse and standardize |
| createdAt | Missing | Set to current timestamp |
11.2 RBAC Data Cleansing Tool
This tool adds missing role-based access control (RBAC) fields to appointments.
Purpose:
- Adds consultantId field to appointments (required for consultant-specific filtering)
- Adds createdBy field (tracks who created the appointment)
- Defaults to tenant owner if actual consultant/creator is unknown
- Enables proper role-based filtering on dashboard and reports
- Fixes "orphaned" appointments without consultant assignment
When to Use:
- After upgrading from a version without RBAC support
- If consultants report not seeing their appointments
- When migrating from single-user to multi-user setup
- If appointment filtering by consultant is not working
How to Run RBAC Data Cleansing:
- Go to Admin Tools → "RBAC Data Cleansing" section
- The tool shows: "[X] appointments missing consultantId or createdBy fields"
- Click "Run RBAC Cleansing" button
- Confirm: "This will update appointment ownership fields. Continue?"
- Click "Yes, Update RBAC Fields"
- Progress indicator shows: "Processing batch [X] of [Y]..."
- Tool assigns:
- consultantId: Tenant owner's UID (default) or actual consultant if detectable
- createdBy: Tenant owner's UID (default)
- Success message: "RBAC cleansing completed. [X] appointments updated."
After Running RBAC Cleansing:
- Go to Appointments page
- Filter by consultant to verify assignments
- Manually edit appointments that need correct consultant assignment
- Inform consultants about the update
- Test consultant login to ensure they see appropriate appointments
11.3 Availability System Migration Tool
Pre-generates appointment time slots based on working hours and existing appointments.
Purpose:
- Generates availability slots for the next 30 days
- Improves booking performance (no real-time calculation needed)
- Accounts for clinic working hours configuration
- Marks slots as occupied based on existing appointments
- Enables faster appointment scheduling and conflict detection
When to Use:
- When first setting up the system
- After changing working hours in Settings
- If appointment booking is slow or showing incorrect availability
- Monthly as maintenance (regenerate for upcoming month)
- After importing bulk appointments from another system
How Availability System Works:
- Step 1 - Read Working Hours: Tool reads clinic working hours from Settings
- Step 2 - Generate Slots: Creates time slots based on configured interval (e.g., every 30 minutes)
- Step 3 - Check Appointments: Compares with existing appointments
- Step 4 - Mark Availability: Slots with appointments marked as "occupied", others as "available"
- Step 5 - Store Cache: Saves to Firestore for fast retrieval during booking
How to Run Availability Migration:
- Navigate to Admin Tools → "Availability System" section
- Tool displays: "Generate slots for next 30 days based on current working hours"
- Review your current working hours (link to Settings)
- Click "Generate Availability" button
- Confirm: "This will generate [X] time slots. Continue?"
- Click "Yes, Generate Slots"
- Progress counter shows: "Generated [X] slots for [Date]..."
- Process runs for each day over 30-day period
- Success: "Availability migration complete. [X] slots generated."
- Slots are immediately available for appointment booking
Availability Slot Calculation Example:
Scenario: Clinic open Monday-Friday, 9:00 AM - 6:00 PM, 30-minute slots
- Working hours: 9 hours per day
- Slots per day: 18 (9 hours × 2 slots per hour)
- Slots per week: 90 (18 × 5 working days)
- Slots for 30 days: ~540 slots
11.4 Cache Management
Clear system caches to force data refresh:
Clear Availability Cache:
- Click "Clear Availability Cache"
- Removes all pre-generated availability slots
- Next booking will trigger fresh calculation
- Use this if slots are showing incorrect availability
Clear User Permissions Cache:
- Click "Clear User Cache"
- Forces reload of user roles and permissions
- Use after changing user roles in User Management
- Users must log out and back in for changes to take effect
11.5 Database Health Check
Run diagnostic tests on your Firestore database:
- Click "Run Health Check" button
- System checks:
- Database connection status
- Collection integrity (clients, appointments, payments, users)
- Missing required fields in documents
- Orphaned references (appointments without clients, etc.)
- Duplicate entries
- Invalid data types
- Report displays findings with severity levels (Critical/Warning/Info)
- Suggested actions appear for each issue
- Option to "Auto-Fix" minor issues
- Backup first: Always export data before running admin tools
- Test environment: If possible, test on a copy of your data first
- Peak hours: Avoid running during busy clinic hours
- Monitor progress: Don't navigate away while tools are running
- Review logs: Check what changed after each tool execution
- Cannot undo: Most admin tool operations are irreversible
11.6 Audit Log Viewer
View system activity and changes:
- Access complete audit trail of admin actions
- Filter by date, user, action type
- See who ran which admin tool and when
- Track data changes (before/after values)
- Export audit logs for compliance
11.7 Best Practices for Admin Tools
- ✅ Always download a data backup before running any admin tool
- ✅ Run admin tools during off-peak hours (early morning/late evening)
- ✅ Review the estimated impact before confirming
- ✅ Run database health check monthly as preventive maintenance
- ✅ Document why you ran each tool (for audit purposes)
- ✅ Regenerate availability monthly or after working hours changes
- ❌ Don't run multiple admin tools simultaneously
- ❌ Don't close browser window while tool is executing
- ❌ Don't skip the confirmation dialogs - read them carefully
12. Troubleshooting & FAQs
This section provides solutions to common issues and answers to frequently asked questions. If you can't find a solution here, contact your system administrator.
12.1 Login & Authentication Issues
Q: I can't log in with my credentials
Possible solutions:
- ✅ Verify email and password: Check for typos, ensure caps lock is OFF
- ✅ Check email format: Must be valid email address (e.g., user@example.com)
- ✅ Password case-sensitive: Ensure correct capitalization
- ✅ Clear browser cache: Try Ctrl+Shift+Delete (Windows) or Cmd+Shift+Delete (Mac)
- ✅ Try different browser: Test in Chrome, Firefox, or Safari
- ✅ Use forgot password: Click "Forgot Password?" to reset
- ✅ Contact admin: Your account may be deactivated or not yet created
Q: I'm getting "Access Denied" or "Permission Denied" errors
This means you don't have permission for that feature.
- 🔍 Check your role: Click your profile icon → view your role (Admin/Consultant/Staff)
- 🔍 Review permissions: See Section 2 (User Roles & Permissions) for what each role can access
- 🔍 Staff limitations: Staff cannot view payments or revenue statistics
- 🔍 Consultant limitations: Consultants only see their own appointments
- 🔍 Request access: Contact administrator to upgrade your role if needed
Q: I'm automatically logged out after a few minutes
This is normal security behavior.
- ⏱️ Session timeout is set to 30 minutes of inactivity
- ⏱️ Any click or interaction resets the timer
- ⏱️ You'll get a 2-minute warning before logout
- ⏱️ Simply log back in to continue working
- ⏱️ Your unsaved work may be lost - save frequently
12.2 Appointment Booking Issues
Q: I don't see any available time slots when scheduling
Multiple possible causes:
- Working hours not configured:
- Admin needs to set working hours in Settings
- Check if the selected day is marked as "open"
- Date in the past:
- Cannot book appointments for past dates
- Today's past times are also unavailable
- All slots occupied:
- Consultant may be fully booked for that day
- Try a different date or time
- Availability cache not generated:
- Admin needs to run "Availability System Migration" in Admin Tools
- This pre-generates time slots for booking
- Consultant on leave:
- Consultant may have marked that date as unavailable
- Check with consultant or try different consultant
Q: I get "Conflict detected" error when booking
This prevents double-booking.
- ⚠️ Consultant already has appointment at that time
- ⚠️ Client already has appointment at that time (warning, not error)
- ⚠️ Choose a different time slot (green checkmark indicates available)
- ⚠️ If you must book during conflict, contact administrator (they can force-book)
Q: I can't create appointments (Consultant user)
Consultants have restricted permissions:
- ✅ Consultants can only create appointments assigned to themselves
- ✅ When scheduling, the "Consultant" field is auto-filled and locked
- ✅ This is by design to prevent booking for other consultants
- ✅ If you need to book for another consultant, ask Admin or Staff
Q: Appointment times are showing in wrong timezone
Check timezone settings:
- 🌍 Go to Profile Settings → Timezone
- 🌍 Select your correct timezone
- 🌍 System will adjust all times automatically
- 🌍 If problem persists, contact admin to check server timezone
12.3 Client Management Issues
Q: I can't add a new client - form keeps giving errors
Check required field validation:
- ✅ First Name: Required, letters only
- ✅ Last Name: Required, letters only
- ✅ Email: Required, must be valid format (user@domain.com)
- ✅ Phone: Required, 10-15 digits with country code (+94771234567)
- ✅ Date of Birth: Required, cannot be in the future
- ✅ Remove special characters from phone number except "+" at start
Q: Client search is not working
Search tips:
- 🔍 Search is case-insensitive (JOHN = john)
- 🔍 Use partial names (searching "John" finds "John Smith" and "Johnny Doe")
- 🔍 Try searching by phone number or email
- 🔍 Clear search box completely and try again
- 🔍 Refresh the page (F5 or Cmd+R)
- 🔍 If still not working, check with admin about database indexing
Q: I accidentally deleted a client - can I recover?
Unfortunately, deletions are permanent.
- ❌ Deleted clients cannot be recovered from the system
- ❌ All related appointments and payments are also deleted
- ❌ Only administrators can delete clients (for this reason)
- ✅ Contact your administrator - they may have a backup
- ✅ Best practice: Deactivate clients instead of deleting
12.4 Payment & Financial Issues
Q: I'm a Staff member and can't see payments
This is intentional (role-based access):
- 🔒 Staff role does not have access to financial data
- 🔒 Payment Management menu is hidden for staff
- 🔒 Revenue statistics on dashboard are also hidden
- 🔒 This protects sensitive financial information
- 🔒 If you need payment access, request Admin or Consultant role upgrade
Q: Payment totals don't match my physical records
Reconciliation steps:
- Go to Reports → Payments Table
- Set date range to the period you're checking
- Export to CSV for detailed analysis
- Compare line-by-line with physical receipts
- Check for:
- Payments recorded on wrong date
- Duplicate entries
- Missing entries (not recorded in system)
- Incorrect amounts (data entry errors)
- Contact administrator if you find discrepancies
Q: I recorded a payment with wrong amount - how to fix?
Payment corrections require admin help:
- Payments cannot be edited once saved (by design for audit purposes)
- Contact your administrator
- Admin will:
- Delete the incorrect payment entry
- Create a new payment with correct amount
- Add note explaining the correction
- Both actions are logged in audit trail
12.5 Performance & Loading Issues
Q: Application is very slow or pages take long to load
Try these solutions in order:
- Clear browser cache:
- Chrome: Settings → Privacy → Clear browsing data
- Firefox: Options → Privacy → Clear Data
- Safari: Preferences → Privacy → Manage Website Data → Remove All
- Check internet connection:
- Run speed test (speedtest.net)
- Minimum recommended: 5 Mbps download
- Try different WiFi network or use mobile data
- Close other tabs/applications:
- Each tab uses memory
- Close unnecessary tabs in browser
- Close other applications running on computer
- Try different browser:
- Recommended: Chrome, Firefox, Safari, Edge (latest versions)
- Update browser to latest version
- Restart browser completely:
- Close all browser windows
- Reopen browser
- Log back into the system
- Contact administrator if still slow:
- May be server-side performance issue
- Admin can check Firebase metrics
- May need database optimization
Q: Data not loading or showing "Error loading data"
Troubleshooting steps:
- 🔄 Refresh the page: Press F5 (Windows) or Cmd+R (Mac)
- 🔄 Check internet connection: Open another website to confirm connectivity
- 🔄 Clear browser cache: See instructions above
- 🔄 Check console for errors: Press F12 → Console tab → screenshot errors
- 🔄 Try incognito/private mode: Rules out extension conflicts
- 🔄 Contact administrator: May be Firebase service outage
Q: Images or screenshots not displaying
Common causes:
- 🖼️ Firebase Storage URL expired (admin needs to regenerate)
- 🖼️ Ad blocker preventing image loading (disable for this site)
- 🖼️ Slow internet connection (images are large files)
- 🖼️ Right-click image → "Open in new tab" to check direct access
12.6 Browser Compatibility Issues
Q: Some features not working in my browser
Supported browsers and requirements:
| Browser | Minimum Version | Recommended |
|---|---|---|
| Google Chrome | Version 90+ | ✅ Latest version |
| Mozilla Firefox | Version 88+ | ✅ Latest version |
| Safari (Mac) | Version 14+ | ✅ Latest version |
| Microsoft Edge | Version 90+ | ✅ Latest version |
| Internet Explorer | N/A | ❌ Not supported |
Required browser features:
- ✅ JavaScript must be enabled
- ✅ Cookies must be enabled
- ✅ LocalStorage must be enabled
- ✅ Pop-ups allowed for this site
- ✅ Minimum screen resolution: 1024x768
Q: Mobile device support?
Mobile access is supported but limited:
- 📱 Responsive design: Layout adapts to mobile screens
- 📱 Hamburger menu: Navigation collapses on small screens
- 📱 Touch-friendly: Buttons and inputs sized for touch
- 📱 Best experience: Tablet (iPad, Android tablet) or desktop
- 📱 Limitations on phone: Small screen makes some data entry difficult
- 📱 Recommended: Use desktop/laptop for data entry, mobile for viewing
12.7 Report & Export Issues
Q: CSV export is empty or incomplete
Solutions:
- 📊 Check date range - may be filtering out all data
- 📊 Clear all filters before exporting
- 📊 Try exporting smaller date ranges
- 📊 Ensure pop-ups are not blocked (CSV downloads use pop-up)
- 📊 Check Downloads folder - file may have downloaded
Q: Reports showing "No data available"
Common reasons:
- 📈 Date range selected has no appointments or payments
- 📈 Consultant user viewing reports (only shows own data)
- 📈 Filters too restrictive (try resetting filters)
- 📈 Database connection issue (refresh page)
12.8 General Best Practices
- ✅ Always log out when finished (don't just close browser)
- ✅ Save work frequently (session may timeout)
- ✅ Use latest browser version for best performance
- ✅ Keep stable internet connection
- ✅ Don't open multiple tabs of the same application
- ✅ Refresh page if data seems outdated
- ✅ Report bugs or issues to administrator immediately
- ✅ Document steps that led to error (helps troubleshooting)
12.9 Getting Additional Help
If your issue is not resolved:
- Contact your clinic administrator
- They have access to system logs and admin tools
- Can check your user permissions
- Can run diagnostic tools
- Provide detailed information:
- What were you trying to do?
- What exactly happened? (error message, unexpected behavior)
- Take a screenshot of the error
- Note the time it occurred
- List steps to reproduce the issue
- Check system status:
- Firebase Status: https://status.firebase.google.com
- May be a temporary service outage
For technical support, contact your clinic administrator or IT support team.
System Administrator: [Insert contact details]
Technical Support: [Insert support email/phone]
Emergency Contact: [Insert after-hours contact if available]
12.10 Common Error Messages Explained
| Error Message | Meaning | Solution |
|---|---|---|
| "Authentication failed" | Invalid login credentials | Check email/password, use forgot password |
| "Permission denied" | Your role can't access this feature | Contact admin to upgrade role |
| "Network error" | Internet connection issue | Check connection, refresh page |
| "Validation failed" | Form data doesn't meet requirements | Check required fields, correct format |
| "Conflict detected" | Appointment slot already booked | Choose different time slot |
| "Session expired" | Logged out due to inactivity | Log back in |
| "Database error" | Firestore connection problem | Refresh page, contact admin if persists |